

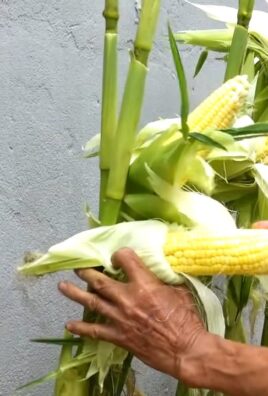
Growing Bay Leaf Cuttings might seem daunting, but trust me, it’s a rewarding journey that connects you to centuries of culinary tradition! Bay leaves, with their distinctive aroma, have been prized since ancient times, adorning the brows of victors and flavoring the dishes of emperors. Imagine cultivating your own supply of these fragrant leaves, ready to elevate your cooking with just a snip.
But why bother with cuttings when you can buy bay leaves at the store? Well, for starters, the flavor of homegrown bay leaves is simply unmatched – fresher, more vibrant, and bursting with essential oils. Plus, think of the satisfaction of nurturing a plant from a simple cutting to a thriving shrub! More importantly, propagating your own bay laurel is significantly cheaper than buying a mature plant, and it allows you to control the quality and variety you grow.
This DIY guide is your key to unlocking the secrets of successful bay leaf propagation. I’ll walk you through each step, from selecting the perfect cutting to providing the ideal environment for root development. Whether you’re a seasoned gardener or a complete beginner, I’m confident that you’ll be able to master the art of growing bay leaf cuttings and enjoy a bountiful harvest for years to come. So, grab your gardening gloves, and let’s get started!
Propagating Bay Laurel: A DIY Guide to Growing Bay Leaf Cuttings
Hey there, fellow plant enthusiasts! Ever dreamt of having an endless supply of fresh bay leaves right in your backyard? Well, you’re in luck! Propagating bay laurel ( *Laurus nobilis* ) from cuttings is totally doable, and I’m here to walk you through the whole process. It might seem a little intimidating at first, but trust me, with a little patience and the right steps, you’ll be snipping and seasoning in no time.
Understanding Bay Laurel Propagation
Before we dive into the nitty-gritty, let’s quickly cover the basics. Bay laurel, also known as sweet bay or bay tree, is a slow-growing evergreen shrub or small tree prized for its aromatic leaves. While you can grow it from seed, propagation from cuttings is a faster and more reliable way to get a new plant that’s genetically identical to the parent. This means you’ll get the same delicious flavor in your homegrown bay leaves!
Key Considerations for Success:
* Timing is crucial: The best time to take bay laurel cuttings is in late spring or early summer, when the plant is actively growing.
* Choose healthy growth: Select semi-hardwood cuttings, which are stems that have started to mature but are still somewhat flexible.
* Patience is a virtue: Rooting bay laurel cuttings can take several weeks, sometimes even a few months. Don’t get discouraged if you don’t see results immediately.
* Cleanliness is key: Always use clean, sharp tools to prevent the spread of disease.
Materials You’ll Need
Alright, let’s gather our supplies. Here’s what you’ll need to successfully propagate bay laurel cuttings:
* A healthy bay laurel plant: This is your source for the cuttings! Make sure it’s a healthy, vigorous plant.
* Sharp pruning shears or a knife: Clean and sharp tools are essential for making clean cuts.
* Rooting hormone: This will help stimulate root growth. You can find it at most garden centers.
* Small pots or containers: Choose pots with drainage holes to prevent waterlogging.
* Well-draining potting mix: A mix of perlite, vermiculite, and peat moss works well. You can also use a commercial seed-starting mix.
* Clear plastic bags or a humidity dome: These will help create a humid environment for the cuttings.
* Spray bottle with water: For misting the cuttings.
* Optional: Heat mat: Bottom heat can speed up the rooting process.
Taking the Cuttings
This is where the magic begins! Follow these steps carefully to take healthy bay laurel cuttings:
1. Prepare your tools: Sterilize your pruning shears or knife with rubbing alcohol to prevent the spread of disease.
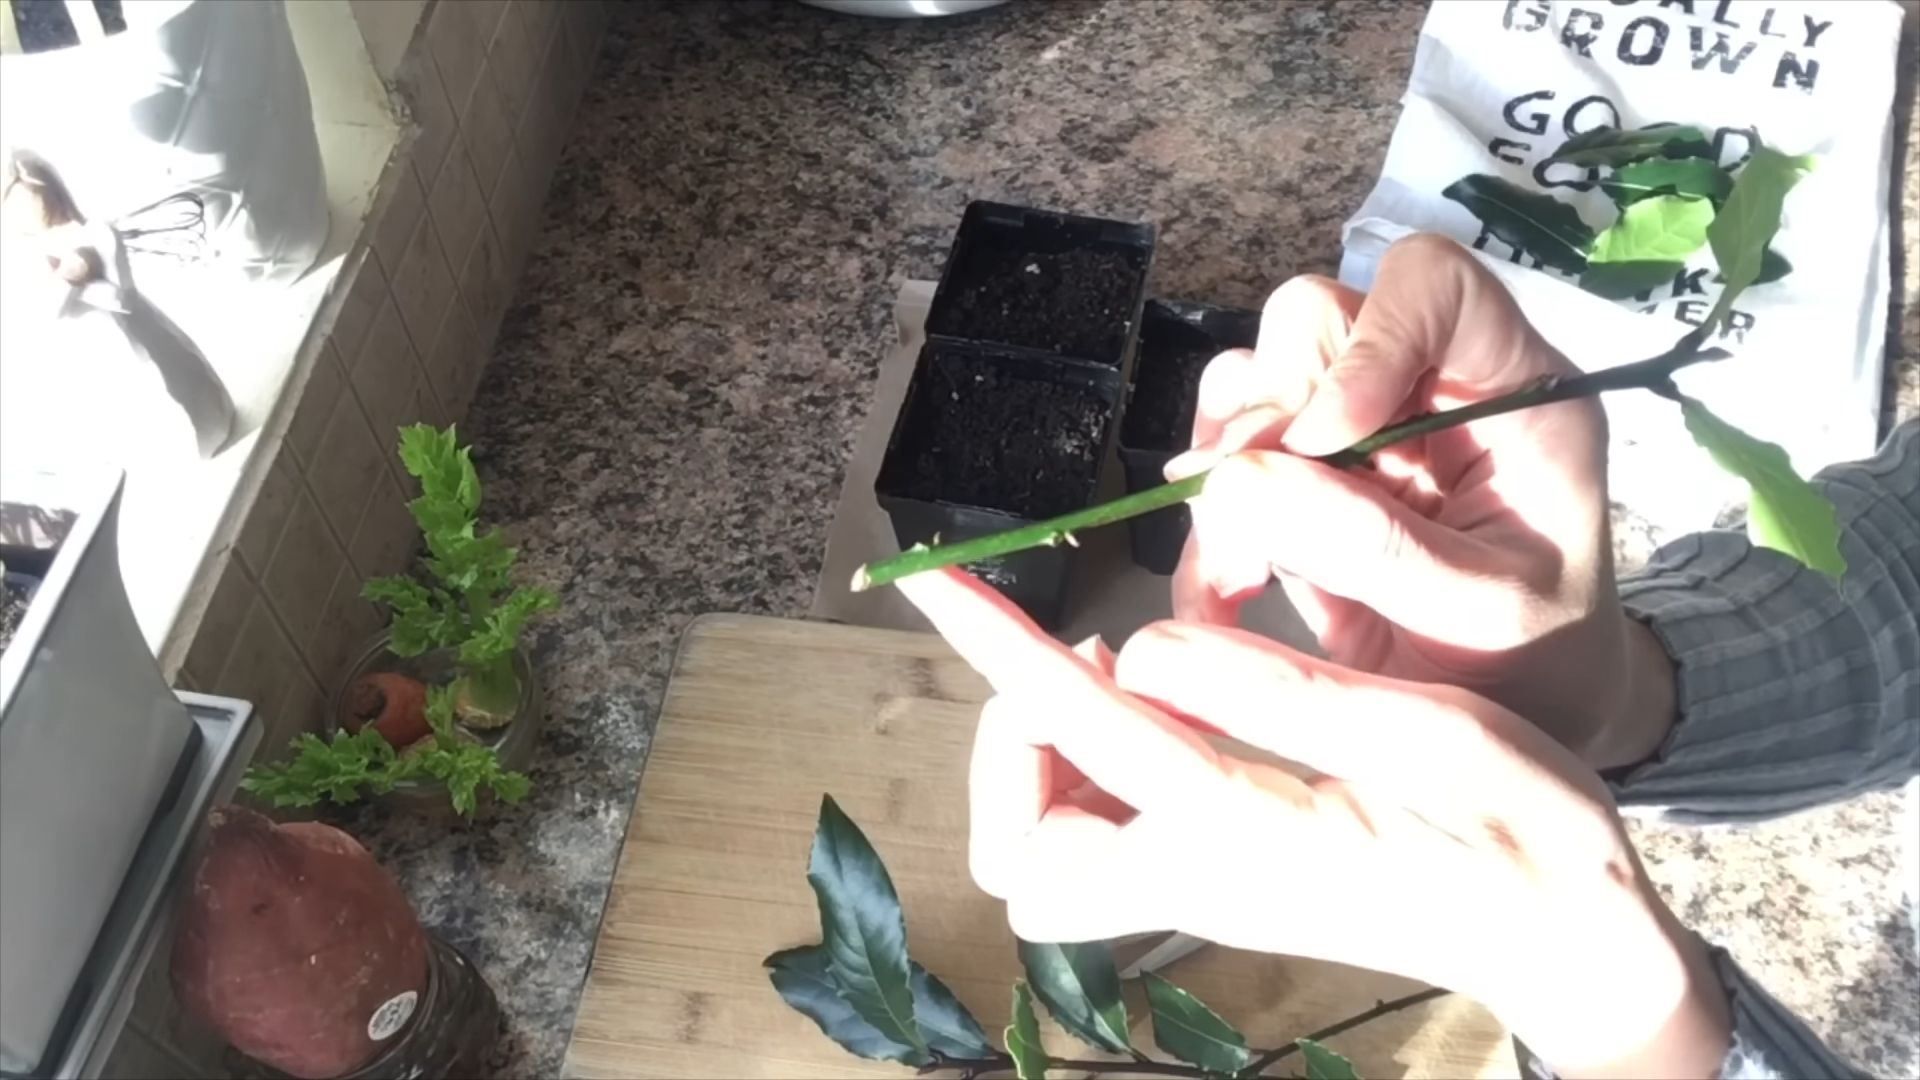
2. Select your cuttings: Look for semi-hardwood stems that are about 4-6 inches long. These are stems that have started to mature but are still somewhat flexible. Avoid stems that are too soft and green or too hard and woody.
3. Make the cuts: Using your sterilized pruning shears or knife, make a clean cut at a 45-degree angle just below a leaf node (the point where a leaf grows from the stem). This angled cut will increase the surface area for root development.
4. Remove the lower leaves: Strip off the leaves from the bottom 1-2 inches of the cutting. This will prevent them from rotting and contaminating the potting mix.
5. Prepare the cutting: Gently scrape the bottom inch of the cutting with your knife. This will lightly wound the stem and encourage root formation.
Planting the Cuttings
Now that you have your cuttings, it’s time to get them planted!
1. Prepare the pots: Fill your small pots or containers with well-draining potting mix. Moisten the mix thoroughly, but don’t let it get soggy.
2. Apply rooting hormone: Dip the bottom inch of the cutting into rooting hormone powder or liquid. Tap off any excess.
3. Plant the cuttings: Use a pencil or your finger to make a hole in the potting mix. Insert the cutting into the hole, making sure that the bottom 1-2 inches are buried. Gently firm the soil around the cutting to secure it in place.
4. Water the cuttings: Lightly water the cuttings to settle the soil.
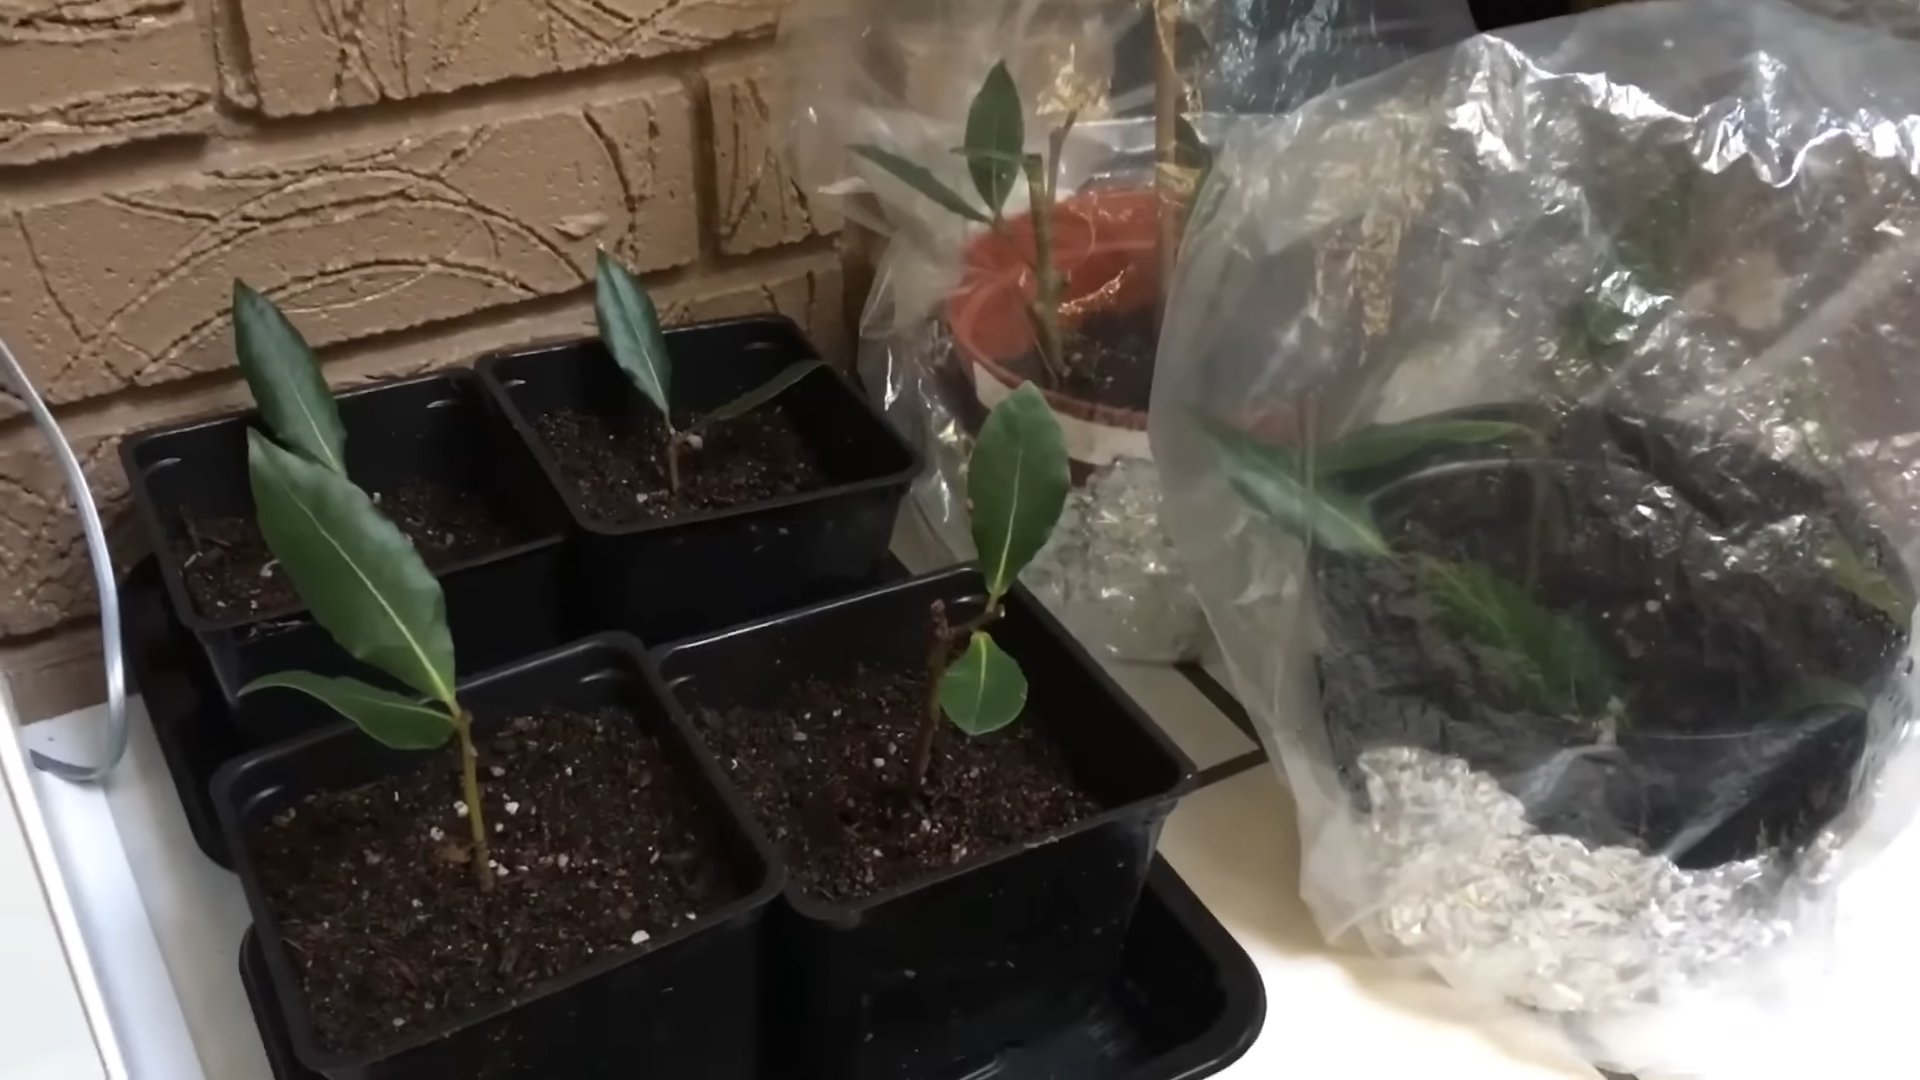
5. Create a humid environment: Place the pots inside clear plastic bags or under a humidity dome. This will help maintain high humidity, which is essential for successful rooting. If using plastic bags, make sure to poke a few small holes for ventilation.
Caring for the Cuttings
This is where patience comes in! Here’s how to care for your bay laurel cuttings while they’re rooting:
1. Provide bright, indirect light: Place the cuttings in a location that receives bright, indirect light. Avoid direct sunlight, which can scorch the leaves.
2. Maintain high humidity: Keep the cuttings covered with plastic bags or a humidity dome to maintain high humidity. Mist the cuttings regularly with water to keep them moist.
3. Keep the soil moist: Check the soil moisture regularly. Water the cuttings when the top inch of soil feels dry to the touch. Avoid overwatering, which can lead to root rot.
4. Provide bottom heat (optional): If you have a heat mat, place the pots on the mat to provide bottom heat. This can speed up the rooting process.
5. Ventilate regularly: Remove the plastic bags or humidity dome for a few minutes each day to allow for ventilation. This will help prevent the growth of mold and mildew.
Checking for Root Development
After a few weeks, you can start checking for root development. Gently tug on the cuttings. If they resist, it means they’ve started to root. You can also gently dig around the base of the cutting to check for new roots.
Signs of Successful Rooting:
* New leaf growth
* Resistance when gently tugging on the cutting
* Visible roots emerging from the drainage holes
Transplanting the Rooted Cuttings
Once the cuttings have developed a good root system, it’s time to transplant them into larger pots.
1. Choose larger pots: Select pots that are a few inches larger than the original pots.
2. Prepare the potting mix: Fill the larger pots with well-draining potting mix.
3. Gently remove the cuttings: Carefully remove the rooted cuttings from their original pots, being careful not to damage the roots.
4. Plant the cuttings: Place the cuttings in the larger pots and fill in around the roots with potting mix. Gently firm the soil around the base of the plant.
5. Water the cuttings: Water the cuttings thoroughly to settle the soil.
Caring for Your New Bay Laurel Plants
Now that you have your own bay laurel plants, here’s how to care for them:
1. Provide full sun to partial shade: Bay laurel plants thrive in full sun to partial shade.
2. Water regularly: Water the plants regularly, especially during dry periods. Allow the soil to dry out slightly between waterings.
3. Fertilize occasionally: Fertilize the plants occasionally with a balanced fertilizer.
4. Prune as needed: Prune the plants as needed to maintain their shape and size. You can also harvest leaves for cooking at any time.
5. Protect from frost: Bay laurel plants are hardy to about 20°F (-6°C). If you live in an area with colder winters, protect the plants from frost by covering them with burlap or moving them indoors.
Troubleshooting
Sometimes, things don’t go as planned. Here are some common problems you might encounter when propagating bay laurel cuttings and how to fix them:
* Cuttings not rooting: This could be due to several factors, including poor quality cuttings, insufficient humidity, or lack of rooting hormone. Try taking new cuttings from a different part of the plant, increasing the humidity, and using rooting hormone.
* Cuttings rotting: This is usually caused by overwatering or poor drainage. Make sure the potting mix is well-draining and avoid overwatering.
* Cuttings drying out: This is usually caused by insufficient humidity. Make sure the cuttings are covered with plastic bags or a humidity dome and mist them regularly with water.
* Cuttings developing mold or mildew: This is usually caused by poor ventilation. Remove the plastic bags or humidity dome for a few minutes each day to allow for ventilation.
Enjoy Your Homegrown Bay Leaves!
And there you have it! You’ve successfully propagated bay laurel cuttings and are well on your way to having an endless supply of fresh bay leaves. Remember to be patient and persistent, and don’t be afraid to experiment. Happy growing!
Conclusion
So, there you have it! Mastering the art of growing bay leaf cuttings is not only achievable but also incredibly rewarding. Forget shelling out money for overpriced bay leaves at the grocery store when you can cultivate your own thriving bay leaf plant right in your backyard or even on your windowsill. This DIY trick is a must-try for any home cook, gardening enthusiast, or anyone who appreciates the fresh, aromatic flavor of homegrown herbs.
Why is this method so compelling? First and foremost, it’s cost-effective. Instead of repeatedly purchasing bay leaves, you invest a little time and effort upfront and reap the benefits for years to come. Secondly, it’s sustainable. You’re reducing your reliance on commercially grown herbs, which often involve transportation and packaging that contribute to environmental waste. Finally, and perhaps most importantly, it’s deeply satisfying. There’s a unique joy in nurturing a plant from a simple cutting to a flourishing specimen, knowing that you played an integral role in its growth.
But the journey doesn’t end with the basic method. Feel free to experiment with different rooting mediums. While we’ve highlighted the success of using a well-draining potting mix, you could also try perlite, vermiculite, or even a combination of these. Some gardeners have also reported success with rooting bay leaf cuttings in water, although this method may require more frequent water changes and careful monitoring to prevent algae growth.
Consider the type of bay leaf you’re propagating. There are different varieties, each with slightly different flavor profiles. The most common is the sweet bay (Laurus nobilis), but you might also encounter California bay laurel (Umbellularia californica), which has a stronger, more pungent flavor. Ensure you know which type you’re working with to avoid any surprises in your culinary creations.
Another variation to explore is the use of rooting hormones. While not strictly necessary, rooting hormones can significantly increase the success rate and speed up the rooting process, especially for cuttings that are proving stubborn. Simply dip the cut end of the bay leaf cutting into the rooting hormone powder or liquid before planting it in the rooting medium.
Once your bay leaf cuttings have successfully rooted and established themselves, don’t be afraid to get creative with their placement. Bay leaf plants thrive in containers, making them ideal for patios, balconies, or even indoor spaces with sufficient sunlight. You can also plant them directly in the ground, provided you live in a region with a suitable climate (USDA hardiness zones 8-10).
Remember to protect your young bay leaf plants from harsh weather conditions, especially during their first few years. Provide them with adequate water, sunlight, and occasional fertilization to ensure their healthy growth. And don’t forget to prune them regularly to maintain their shape and encourage bushier growth.
Ultimately, the best way to learn is by doing. So, gather your supplies, select your bay leaf cuttings, and embark on this exciting gardening adventure. We’re confident that you’ll be amazed by the results.
We wholeheartedly encourage you to try this DIY trick for growing bay leaf cuttings. It’s a simple, rewarding, and sustainable way to add fresh, flavorful herbs to your culinary repertoire. And once you’ve experienced the joy of growing your own bay leaves, we’d love to hear about it! Share your experiences, tips, and photos with us in the comments section below. Let’s build a community of bay leaf enthusiasts and inspire others to embrace the magic of homegrown herbs. Happy gardening!
Frequently Asked Questions (FAQ)
What is the best time of year to take bay leaf cuttings?
The ideal time to take bay leaf cuttings is typically in late spring or early summer. This is when the plant is actively growing, and the cuttings are more likely to root successfully. Avoid taking cuttings during the dormant season (winter) or during periods of extreme heat or drought.
How long does it take for bay leaf cuttings to root?
Rooting time can vary depending on several factors, including the health of the cutting, the rooting medium used, and the environmental conditions. Generally, it takes anywhere from 4 to 8 weeks for bay leaf cuttings to develop roots. Be patient and monitor the cuttings regularly for signs of growth.
What are the signs that my bay leaf cutting has rooted?
The most obvious sign that your bay leaf cutting has rooted is the appearance of new growth. This could be in the form of new leaves or shoots emerging from the cutting. You can also gently tug on the cutting to see if it offers any resistance. If it feels firmly anchored in the rooting medium, it’s likely that roots have formed. Avoid pulling too hard, as this could damage the delicate roots.
What type of soil is best for growing bay leaf cuttings?
A well-draining potting mix is essential for successful rooting. Avoid using heavy, clay-based soils, as these can retain too much moisture and lead to root rot. A mixture of peat moss, perlite, and vermiculite is a good option. You can also purchase commercially available rooting mixes specifically designed for cuttings.
How often should I water my bay leaf cuttings?
Keep the rooting medium consistently moist, but not waterlogged. Water the cuttings whenever the top inch of the soil feels dry to the touch. Avoid overwatering, as this can lead to root rot. Ensure that the container has adequate drainage holes to prevent water from accumulating at the bottom.
What kind of light do bay leaf cuttings need?
Bay leaf cuttings need bright, indirect light to thrive. Avoid placing them in direct sunlight, as this can scorch the leaves. A location near an east-facing or west-facing window is ideal. If you don’t have access to natural light, you can use a grow light to supplement their lighting needs.
Do I need to use rooting hormone for bay leaf cuttings?
While not strictly necessary, rooting hormone can significantly increase the success rate and speed up the rooting process. It contains auxins, which are plant hormones that stimulate root development. If you’re having trouble getting your bay leaf cuttings to root, using rooting hormone is definitely worth considering.
How do I care for my bay leaf plant after it has rooted?
Once your bay leaf cutting has rooted and established itself, you can transplant it into a larger pot or directly into the ground (if you live in a suitable climate). Provide it with well-draining soil, regular watering, and occasional fertilization. Bay leaf plants prefer full sun to partial shade. Prune them regularly to maintain their shape and encourage bushier growth.
Can I grow bay leaf cuttings indoors?
Yes, bay leaf plants can be grown indoors, provided they receive sufficient sunlight. Place them near a sunny window or supplement their lighting needs with a grow light. Ensure that the pot has adequate drainage holes and water them regularly. You may also need to increase the humidity around the plant, especially during the winter months when indoor air tends to be dry.
What are some common problems when growing bay leaf cuttings?
Some common problems when growing bay leaf cuttings include root rot, fungal diseases, and pest infestations. Root rot is typically caused by overwatering or poor drainage. Fungal diseases can be prevented by providing good air circulation and avoiding overhead watering. Pest infestations can be controlled with insecticidal soap or neem oil. Regularly inspect your bay leaf cuttings for any signs of problems and take action promptly to prevent them from escalating.
How do I harvest bay leaves from my plant?
You can harvest bay leaves from your plant at any time of year. Simply snip off the leaves with a pair of scissors or pruning shears. Choose mature leaves that are dark green and free from blemishes. Fresh bay leaves have a stronger flavor than dried bay leaves, but both can be used in cooking. To dry bay leaves, simply spread them out on a tray in a cool, dry place for several days until they are brittle. Store dried bay leaves in an airtight container.
Is growing bay leaf cuttings difficult?
No, growing bay leaf cuttings is not particularly difficult, but it does require some patience and attention to detail. By following the steps outlined in this guide and providing your cuttings with the right conditions, you can significantly increase your chances of success. Don’t be discouraged if your first attempt is not successful. Keep practicing and experimenting, and you’ll eventually master the art of growing bay leaf cuttings.
Leave a Comment