

Dish Soap Alcohol Cleaning Hacks: Who knew your kitchen staples could be the secret weapons in your cleaning arsenal? I’m always on the lookout for simple, effective, and budget-friendly ways to keep my home sparkling, and let me tell you, this combination is a game-changer! Forget those expensive, chemical-laden cleaners – we’re going back to basics with a powerful duo that’s been trusted for generations.
The use of soap and alcohol for cleaning isn’t exactly new. Historically, soaps derived from natural fats and oils have been used for centuries, while alcohol’s disinfecting properties have been recognized for just as long. Combining them? That’s where the magic happens! It’s a testament to the ingenuity of resourceful homemakers who understood the power of simple ingredients.
In today’s busy world, who has time to spend hours scrubbing? That’s where these dish soap alcohol cleaning hacks come in. We all crave a clean and healthy home, but we don’t want to break the bank or expose ourselves to harsh chemicals. This DIY approach offers a safe, effective, and surprisingly versatile solution for tackling everything from grimy countertops to stubborn stains. I’m excited to share these easy-to-follow recipes and tips that will transform your cleaning routine and leave your home sparkling!
DIY All-Purpose Cleaner: Dish Soap and Alcohol Magic!
Hey everyone! I’m super excited to share one of my favorite DIY cleaning hacks with you: a powerful all-purpose cleaner made with just two ingredients – dish soap and rubbing alcohol! It’s incredibly effective, budget-friendly, and so easy to whip up. I’ve been using this for ages, and it works wonders on everything from countertops to bathroom surfaces. Let’s get started!
Why This Cleaner Rocks
Before we dive into the how-to, let’s talk about why this combination is so awesome:
* Dish Soap: Cuts through grease and grime like a champ. It’s designed to break down food particles, so it’s perfect for tackling sticky messes.
* Rubbing Alcohol (Isopropyl Alcohol): A fantastic disinfectant and degreaser. It evaporates quickly, leaving surfaces streak-free and sparkling. Plus, it helps kill germs and bacteria.
* The Synergy: Together, they create a cleaning powerhouse that’s effective on a wide range of surfaces.
What You’ll Need
Okay, gather your supplies! This is a super simple list:
* Empty spray bottle (I prefer a 16-ounce bottle, but any size will do – just adjust the recipe accordingly)
* Dish soap (I usually use Dawn, but any brand will work)
* Rubbing alcohol (70% isopropyl alcohol is ideal, but 91% works too – just dilute it slightly more with water if you’re using 91%)
* Water (optional, for diluting the alcohol if you’re using 91%)
* Measuring cups or spoons (for accuracy)
* Funnel (optional, but it makes pouring easier)
Step-by-Step Instructions: Making Your All-Purpose Cleaner
Alright, let’s get mixing! Follow these steps carefully for the best results.
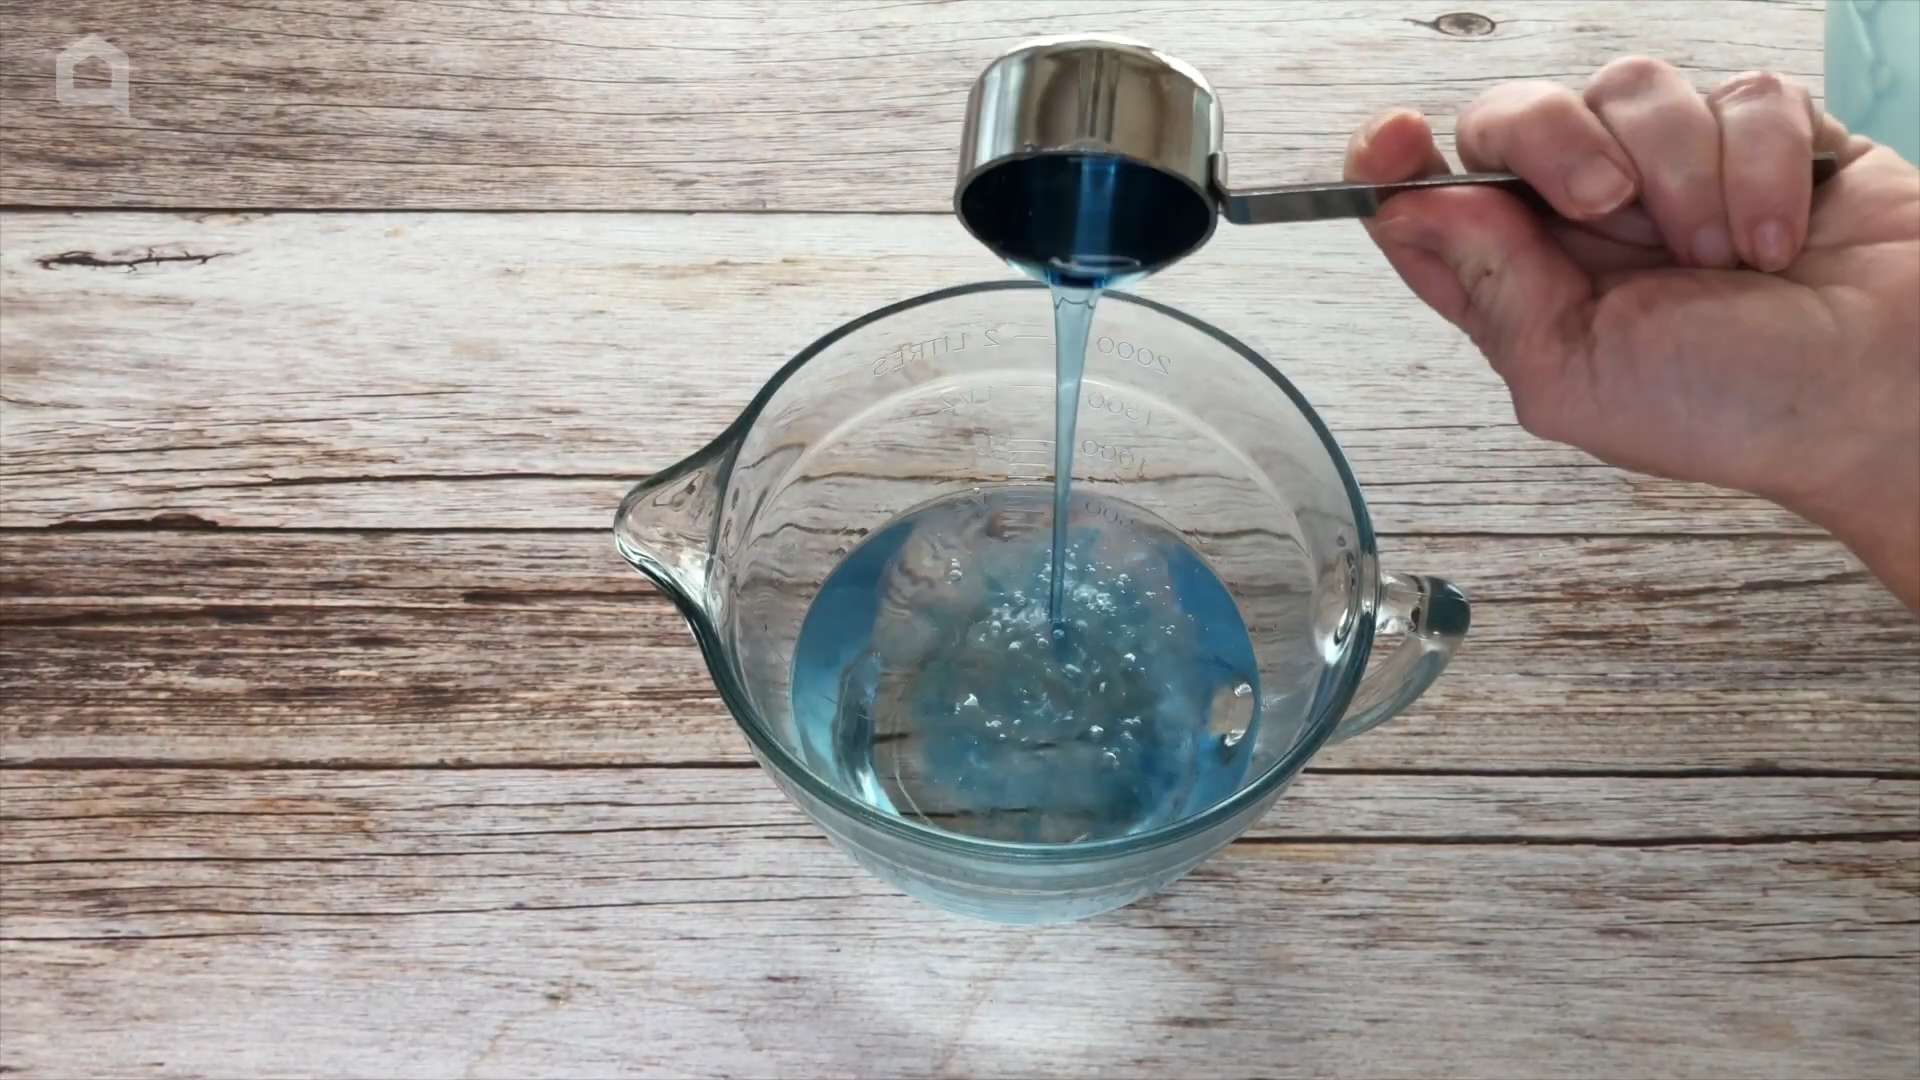
1. Prepare Your Spray Bottle: Make sure your spray bottle is clean and dry. Any residue inside could affect the cleaner’s performance. I usually rinse mine out with hot water and let it air dry.
2. Add the Rubbing Alcohol: This is the base of our cleaner. Pour 1 cup (8 ounces) of rubbing alcohol into the spray bottle. If you’re using 91% isopropyl alcohol, you might want to dilute it slightly with about 1/4 cup of water. This will make it a bit gentler on surfaces.
3. Add the Dish Soap: Now for the magic ingredient! Add 1 tablespoon of dish soap to the spray bottle. Important: Don’t add too much dish soap! Too much soap can leave a sticky residue on surfaces. Trust me, a little goes a long way.
4. Add Water (Optional): If you diluted the alcohol in step 2, you don’t need to add any more water. If you used 70% isopropyl alcohol, you can add about 1/2 cup of water to top off the bottle. This isn’t strictly necessary, but it can help to further dilute the solution and make it a bit less harsh.
5. Close and Shake: Secure the spray nozzle tightly onto the bottle. Now, gently shake the bottle to combine the ingredients. Be careful not to shake it too vigorously, as this can create excessive suds. A gentle swirl is all you need.
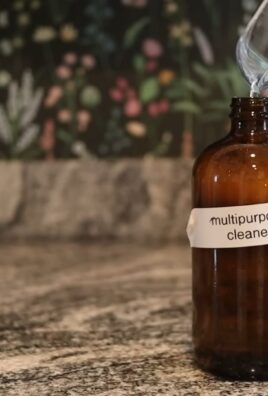
6. Label Your Bottle: This is super important! Label your spray bottle clearly with “All-Purpose Cleaner” and the ingredients. This will prevent any accidental misuse. I also like to add a little warning label that says “Keep out of reach of children.”
Using Your New All-Purpose Cleaner
Now that you’ve made your cleaner, let’s put it to work!
1. Test in an Inconspicuous Area: Before using the cleaner on a large surface, always test it in a small, hidden area first. This will ensure that it doesn’t damage or discolor the surface. I usually test it on the underside of a countertop or inside a cabinet.
2. Spray and Wipe: Spray the cleaner directly onto the surface you want to clean. Let it sit for a few seconds to allow the alcohol to disinfect and the dish soap to loosen grime. Then, wipe the surface clean with a damp cloth or sponge.
3. Dry the Surface: For best results, dry the surface with a clean, dry cloth. This will prevent water spots and leave a sparkling finish.
Where to Use This Cleaner
This all-purpose cleaner is incredibly versatile! Here are some of my favorite places to use it:
* Kitchen Countertops: It’s great for wiping up spills and messes on granite, quartz, laminate, and other countertop materials.
* Kitchen Sink: Keep your sink clean and fresh by spraying it down with this cleaner after each use.
* Bathroom Surfaces: Use it to clean sinks, toilets, showers, and tubs. The alcohol will help kill germs and prevent mildew.
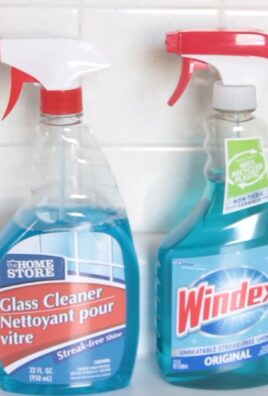
* Mirrors and Glass: This cleaner leaves mirrors and glass streak-free and sparkling.
* Appliances: Wipe down the exterior of your appliances, such as your refrigerator, oven, and microwave.
* Floors: You can use this cleaner on hard floors, such as tile, laminate, and hardwood (but be sure to test it in an inconspicuous area first!). Dilute it with water in a bucket for mopping.
* Doorknobs and Light Switches: These are high-touch areas that can harbor germs. Spray them down with this cleaner regularly to keep them clean and disinfected.
Surfaces to Avoid
While this cleaner is generally safe for most surfaces, there are a few exceptions:
* Unsealed Wood: Avoid using this cleaner on unsealed wood, as it can damage the finish.
* Painted Surfaces: Be cautious when using this cleaner on painted surfaces, as it can sometimes cause the paint to fade or peel. Always test it in an inconspicuous area first.
* Electronics: Never spray this cleaner directly onto electronics. Instead, dampen a cloth with the cleaner and gently wipe the surface.
Tips and Tricks for Success
Here are a few extra tips to help you get the most out of your DIY all-purpose cleaner:
* Adjust the Recipe: Feel free to adjust the recipe to suit your needs. If you find that the cleaner is too strong, add more water. If it’s not strong enough, add a little more dish soap.
* Add Essential Oils: For a pleasant scent, add a few drops of your favorite essential oil to the cleaner. Lavender, lemon, and tea tree oil are all great options.
* Make a Larger Batch: If you use this cleaner frequently, you can make a larger batch and store it in a sealed container.
* Use a Microfiber Cloth: Microfiber cloths are excellent for cleaning because they trap dirt and grime effectively.
* Clean Regularly: The key to keeping your home clean is to clean regularly. A quick wipe-down with this all-purpose cleaner every day can make a big difference.
* Don’t Mix with Other Cleaners: Never mix this cleaner with other cleaning products, especially bleach. Mixing cleaners can create dangerous fumes.
* Store Properly: Store your all-purpose cleaner in a cool, dry place away from direct sunlight.
Troubleshooting
Sometimes, things don’t go exactly as planned. Here are a few common problems and how to fix them:
* Streaky Surfaces: If you’re getting streaks, you’re probably using too much dish soap. Try reducing the amount of dish soap in the recipe. Also, make sure you’re drying the surface with a clean, dry cloth.
* Sticky Residue: Again, this is usually caused by using too much dish soap. Try wiping the surface with a damp cloth to remove the residue.
* Cloudy Cleaner: This can happen if the ingredients aren’t fully mixed. Shake the bottle well before each use.
* Unpleasant Smell: If you don’t like the smell of the cleaner, add a few drops of essential oil.
Safety First!
While this cleaner is relatively safe, it’s important to take a few precautions:
* Keep Out of Reach of Children: Store the cleaner in a safe place where children cannot access it.
* Avoid Contact with Eyes: If the cleaner gets in your eyes, rinse them immediately with plenty of water.
* Ventilation: Use the cleaner in a well-ventilated area.
* Skin Sensitivity: If you have sensitive skin, wear gloves when using the cleaner.
Final Thoughts
I hope you found this DIY all-purpose cleaner recipe helpful! It’s a simple, effective, and affordable way to keep your home clean and sparkling. Give it a try, and let me know what you think! Happy cleaning!

Conclusion
So, there you have it! This simple yet incredibly effective Dish Soap Alcohol Cleaning Hacks is a game-changer for anyone looking to simplify their cleaning routine and achieve sparkling results without harsh chemicals or breaking the bank. We’ve explored how the degreasing power of dish soap, combined with the disinfecting and quick-drying properties of rubbing alcohol, creates a potent cleaning solution that tackles a wide range of household messes.
Why is this a must-try? Because it’s efficient, economical, and eco-friendlier than many commercial cleaners. Think about it: you likely already have these ingredients in your home. No more running to the store for specialized cleaners for every surface. This DIY solution streamlines your cleaning process, saving you time and money. Plus, you have complete control over the ingredients, avoiding potentially harmful chemicals and reducing your environmental impact.
But the beauty of this hack lies in its versatility. Feel free to experiment with different ratios to find what works best for your specific needs. For tougher grease stains, you might want to increase the amount of dish soap slightly. For areas prone to mold or mildew, a higher concentration of rubbing alcohol could be beneficial. Consider adding a few drops of your favorite essential oil, like lemon, lavender, or tea tree, for a pleasant scent and added antibacterial properties. Just be sure to test any new variation on an inconspicuous area first to ensure it doesn’t damage the surface.
Another variation to consider is using different types of dish soap. While most dish soaps will work, those specifically designed for grease-cutting will naturally be more effective on greasy surfaces. You can also explore using different concentrations of isopropyl alcohol. 70% isopropyl alcohol is readily available and effective for disinfection, but 90% or higher will evaporate even faster, leaving behind less residue.
We’ve covered a multitude of applications, from sparkling windows and mirrors to gleaming countertops and sanitized bathrooms. Remember to always test the solution on a small, hidden area first, especially on delicate surfaces like wood or painted walls. And always use proper ventilation when working with rubbing alcohol.
Ultimately, the success of this Dish Soap Alcohol Cleaning Hacks depends on your willingness to give it a try. We’re confident that you’ll be amazed by the results. It’s a simple, effective, and affordable way to keep your home clean and fresh.
So, ditch the expensive, chemical-laden cleaners and embrace the power of this DIY solution. We encourage you to try it out and see for yourself the difference it can make. And most importantly, we want to hear about your experience! Share your tips, variations, and success stories in the comments below. Let’s build a community of clean-home enthusiasts who are passionate about simple, effective, and eco-friendly cleaning solutions. Your feedback will not only help others but also inspire us to continue sharing innovative cleaning hacks. Happy cleaning!
Frequently Asked Questions (FAQ)
What type of dish soap works best for this cleaning hack?
Generally, any dish soap will work, but dish soaps specifically formulated for grease-cutting will provide the best results, especially when tackling greasy surfaces like stovetops or kitchen counters. Look for dish soaps that advertise their degreasing power. Avoid using hand soaps or body washes, as they are not designed for cleaning surfaces and may leave a residue.
What concentration of rubbing alcohol should I use?
70% isopropyl alcohol is readily available and effective for disinfection. However, 90% or higher isopropyl alcohol will evaporate faster, leaving behind less residue. Both concentrations are suitable for this cleaning hack, but consider the surface you’re cleaning. For surfaces prone to water spots, the higher concentration might be preferable. Always handle rubbing alcohol with care and ensure proper ventilation.
Can I use this cleaning solution on all surfaces?
No, it’s crucial to test the solution on a small, inconspicuous area before applying it to the entire surface, especially on delicate materials like wood, painted walls, leather, or natural stone. The alcohol in the solution can potentially damage or discolor certain finishes. Avoid using it on porous surfaces that may absorb the solution.
How do I store the cleaning solution?
Store the cleaning solution in a clean, labeled spray bottle. Keep it out of reach of children and pets. It’s best to use a dark-colored or opaque bottle to protect the solution from light, which can degrade the alcohol over time. While the solution doesn’t typically expire quickly, it’s recommended to use it within a few months for optimal effectiveness.
Is this cleaning solution safe for use around children and pets?
While the ingredients are generally considered safe when used as directed, it’s essential to exercise caution when cleaning around children and pets. Ensure the area is well-ventilated, and keep them away from the cleaning solution and the surfaces being cleaned until they are completely dry. Store the solution out of their reach. If ingested, contact a medical professional or veterinarian immediately.
Can I add essential oils to this cleaning solution?
Yes, adding a few drops of essential oils can enhance the cleaning power and provide a pleasant scent. Lemon, lavender, tea tree, and eucalyptus oils are popular choices for their antibacterial and antiviral properties. However, be mindful of potential allergies or sensitivities to certain essential oils. Always test the solution with essential oils on a small, hidden area first to ensure it doesn’t damage the surface.
How often should I use this cleaning solution?
The frequency of use depends on your cleaning needs and the surfaces being cleaned. For high-traffic areas or surfaces that require frequent cleaning, such as kitchen counters and bathroom sinks, you can use the solution daily or as needed. For less frequently used areas, such as windows and mirrors, you can use it weekly or monthly.
What if the solution leaves streaks on my windows or mirrors?
Streaking can occur if too much solution is used or if the surface is not properly wiped dry. Use a microfiber cloth to wipe the surface clean and dry. You can also try diluting the solution further with water. Ensure the cloth is clean and free of lint. Another tip is to clean windows and mirrors on a cloudy day, as direct sunlight can cause the solution to dry too quickly, leading to streaks.
Can I use this solution to clean electronics?
No, it’s generally not recommended to use this solution to clean electronics, as the liquid can damage sensitive components. Instead, use a microfiber cloth lightly dampened with distilled water or a specialized electronic cleaning solution. Always unplug the device before cleaning and avoid getting any liquid inside.
What are the benefits of using this DIY cleaning solution compared to commercial cleaners?
This DIY cleaning solution offers several advantages over commercial cleaners. It’s more economical, as you likely already have the ingredients on hand. It’s also more environmentally friendly, as you’re reducing your reliance on harsh chemicals and plastic packaging. You have complete control over the ingredients, avoiding potentially harmful substances. And it’s just as effective, if not more so, at cleaning and disinfecting many surfaces in your home. The Dish Soap Alcohol Cleaning Hacks is a win-win for your wallet, your health, and the environment.
Leave a Comment