

Grow Bok Choy at Home? Absolutely! Imagine stepping into your backyard and harvesting fresh, crisp bok choy for a delicious stir-fry or a vibrant salad. It’s easier than you think, and I’m here to guide you through the process with some simple DIY tricks and hacks that will have you enjoying homegrown goodness in no time.
Bok choy, also known as pak choi, has a rich history rooted in Chinese cuisine, dating back over 5,000 years! It’s a staple ingredient in many Asian dishes and is prized for its mild flavor and nutritional benefits. But you don’t need to travel to Asia to enjoy this leafy green. You can grow bok choy at home, regardless of your gardening experience.
Why bother with DIY bok choy gardening? Well, for starters, you’ll have access to fresher, healthier produce than you can often find in stores. Plus, you’ll know exactly what’s going into your food – no pesticides or mystery ingredients! And let’s be honest, there’s something incredibly satisfying about nurturing a plant from seed to table. In this article, I’ll share my favorite tips and tricks to help you successfully cultivate this versatile vegetable, even if you have limited space or a less-than-green thumb. Get ready to unlock the secrets to a bountiful bok choy harvest right in your own backyard!
Grow Your Own Delicious Bok Choy at Home: A Beginner’s Guide
Hey there, fellow gardening enthusiasts! I’m so excited to share my experience with growing bok choy at home. It’s surprisingly easy, even if you’re a complete newbie like I was when I started. Bok choy, also known as pak choi, is a type of Chinese cabbage that’s packed with nutrients and adds a delightful crunch to stir-fries, soups, and salads. Plus, it grows relatively quickly, giving you a rewarding harvest in just a few weeks. Let’s dive in!
Choosing Your Bok Choy Variety
Before we get our hands dirty, let’s talk about the different types of bok choy you can grow. There are several varieties, each with its own unique characteristics. Here are a few popular options:
* Shanghai Bok Choy: This variety has light green, spoon-shaped leaves and thick, pale green stalks. It’s known for its mild flavor and tender texture.
* Baby Bok Choy: As the name suggests, this is a smaller version of regular bok choy. It’s perfect for single servings and has a slightly sweeter taste.
* Joi Choi: This is a larger variety with dark green, crinkled leaves and thick, white stalks. It’s known for its robust flavor and crisp texture.
* Purple Lady Bok Choy: For a touch of color in your garden, try Purple Lady bok choy. It has beautiful purple leaves and a slightly peppery flavor.
I personally love growing Shanghai bok choy because it’s so versatile in the kitchen, but feel free to experiment and find your favorite!
Getting Started: Seeds vs. Seedlings
You have two options when it comes to starting your bok choy: seeds or seedlings.
* Seeds: Starting from seeds gives you more control over the entire growing process and is generally more economical. However, it requires a bit more patience and attention.
* Seedlings: Buying seedlings from a nursery is a quicker and easier option, especially if you’re short on time or don’t have a lot of space for starting seeds indoors.
I’ve tried both methods and found that starting from seeds is quite rewarding, but seedlings are a great option if you want a head start.
Preparing Your Growing Space
Bok choy thrives in cool weather, so the best time to plant it is in the spring or fall. Here’s what you need to consider when preparing your growing space:
* Sunlight: Bok choy needs at least 4-6 hours of sunlight per day. Choose a location in your garden that receives plenty of sunshine.
* Soil: Bok choy prefers well-drained, fertile soil with a pH of 6.0 to 7.5. Amend your soil with compost or other organic matter to improve its fertility and drainage.
* Container Gardening: If you’re growing bok choy in containers, choose pots that are at least 6 inches deep and wide. Use a high-quality potting mix that drains well.
I usually amend my garden soil with composted manure before planting bok choy. It really helps to boost the growth and flavor.
Planting Your Bok Choy
Now for the fun part: planting! Here’s how to plant bok choy from seeds or seedlings:
Planting from Seeds:
1. Sow the Seeds: Sow the seeds about 1/4 to 1/2 inch deep and 1 inch apart in rows that are 12-18 inches apart.
2. Water Gently: Water the soil gently to avoid disturbing the seeds.
3. Keep Moist: Keep the soil consistently moist until the seeds germinate, which usually takes about 5-7 days.
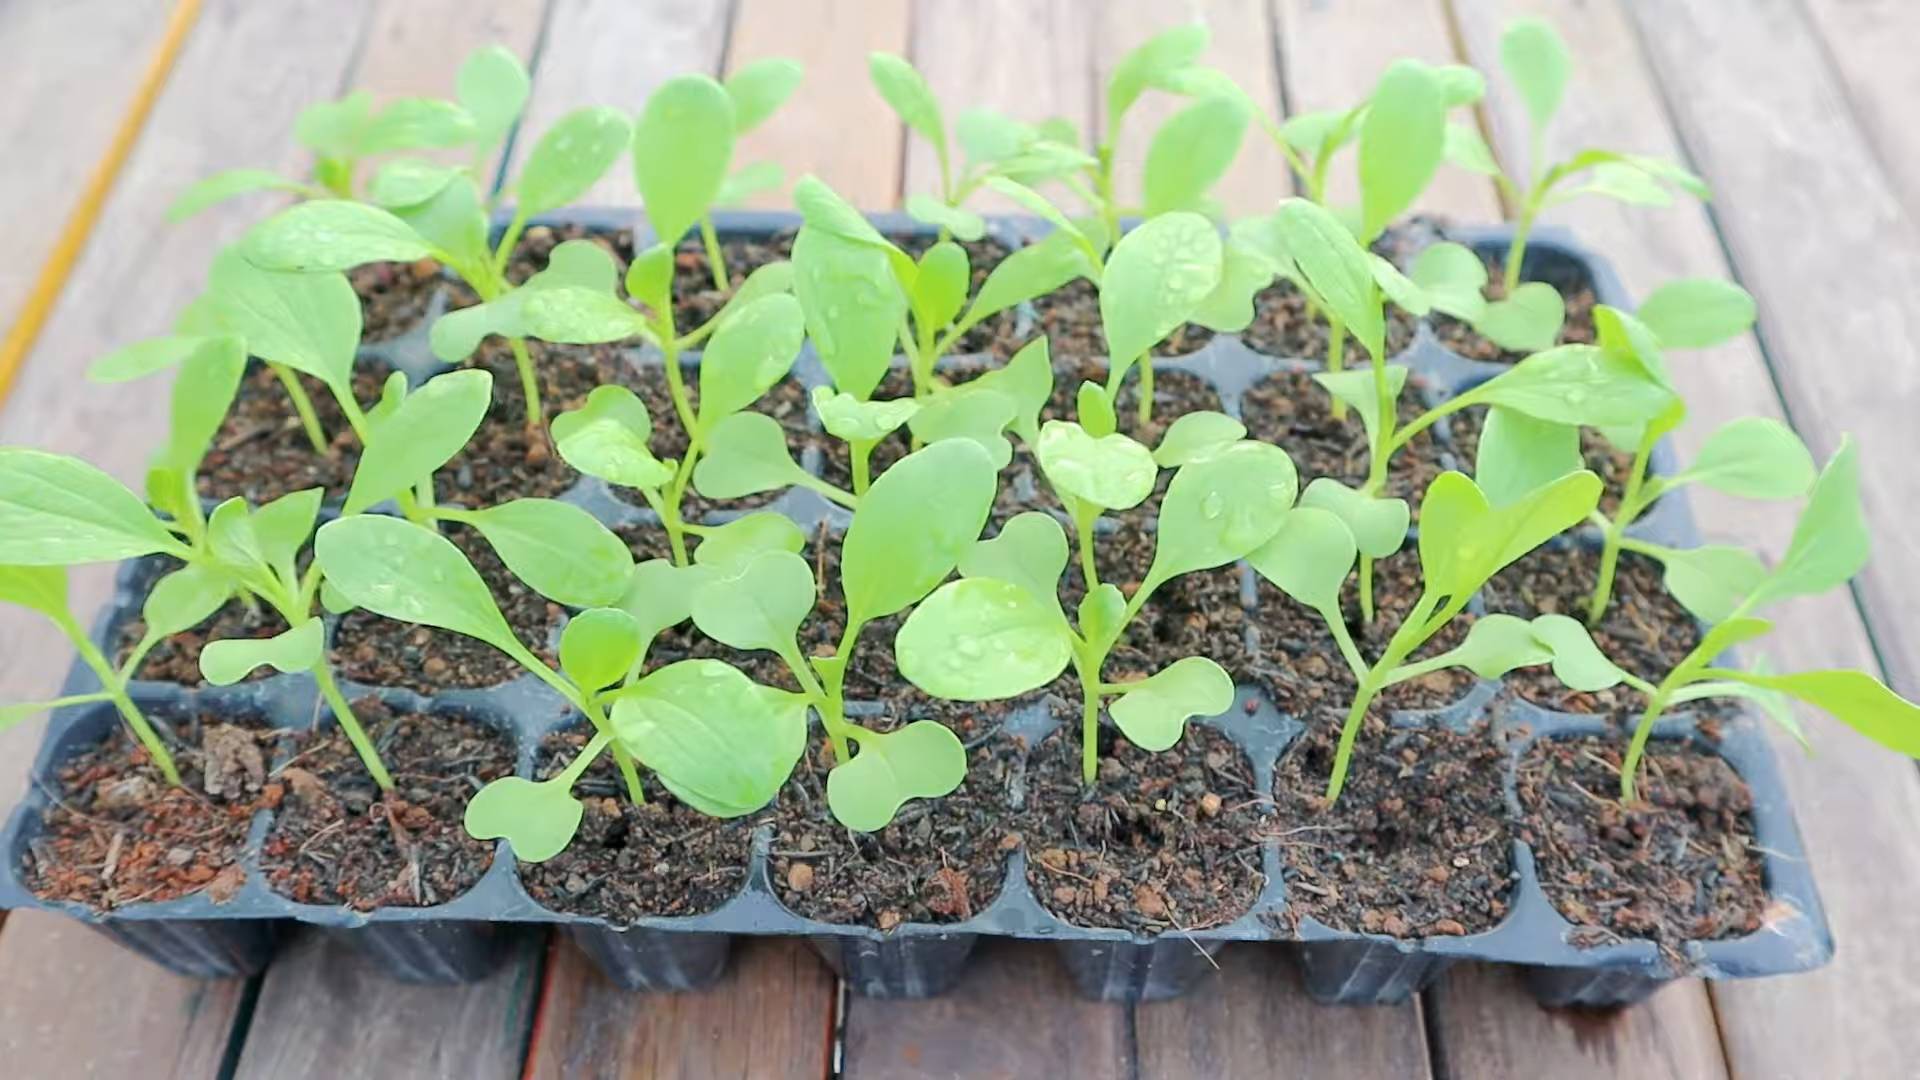
4. Thin Seedlings: Once the seedlings have a few true leaves, thin them to about 6-8 inches apart. This will give them enough space to grow and develop.
Planting Seedlings:
1. Prepare the Holes: Dig holes that are slightly larger than the root balls of the seedlings. Space the holes about 6-8 inches apart.
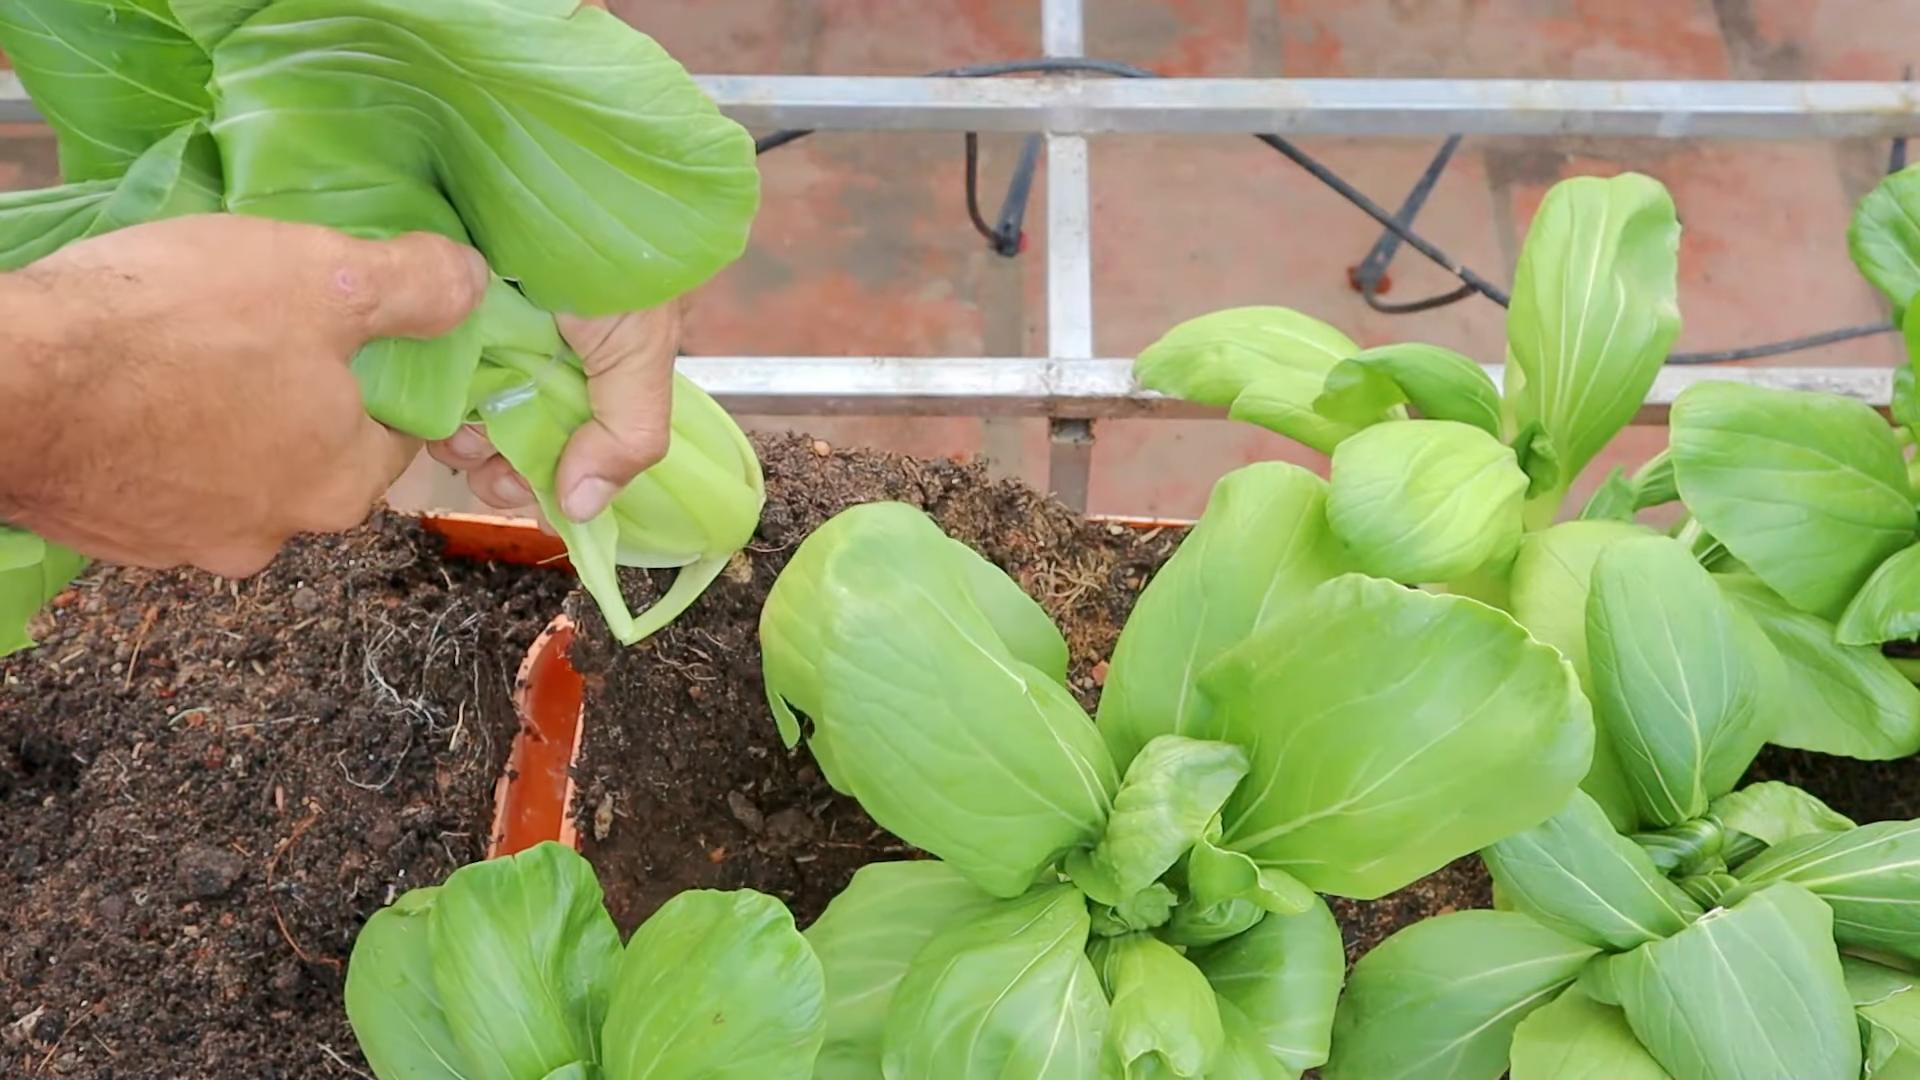
2. Remove Seedlings: Gently remove the seedlings from their containers, being careful not to damage the roots.
3. Place Seedlings: Place the seedlings in the holes and backfill with soil.
4. Water Thoroughly: Water the seedlings thoroughly after planting.
I always add a little bit of bone meal to the planting hole when transplanting seedlings. It helps to promote strong root growth.
Caring for Your Bok Choy
Once your bok choy is planted, it’s important to provide it with the right care to ensure a healthy and abundant harvest.
* Watering: Bok choy needs consistent moisture, especially during hot weather. Water deeply whenever the top inch of soil feels dry.
* Fertilizing: Fertilize your bok choy every 2-3 weeks with a balanced fertilizer. Follow the instructions on the fertilizer package.
* Weeding: Keep your bok choy patch free of weeds, which can compete for nutrients and water.
* Pest Control: Bok choy can be susceptible to pests like aphids, cabbage worms, and flea beetles. Inspect your plants regularly and take action if you notice any signs of infestation.
I like to use organic pest control methods whenever possible. For example, I’ll spray my bok choy with a mixture of water and neem oil to control aphids.
Dealing with Common Pests and Diseases
Even with the best care, your bok choy might encounter some pests or diseases. Here’s how to deal with some common problems:
* Aphids: These tiny insects suck the sap from plants, causing them to weaken and become distorted. Spray aphids with a strong stream of water or use insecticidal soap.
* Cabbage Worms: These green caterpillars can quickly devour bok choy leaves. Handpick them off the plants or use Bacillus thuringiensis (Bt), a natural insecticide.
* Flea Beetles: These small, jumping beetles can create tiny holes in bok choy leaves. Cover your plants with row covers to prevent flea beetles from reaching them.
* Downy Mildew: This fungal disease can cause yellow spots on bok choy leaves. Improve air circulation around your plants and avoid overhead watering to prevent downy mildew.
I’ve found that early detection is key when it comes to dealing with pests and diseases. The sooner you address the problem, the easier it will be to control.
Harvesting Your Bok Choy
Bok choy is typically ready to harvest in about 45-60 days from planting. You can harvest the entire plant at once or harvest individual leaves as needed.
* Harvesting the Entire Plant: To harvest the entire plant, cut it off at the base with a sharp knife.
* Harvesting Individual Leaves: To harvest individual leaves, simply snap them off from the outer part of the plant. This will allow the plant to continue producing new leaves.
I usually harvest my bok choy in the morning, when the leaves are crisp and fresh.
Storing Your Bok Choy
After harvesting, bok choy can be stored in the refrigerator for up to a week.
* Wrap in Damp Paper Towels: Wrap the bok choy in damp paper towels and place it in a plastic bag.
* Store in the Crisper Drawer: Store the bag in the crisper drawer of your refrigerator.
I find that bok choy stays freshest when stored this way.
Enjoying Your Homegrown Bok Choy
Now for the best part: enjoying your homegrown bok choy! There are countless ways to prepare this versatile vegetable. Here are a few of my favorite recipes:
* Stir-fries: Bok choy is a classic ingredient in stir-fries. Simply chop it up and add it to your favorite stir-fry recipe.
* Soups: Bok choy adds a delicious crunch to soups. Add it to your favorite soup recipe during the last few minutes of cooking.
* Salads: Baby bok choy can be used in salads. Its tender leaves and mild flavor make it a great addition to any salad.
* Steamed: Steamed bok choy is a simple and healthy side dish. Steam it until it’s tender-crisp and then drizzle it with soy sauce and sesame oil.
I love to sauté bok choy with garlic and ginger. It’s a quick and easy side dish that’s packed with flavor.
Troubleshooting Tips
Even with the best planning, sometimes things don’t go as expected. Here are some troubleshooting tips for common bok choy growing problems:
* Bok Choy Bolting (Going to Seed): If your bok choy starts to bolt (produce a flower stalk), it means it’s stressed. This can be caused by hot weather, lack of water, or poor soil. Try to provide your bok choy with consistent moisture and shade during hot weather.
* Slow Growth:
Conclusion
So, there you have it! Growing your own bok choy at home is not only surprisingly simple, but it’s also incredibly rewarding. Forget those wilted, overpriced heads at the grocery store. Imagine stepping out into your garden or onto your balcony and harvesting crisp, vibrant bok choy whenever you need it. The flavor difference alone is enough to convince anyone to give this a try. Freshly grown bok choy boasts a delicate sweetness and satisfying crunch that store-bought varieties simply can’t match.
But the benefits extend beyond just taste. By growing your own, you have complete control over what goes into your food. You can avoid harmful pesticides and herbicides, ensuring that you’re feeding yourself and your family the healthiest possible produce. Plus, gardening is a fantastic stress reliever! There’s something incredibly therapeutic about nurturing a plant from seed to harvest.
This DIY bok choy growing method is a must-try for anyone looking to add fresh, healthy greens to their diet, save money, and connect with nature. And don’t be afraid to experiment! Try different varieties of bok choy, such as the baby bok choy for a more tender texture or the Shanghai bok choy for a slightly milder flavor. You can also adjust the growing conditions to suit your local climate. If you live in a particularly hot area, provide some afternoon shade to prevent the leaves from scorching. If you’re growing indoors, experiment with different grow lights to find the optimal setup for your plants.
Consider companion planting your bok choy with other vegetables and herbs. For example, planting marigolds nearby can help deter pests, while planting dill can attract beneficial insects. You can even intercrop bok choy with faster-growing vegetables like radishes or lettuce to maximize your garden space.
Don’t wait any longer! Grab some seeds, prepare your soil, and get ready to enjoy the freshest, most delicious bok choy you’ve ever tasted. We’re confident that you’ll be amazed at how easy and rewarding it is to grow your own.
We’d love to hear about your experiences! Share your tips, tricks, and photos of your homegrown bok choy in the comments below. Let’s build a community of bok choy enthusiasts and inspire others to embrace the joy of gardening. Happy growing!
Frequently Asked Questions (FAQ)
What is the best time of year to plant bok choy?
Bok choy is a cool-season crop, meaning it thrives in cooler temperatures. The best time to plant bok choy is in early spring or late summer/early fall. Avoid planting during the hottest months of summer, as the heat can cause the plants to bolt (go to seed prematurely), resulting in bitter-tasting leaves. In spring, plant after the last frost. For a fall harvest, plant about 4-6 weeks before the first expected frost. If you live in a region with mild winters, you may even be able to grow bok choy throughout the winter months.
How much sunlight does bok choy need?
Bok choy prefers full sun, which means at least 6 hours of direct sunlight per day. However, it can also tolerate partial shade, especially in hotter climates. If you’re growing bok choy in a container, you can move it around to ensure it gets enough sunlight. If you’re growing it in the ground, choose a location that receives plenty of sunlight throughout the day. If you live in a very hot climate, providing some afternoon shade can help prevent the leaves from scorching.
What kind of soil is best for growing bok choy?
Bok choy prefers well-drained, fertile soil that is rich in organic matter. The ideal soil pH is between 6.0 and 7.5. Before planting, amend the soil with compost or other organic matter to improve drainage and fertility. You can also add a slow-release fertilizer to provide the plants with essential nutrients. If you’re growing bok choy in a container, use a high-quality potting mix that is specifically formulated for vegetables.
How often should I water bok choy?
Bok choy needs consistent moisture to thrive. Water regularly, especially during dry periods. Aim to keep the soil consistently moist but not waterlogged. Overwatering can lead to root rot, so be sure to provide good drainage. A good rule of thumb is to water when the top inch of soil feels dry to the touch. Mulching around the plants can help retain moisture and suppress weeds.
What are some common pests and diseases that affect bok choy?
Bok choy can be susceptible to several pests and diseases, including aphids, cabbage worms, flea beetles, and downy mildew. To prevent pest and disease problems, practice good garden hygiene. Remove any weeds or debris that could harbor pests or diseases. Inspect your plants regularly for signs of infestation or disease. If you find any pests, you can try hand-picking them off the plants or using an insecticidal soap or neem oil. For diseases, you can try using a fungicide or removing the affected leaves. Crop rotation can also help prevent soilborne diseases.
How do I harvest bok choy?
You can harvest bok choy at any stage of growth, depending on your preference. For baby bok choy, harvest when the leaves are about 4-6 inches long. For mature bok choy, harvest when the heads are firm and compact. To harvest, simply cut the entire head off at the base of the plant with a sharp knife. You can also harvest individual leaves as needed, starting with the outer leaves.
Can I grow bok choy in containers?
Yes, bok choy grows very well in containers. Choose a container that is at least 12 inches deep and wide to provide enough room for the roots to grow. Use a high-quality potting mix and be sure to provide good drainage. Water regularly and fertilize as needed. Container-grown bok choy may need to be watered more frequently than bok choy grown in the ground, especially during hot weather.
How do I store bok choy after harvesting?
To store bok choy, wrap it loosely in a damp paper towel and place it in a plastic bag in the refrigerator. It will keep for about a week. You can also blanch and freeze bok choy for longer storage. To blanch, submerge the bok choy in boiling water for 2-3 minutes, then transfer it to an ice bath to stop the cooking process. Drain well and freeze in freezer bags or containers.
What are some ways to use bok choy in cooking?
Bok choy is a versatile vegetable that can be used in a variety of dishes. It can be stir-fried, steamed, boiled, or added to soups and stews. It’s also delicious raw in salads. Bok choy pairs well with Asian flavors such as soy sauce, ginger, garlic, and sesame oil. Try adding it to stir-fries with tofu, chicken, or shrimp. You can also use it in soups like miso soup or wonton soup.
Can I save seeds from my bok choy plants?
Yes, you can save seeds from your bok choy plants, but it requires allowing the plant to bolt and go to seed. This is best done with heirloom varieties to ensure the seeds are true to type. Allow the seed pods to dry on the plant, then harvest them and remove the seeds. Store the seeds in a cool, dry place. Keep in mind that bok choy can cross-pollinate with other members of the Brassica family, so if you’re growing other Brassicas nearby, the seeds may not be true to type.

Leave a Comment