

Balcony Chili Growing Tips: Unleash the fiery potential of your small space! Imagine plucking fresh, vibrant chilies right from your balcony, ready to spice up your next meal. Sounds amazing, right? Well, it’s easier than you think! For centuries, cultures around the globe have cultivated chilies, from the ancient Aztecs using them in rituals to modern-day chefs crafting culinary masterpieces. But you don’t need a sprawling farm to join this flavorful tradition.
I know what you’re thinking: “I don’t have a green thumb!” But trust me, with these balcony chili growing tips, even the most novice gardener can enjoy a bountiful harvest. We’ll break down everything you need to know, from choosing the right chili varieties for container gardening to mastering watering and fertilization techniques. Why spend money on store-bought chilies when you can grow your own, knowing exactly where they came from and how they were cared for? Plus, there’s nothing quite like the satisfaction of nurturing a plant from seed to spicy fruit. Let’s get started and transform your balcony into a chili paradise!
Growing Chili Peppers on Your Balcony: A Spicy DIY Guide
Hey there, fellow chili enthusiast! Dreaming of fresh, fiery peppers right outside your door? You’ve come to the right place. Growing chili peppers on your balcony is totally achievable, even if you’re a beginner. I’m going to walk you through everything you need to know, from choosing the right varieties to harvesting your spicy bounty. Let’s get started!
Choosing the Right Chili Peppers
First things first, let’s talk about chili pepper varieties. Not all peppers are created equal, and some are definitely better suited for balcony life than others. Consider these factors when making your selection:
* Size: Balconies usually have limited space, so compact varieties are your best bet. Look for bushier plants that don’t grow too tall.
* Sunlight Requirements: Most chili peppers need at least 6-8 hours of direct sunlight per day. Make sure your balcony gets enough sun before choosing a variety.
* Heat Level: This is totally up to your personal preference! Do you want a mild jalapeño or a scorching habanero? Choose peppers that match your spice tolerance.
* Growing Season: Some peppers mature faster than others. If you live in a region with a short growing season, opt for quicker-maturing varieties.
Here are a few of my favorite chili peppers for balcony growing:
* Jalapeño: A classic choice, jalapeños are relatively easy to grow and produce a good yield.
* Serrano: Slightly hotter than jalapeños, serranos are great for adding a kick to salsas and sauces.
* Thai Chili: These small, fiery peppers are perfect for Asian cuisine. They also look beautiful on the plant.
* Habanero: If you’re a heat seeker, habaneros are a must-try. Be warned, they’re seriously spicy!
* Cayenne: Another popular choice, cayenne peppers are versatile and easy to dry for later use.
* ‘Patio Fire’ Hybrid: Bred specifically for container growing, this variety is compact and produces a good amount of medium-hot peppers.
Gathering Your Supplies
Okay, now that you’ve chosen your chili peppers, it’s time to gather your supplies. Here’s what you’ll need:
* Chili Pepper Seeds or Seedlings: You can start from seed or buy seedlings from a local nursery. Seedlings will give you a head start.
* Pots or Containers: Choose pots that are at least 12 inches in diameter. Make sure they have drainage holes to prevent waterlogging. Fabric pots are also a great option.
* Potting Mix: Use a high-quality potting mix that’s well-draining. Avoid using garden soil, as it can compact and suffocate the roots.
* Fertilizer: Chili peppers are heavy feeders, so you’ll need to fertilize them regularly. Use a balanced fertilizer or one specifically formulated for tomatoes and peppers.
* Watering Can or Hose: You’ll need a way to water your plants. A watering can is fine for small balconies, but a hose with a gentle spray nozzle is more convenient for larger spaces.
* Plant Labels: Label your plants so you know which variety is which.
* Gardening Gloves: Protect your hands from dirt and potential irritants.
* Optional:
* Plant Stakes or Cages: Some chili pepper varieties can get top-heavy, so you may need to provide support.
* Pruning Shears: For trimming and shaping your plants.
* Insecticidal Soap or Neem Oil: To control pests.
Planting Your Chili Peppers
Alright, let’s get our hands dirty! Here’s how to plant your chili peppers:
1. Starting from Seed (Optional): If you’re starting from seed, sow the seeds indoors 6-8 weeks before the last expected frost. Plant the seeds about 1/4 inch deep in seed-starting mix. Keep the soil moist and warm (around 75-80°F). Once the seedlings have a few sets of true leaves, you can transplant them into larger pots.
2. Preparing the Pots: Fill your pots with potting mix, leaving about an inch of space at the top.
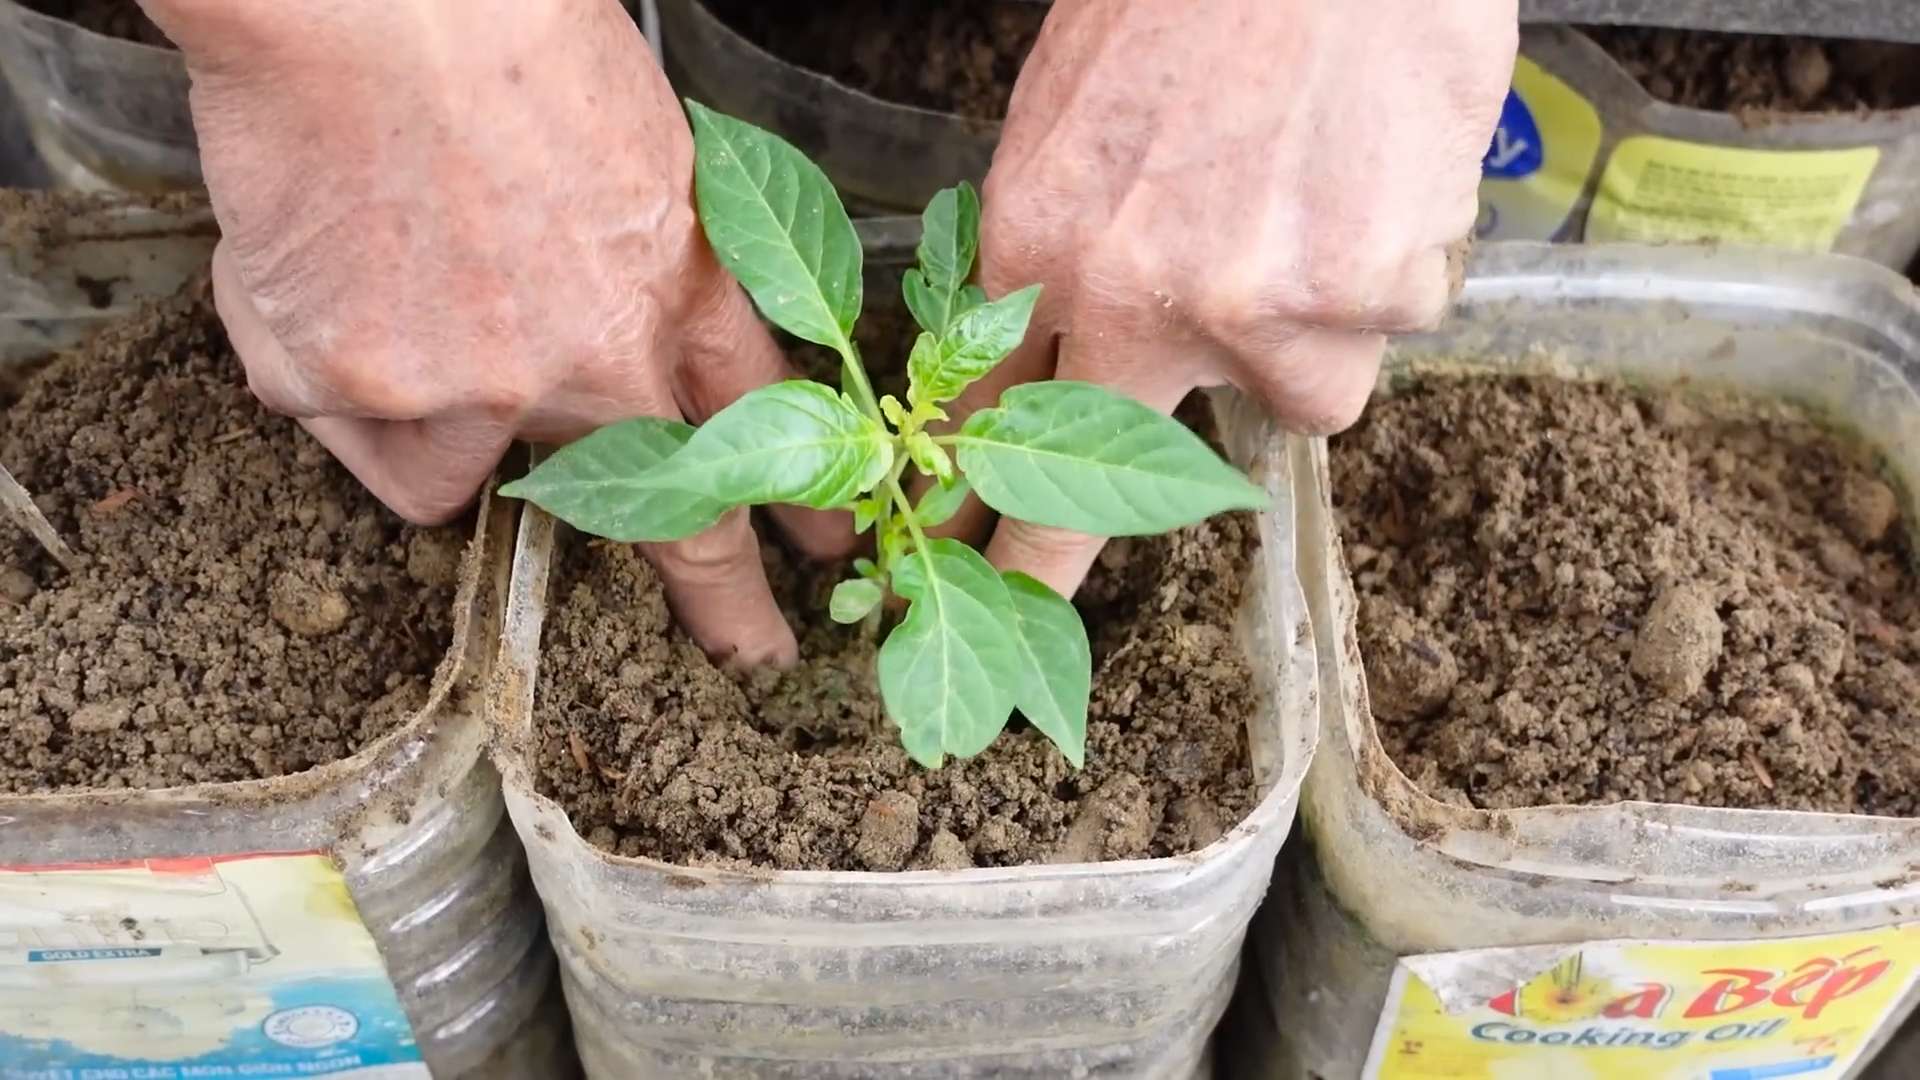
3. Planting the Seedlings: Gently remove the seedlings from their containers. If the roots are pot-bound (tightly circling the pot), gently loosen them before planting.
4. Planting Depth: Plant the seedlings at the same depth they were growing in their original containers.
5. Spacing: If you’re planting multiple chili peppers in the same pot, space them at least 12 inches apart.
6. Watering: Water the newly planted seedlings thoroughly.
7. Labeling: Don’t forget to label your plants!
Caring for Your Chili Peppers
Now that your chili peppers are planted, it’s time to give them the care they need to thrive.
1. Sunlight: Place your chili peppers in a spot that gets at least 6-8 hours of direct sunlight per day. If your balcony doesn’t get enough sun, you may need to supplement with grow lights.
2. Watering: Water your chili peppers regularly, especially during hot, dry weather. The soil should be consistently moist, but not waterlogged. Check the soil moisture by sticking your finger into the soil. If the top inch feels dry, it’s time to water.
3. Fertilizing: Fertilize your chili peppers every 2-3 weeks with a balanced fertilizer or one specifically formulated for tomatoes and peppers. Follow the instructions on the fertilizer label.
4. Pruning: Pruning can help to improve air circulation and encourage bushier growth. Remove any yellowing or dead leaves. You can also pinch off the tips of the branches to encourage more branching.
5. Pest Control: Keep an eye out for pests like aphids, whiteflies, and spider mites. If you spot any pests, treat them with insecticidal soap or neem oil.
6. Supporting the Plants: As your chili peppers grow, they may need support. Use plant stakes or cages to prevent the branches from breaking under the weight of the peppers.
7. Pollination: Chili peppers are self-pollinating, but sometimes they need a little help. You can hand-pollinate them by gently shaking the plants or using a small paintbrush to transfer pollen from one flower to another. This is especially helpful if you’re growing your peppers indoors or in a sheltered location.
Harvesting Your Chili Peppers
The moment you’ve been waiting for! Harvesting your chili peppers is the most rewarding part of the process.
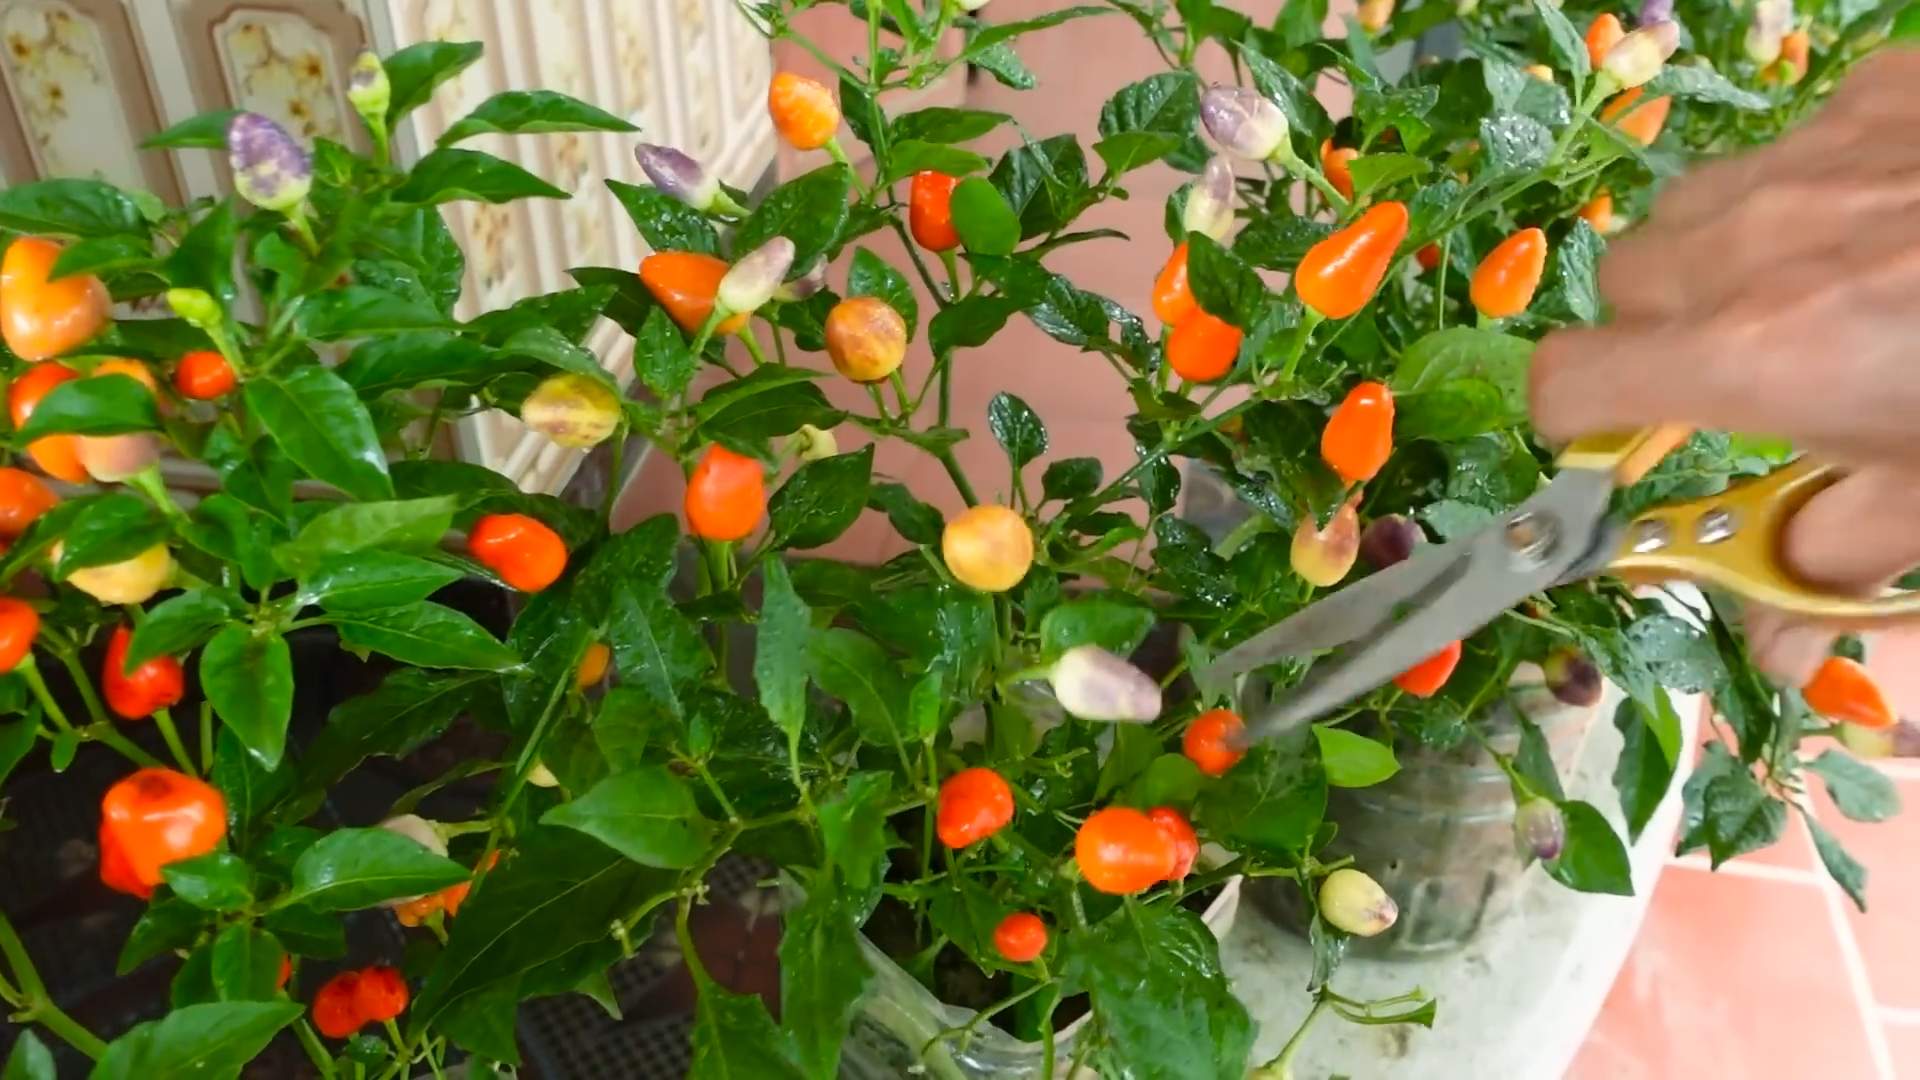
1. When to Harvest: The best time to harvest your chili peppers depends on the variety and your personal preference. Most chili peppers will change color as they ripen, from green to red, yellow, or orange. You can harvest them at any stage of ripeness, but they’ll be at their peak flavor and heat when they’re fully colored.
2. How to Harvest: Use pruning shears or scissors to cut the peppers from the plant. Be careful not to damage the plant.
3. Handling Hot Peppers: If you’re harvesting hot peppers like habaneros or Scotch bonnets, wear gloves to protect your hands from the capsaicin (the compound that makes peppers hot). Avoid touching your eyes or face after handling hot peppers.
4. Storing Your Harvest: You can store your chili peppers in the refrigerator for up to a week. For longer storage, you can dry them, freeze them, or pickle them.
Troubleshooting
Even with the best care, you may encounter some problems while growing chili peppers on your balcony. Here are a few common issues and how to fix them:
* Yellowing Leaves: This can be caused by overwatering, underwatering, nutrient deficiencies, or pests. Check the soil moisture and adjust your watering accordingly. Fertilize your plants regularly. Inspect the leaves for pests.
* Blossom Drop: This is when the flowers fall off the plant without producing fruit. It can be caused by temperature stress, lack of pollination, or nutrient deficiencies. Make sure your plants are getting enough sunlight and water. Hand-pollinate the flowers if necessary. Fertilize your plants with a fertilizer that’s high in phosphorus.
* Pests: Aphids, whiteflies, and spider mites are common pests of chili peppers. Treat them with insecticidal soap or neem oil.
* Fungal Diseases: Fungal diseases like powdery mildew and leaf spot can affect chili peppers. Improve air circulation by pruning the plants. Treat the plants with a fungicide.
Enjoying Your Spicy Harvest
Congratulations! You’ve successfully grown chili peppers on your balcony. Now it’s time to enjoy your spicy harvest. Use your fresh chili peppers in your favorite recipes, or dry them for later use. You can also
Conclusion
So, there you have it! Transforming your balcony into a vibrant chili pepper paradise is not only achievable, but incredibly rewarding. We’ve explored the key elements – from selecting the right chili varieties and containers to mastering watering techniques and pest control – all tailored for the unique environment of a balcony garden.
Why is this DIY balcony chili growing trick a must-try? Because it offers a multitude of benefits. Imagine stepping onto your balcony and harvesting fresh, fiery chilies whenever you need them. Think of the satisfaction of knowing exactly where your food comes from, free from harmful pesticides and grown with your own loving care. Consider the aesthetic appeal of lush, green plants adorned with colorful peppers, adding a touch of vibrancy to your outdoor space. And, of course, there’s the sheer joy of learning a new skill and connecting with nature, even in the heart of the city.
But the beauty of balcony chili growing lies in its adaptability. Feel free to experiment with different chili varieties to find your perfect heat level. Try growing companion plants like basil or marigolds to deter pests and enhance the flavor of your chilies. Get creative with your container choices, using recycled materials or vertical gardening systems to maximize space. You could even explore hydroponic chili growing for a more controlled and efficient system.
Don’t be afraid to tweak the techniques we’ve discussed to suit your specific balcony conditions and preferences. If your balcony is particularly windy, consider using windbreaks or choosing shorter, sturdier chili varieties. If you have limited sunlight, opt for varieties that tolerate partial shade. The key is to observe your plants, learn from your mistakes, and adapt your approach as needed.
We are confident that with a little effort and attention, you can successfully cultivate a thriving chili garden on your balcony. The rewards – fresh, flavorful chilies, a beautiful outdoor space, and a sense of accomplishment – are well worth the investment.
Now, it’s your turn! We encourage you to embrace this DIY balcony chili growing trick and embark on your own chili-growing adventure. Don’t be intimidated if you’re a beginner; everyone starts somewhere. Start small, learn as you go, and most importantly, have fun!
Once you’ve harvested your first batch of chilies, we’d love to hear about your experience. Share your photos, tips, and challenges in the comments section below. Let’s create a community of balcony chili growers, sharing our knowledge and inspiring each other to cultivate even more vibrant and productive gardens. Happy growing!
Frequently Asked Questions (FAQs)
What are the best chili varieties to grow on a balcony?
Choosing the right chili varieties is crucial for success on a balcony. Compact varieties that don’t grow too tall are generally best suited for container gardening. Some excellent options include:
* **Thai Chilies:** These are small, prolific, and pack a significant punch of heat. They are relatively easy to grow and thrive in containers.
* **Jalapeños:** A classic choice, jalapeños are relatively mild and versatile. They are also quite productive and well-suited for container growing.
* **Serrano Peppers:** Similar to jalapeños but with a bit more heat, serranos are another great option for balconies.
* **Habaneros:** If you’re looking for serious heat, habaneros are a good choice, but be aware that they require more sunlight and attention than milder varieties.
* **Cayenne Peppers:** These long, slender peppers are known for their fiery flavor and are relatively easy to grow in containers.
* **Ornamental Peppers:** These varieties are grown for their colorful fruits and compact size, making them a visually appealing and edible addition to your balcony garden. Examples include ‘Black Pearl’ and ‘Purple Flash’.
Consider your personal heat preference and the amount of sunlight your balcony receives when selecting your chili varieties.
What size container do I need for chili plants?
The size of the container depends on the chili variety you choose. As a general rule, aim for a container that is at least 12 inches in diameter and 12 inches deep for smaller varieties like Thai chilies or ornamental peppers. Larger varieties like jalapeños or habaneros will benefit from larger containers, ideally 15-20 inches in diameter and depth.
Ensure that the container has adequate drainage holes to prevent waterlogging, which can lead to root rot. You can also use a well-draining potting mix specifically formulated for container gardening.
How often should I water my chili plants on a balcony?
Watering frequency depends on several factors, including the weather, the size of the container, and the type of potting mix you’re using. As a general guideline, water your chili plants when the top inch of soil feels dry to the touch.
During hot, sunny weather, you may need to water your plants daily, while during cooler or cloudy weather, you can water them less frequently. Avoid overwatering, as this can lead to root rot.
It’s best to water deeply and thoroughly, allowing the water to drain out of the drainage holes. This encourages deep root growth and helps the plants withstand periods of drought.
How much sunlight do chili plants need?
Chili plants thrive in full sun, which means they need at least 6-8 hours of direct sunlight per day. If your balcony doesn’t receive enough sunlight, you can supplement with grow lights.
If you’re growing chili plants in a particularly hot climate, you may need to provide some afternoon shade to prevent the leaves from scorching.
What kind of fertilizer should I use for chili plants?
Chili plants are heavy feeders and benefit from regular fertilization. Use a balanced fertilizer with an NPK ratio of 10-10-10 or 14-14-14. You can also use a fertilizer specifically formulated for tomatoes or peppers, as these plants have similar nutrient requirements.
Fertilize your chili plants every 2-3 weeks during the growing season, following the instructions on the fertilizer package. Avoid over-fertilizing, as this can lead to excessive foliage growth and reduced fruit production.
How do I protect my chili plants from pests and diseases on a balcony?
Balcony gardens are less susceptible to pests and diseases than in-ground gardens, but it’s still important to take preventative measures.
Regularly inspect your plants for signs of pests, such as aphids, spider mites, or whiteflies. If you find any pests, you can try washing them off with a strong stream of water or using insecticidal soap or neem oil.
To prevent fungal diseases, ensure that your plants have good air circulation and avoid overwatering. You can also use a fungicide if necessary.
Companion planting can also help deter pests. For example, basil is known to repel aphids and whiteflies.
When should I harvest my chilies?
The time to harvest your chilies depends on the variety and your personal preference. Most chilies will change color as they ripen, from green to red, yellow, or orange.
You can harvest chilies at any stage of ripeness, but they will generally be hotter and more flavorful when fully ripe. Use scissors or pruning shears to cut the chilies from the plant, leaving a small stem attached.
Can I overwinter my chili plants on a balcony?
In colder climates, you can overwinter your chili plants indoors to protect them from frost. Before the first frost, prune back the plants and move them to a bright, sunny location indoors.
Water sparingly during the winter months and avoid fertilizing. In the spring, gradually acclimate the plants to outdoor conditions before moving them back to your balcony.
What if my chili plant is not producing any fruit?
There are several reasons why your chili plant may not be producing fruit. Some common causes include:
* **Lack of Sunlight:** Chili plants need at least 6-8 hours of direct sunlight per day to produce fruit.
* **Poor Pollination:** Chili plants are self-pollinating, but sometimes they need a little help. You can gently shake the plant or use a small paintbrush to transfer pollen from one flower to another.
* **Over-Fertilization:** Too much nitrogen can lead to excessive foliage growth and reduced fruit production.
* **Extreme Temperatures:** High temperatures can inhibit fruit set.
* **Pest or Disease Infestation:** Pests and diseases can weaken the plant and prevent it from producing fruit.
By addressing these potential issues, you can increase your chances of a bountiful chili harvest.
Leave a Comment