

Grow Kale in Plastic Bottle? Absolutely! I know what you’re thinking: “Kale? In a plastic bottle? Is that even possible?” Well, my friend, prepare to be amazed! We’re diving headfirst into the wonderful world of upcycling and urban gardening, where creativity blossoms alongside our leafy greens.
For centuries, humans have cultivated kale, tracing its roots back to ancient Greece and Rome. It was a staple food, prized for its hardiness and nutritional value. Today, kale enjoys a resurgence in popularity, celebrated as a superfood packed with vitamins and antioxidants. But let’s be honest, not everyone has a sprawling garden to dedicate to this leafy powerhouse. That’s where this ingenious DIY trick comes in!
Imagine harvesting fresh, vibrant kale right from your windowsill, balcony, or even your kitchen counter. No need for acres of land or expensive gardening equipment. This method is perfect for apartment dwellers, budget-conscious gardeners, or anyone looking to add a touch of green to their lives. Plus, you’ll be reducing waste by giving those plastic bottles a new purpose. It’s a win-win! So, let’s unlock the secrets to successfully grow kale in plastic bottle and enjoy a bountiful harvest of this nutritious superfood.
DIY Vertical Kale Garden: Upcycling Plastic Bottles
Hey there, fellow gardening enthusiasts! I’m super excited to share this awesome DIY project with you: creating a vertical kale garden using recycled plastic bottles. Not only is this a fantastic way to grow your own fresh, nutritious kale, but it’s also a brilliant way to reduce plastic waste and add a touch of green to even the smallest spaces. Trust me, it’s easier than you think, and the results are incredibly rewarding!
Materials You’ll Need
Before we dive in, let’s gather all the necessary materials. Here’s what you’ll need:
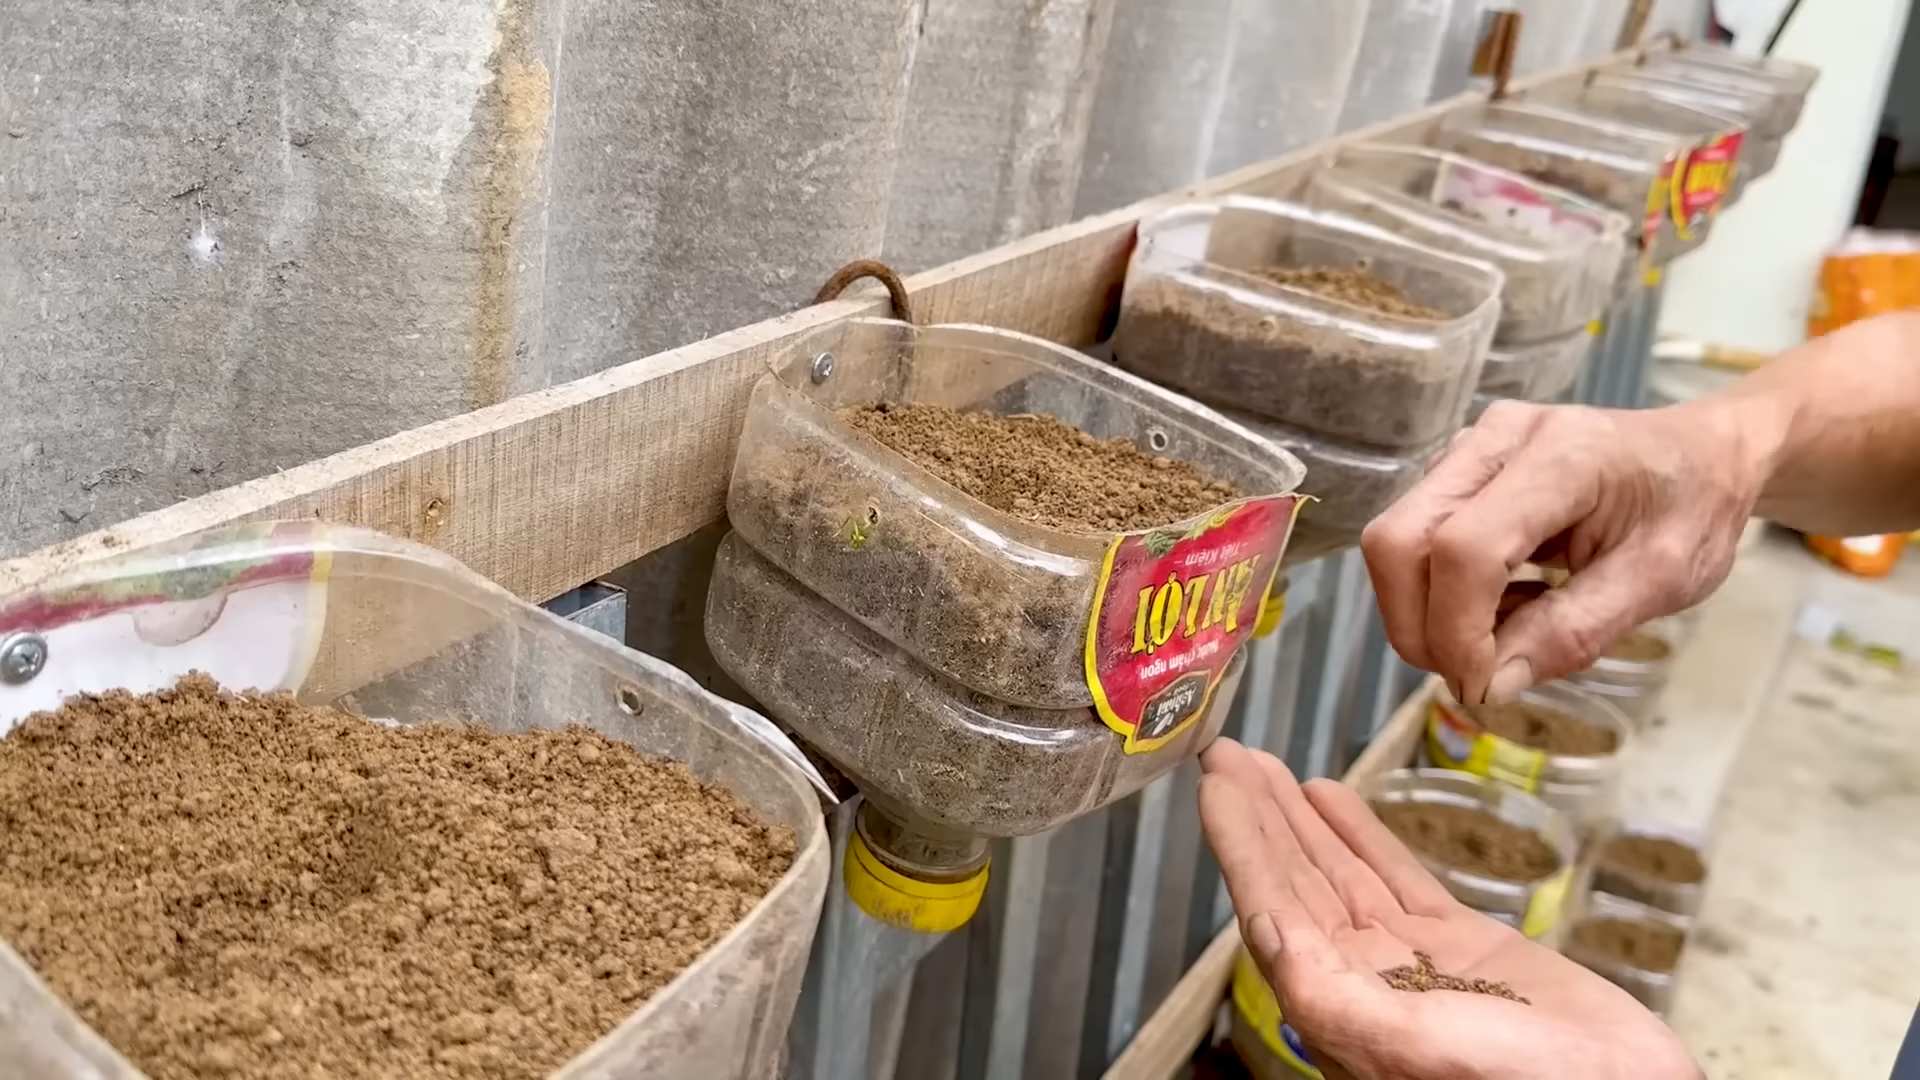
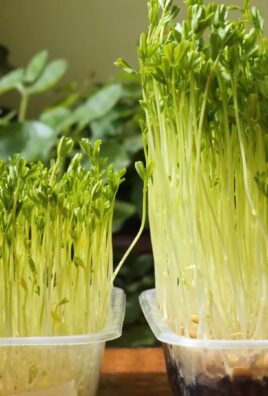
* Plastic Bottles: The star of the show! You’ll need several plastic bottles (2-liter soda bottles or similar work great). The number of bottles depends on how large you want your vertical garden to be. Make sure they’re clean and dry.
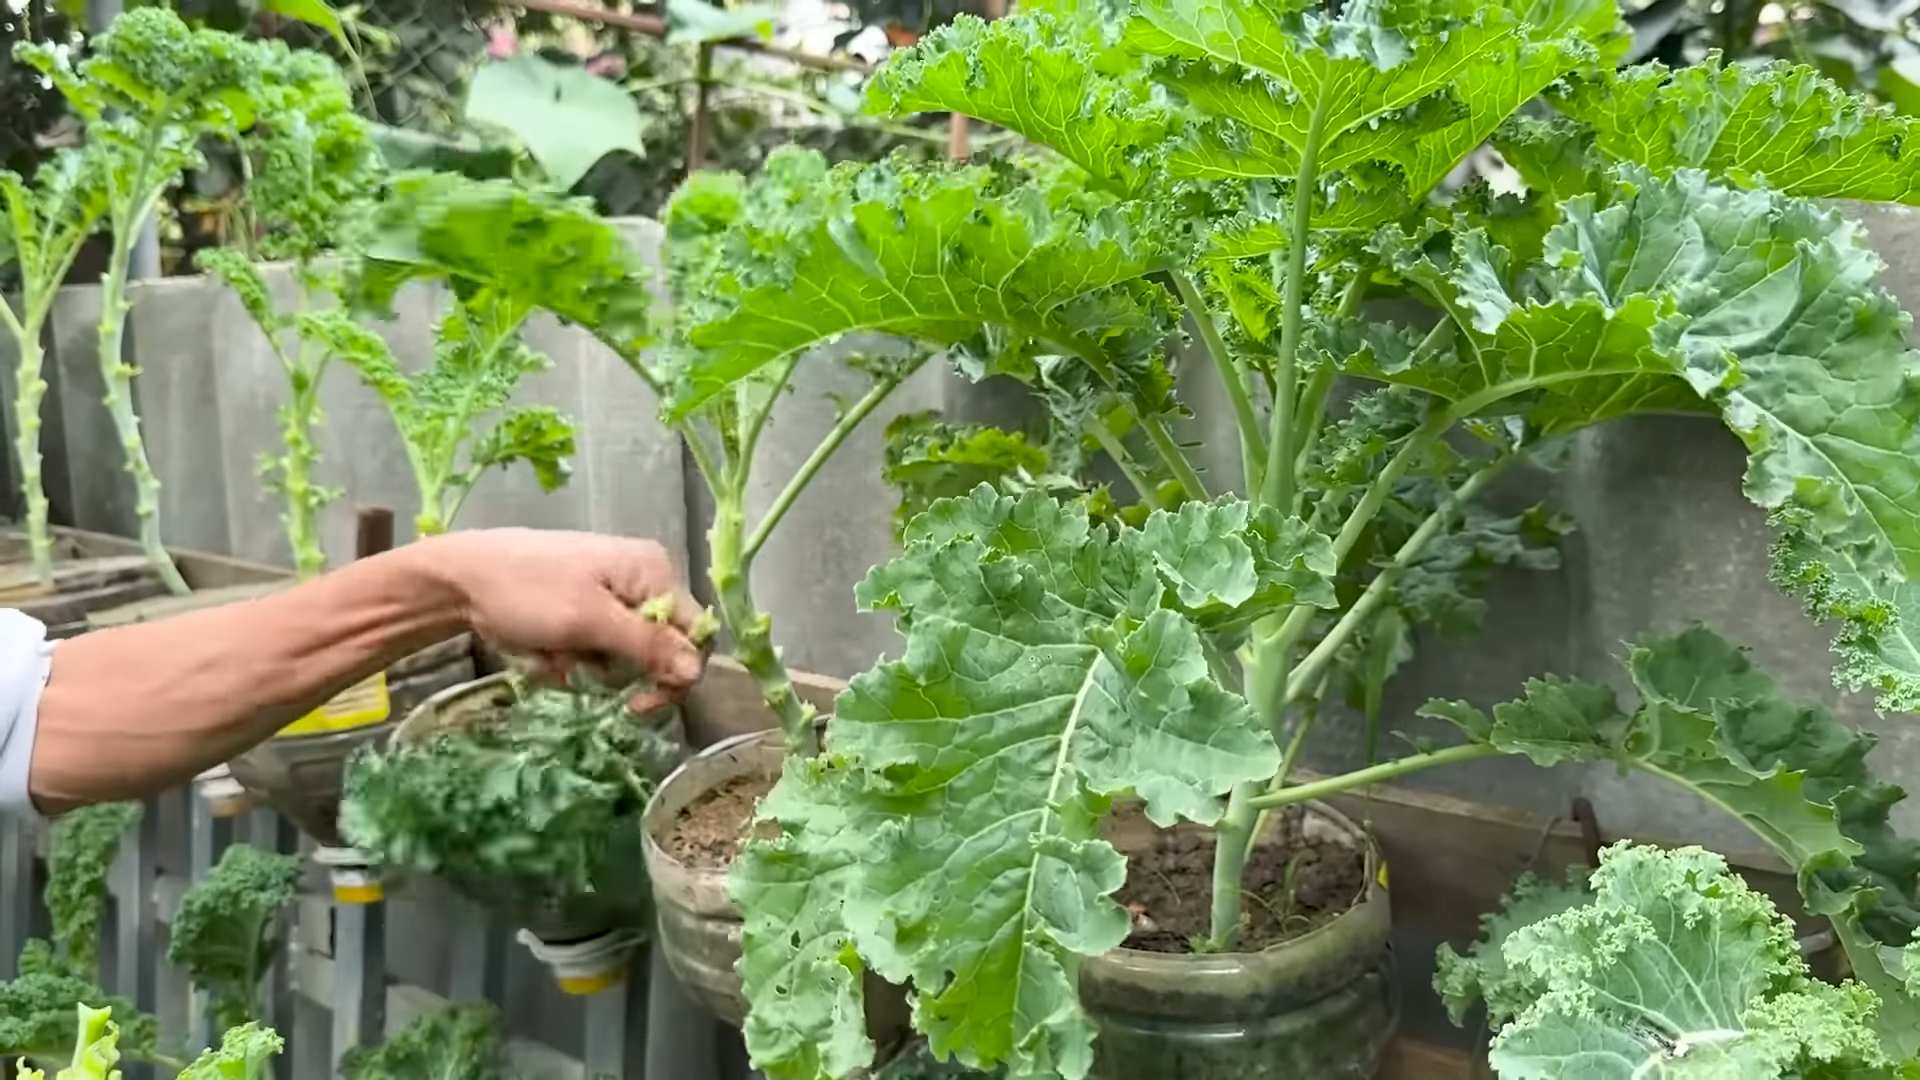
* Kale Seeds or Seedlings: Choose your favorite kale variety! I personally love curly kale and dinosaur kale. You can start from seeds or buy small seedlings from your local nursery.
* Potting Soil: Use a good quality potting mix that’s well-draining. This is crucial for healthy kale growth.
* Scissors or Utility Knife: For cutting the plastic bottles. Be careful and use appropriate safety measures!
* Drill or Nail and Hammer: To create drainage holes and hanging holes.
* Rope or Twine: To hang the bottles vertically. Choose a strong and durable material.
* Measuring Tape or Ruler: For accurate cutting and hole placement.
* Permanent Marker: To mark cutting lines and hole positions.
* Watering Can or Spray Bottle: For watering your kale plants.
* Gloves (Optional): To protect your hands while working with soil and tools.
Preparing the Plastic Bottles
This is where the magic begins! We’ll transform those ordinary plastic bottles into mini kale planters.
1. Clean and Dry the Bottles: Thoroughly wash the plastic bottles with soap and water to remove any residue. Make sure they are completely dry before proceeding. This will prevent mold and mildew growth.
2. Cut the Bottles: This step requires a bit of precision.
* Using your measuring tape and permanent marker, mark a line around the bottle, about 4-5 inches from the top (the neck of the bottle).
* Carefully cut along the marked line using your scissors or utility knife. You’ll essentially be creating two separate pieces: the top (with the bottle neck) and the bottom.
* Repeat this process for all the bottles you plan to use.
3. Create Drainage Holes: Drainage is essential to prevent waterlogging and root rot.
* Take the bottom part of each bottle (the larger section).
* Using your drill or nail and hammer, create several small drainage holes in the bottom of the bottle. Aim for about 4-5 holes, evenly spaced.
* Make sure the holes are large enough to allow water to drain freely, but not so large that soil will escape.
4. Create Hanging Holes: Now, let’s prepare the bottles for hanging.
* On the top part of each bottle (the section with the neck), create two holes on opposite sides, near the cut edge. These holes will be used to thread the rope or twine for hanging.
* Make sure the holes are large enough to accommodate your rope or twine, but not too large that they weaken the plastic.
Planting the Kale
Time to get our hands dirty and plant some kale!
1. Prepare the Soil: If your potting soil is dry, lightly moisten it with water. It should be damp but not soggy.
2. Fill the Bottoms with Soil: Take the bottom part of each bottle (the one with the drainage holes) and fill it with potting soil, leaving about an inch of space at the top.
3. Plant the Kale Seeds or Seedlings:
* From Seeds: Sprinkle a few kale seeds on top of the soil in each bottle. Gently cover the seeds with a thin layer of soil. Water lightly.
* From Seedlings: Carefully remove the kale seedlings from their containers. Gently loosen the roots and plant one seedling in each bottle. Make sure the top of the root ball is level with the soil surface. Water thoroughly.
4. Water the Plants: After planting, water the kale plants gently but thoroughly. Make sure the water drains out of the drainage holes.
Assembling the Vertical Garden
Now for the fun part: putting it all together!
1. Thread the Rope or Twine:
* Cut a length of rope or twine that’s long enough to hang your vertical garden from your desired location. Remember to account for the space between each bottle.
* Thread the rope or twine through the hanging holes in the top part of the first bottle. Tie a secure knot to create a loop for hanging.
2. Stack the Bottles:
* Carefully place the bottom part of the first bottle (the one with the kale plant) inside the top part of the bottle. The top part will act as a support for the bottom part.
* Repeat this process for all the remaining bottles, creating a vertical stack of kale plants.
3. Secure the Bottles:
* To prevent the bottles from shifting or falling, you can use additional rope or twine to tie them together.
* Thread the rope or twine through the drainage holes of the bottom bottles and tie them to the top bottles. This will create a more stable structure.
Caring for Your Vertical Kale Garden
Congratulations! You’ve created your own vertical kale garden. Now, let’s make sure your kale thrives.
1. Sunlight: Kale needs at least 6 hours of sunlight per day. Place your vertical garden in a sunny location, such as a balcony, patio, or near a window.
2. Watering: Water your kale plants regularly, especially during hot and dry weather. Check the soil moisture by sticking your finger into the soil. If the top inch feels dry, it’s time to water. Avoid overwatering, as this can lead to root rot.
3. Fertilizing: Kale is a heavy feeder, so it needs regular fertilization. Use a balanced liquid fertilizer every 2-3 weeks. Follow the instructions on the fertilizer label.
4. Pest Control: Keep an eye out for pests, such as aphids, cabbage worms, and slugs. If you spot any pests, treat them with an organic insecticide or by handpicking them off the plants.
5. Harvesting: You can start harvesting kale leaves when they are about 4-6 inches long. Simply cut off the outer leaves, leaving the inner leaves to continue growing. This will encourage continuous production.
Troubleshooting
Even with the best care, you might encounter some challenges. Here are a few common problems and how to address them:
* Yellowing Leaves: This could be a sign of overwatering, underwatering, or nutrient deficiency. Adjust your watering schedule and fertilize your plants regularly.
* Slow Growth: This could be due to insufficient sunlight, poor soil, or lack of nutrients. Move your vertical garden to a sunnier location, amend the soil with compost, and fertilize your plants.
* Pest Infestation: Treat pests with an organic insecticide or by handpicking them off the plants. You can also try companion planting with herbs like rosemary or thyme, which can help repel pests.
Enjoy Your Fresh Kale!
And there you have it! A thriving vertical kale garden made from recycled plastic bottles. I hope you found this tutorial helpful and inspiring. Now you can enjoy fresh, homegrown kale in your salads, smoothies, soups, and more! Happy gardening!
Conclusion
So, there you have it! Growing kale in plastic bottles isn’t just a quirky gardening experiment; it’s a genuinely effective and sustainable way to cultivate fresh, nutritious greens, even with limited space or resources. We’ve walked you through the simple steps, highlighting the benefits of this innovative method. From reducing plastic waste to enjoying a constant supply of homegrown kale, the advantages are undeniable.
This DIY trick is a must-try for several compelling reasons. First and foremost, it’s incredibly accessible. You likely already have the primary ingredient – plastic bottles – readily available. No need for expensive equipment or specialized gardening tools. Second, it’s a fantastic space-saver. Vertical gardening with plastic bottles allows you to maximize your yield in even the smallest of balconies, patios, or even windowsills. Third, it’s an environmentally conscious choice. Repurposing plastic bottles reduces landfill waste and promotes a more sustainable lifestyle. Finally, and perhaps most importantly, it’s rewarding! There’s nothing quite like the satisfaction of harvesting your own fresh kale, knowing you nurtured it from seed to table.
But don’t stop at just one bottle! Experiment with different varieties of kale. Try growing curly kale, Lacinato kale (also known as dinosaur kale), or even Red Russian kale. Each variety offers a unique flavor and texture, adding variety to your salads, smoothies, and cooked dishes. You can also explore different growing mediums. While we recommended a standard potting mix, you could also try incorporating compost or even experimenting with hydroponics for a soilless approach. Consider adding companion plants like marigolds or basil near your kale bottles to deter pests naturally.
Beyond kale, this plastic bottle gardening technique can be adapted for other leafy greens like spinach, lettuce, or even herbs like parsley and cilantro. The possibilities are truly endless! The key is to ensure proper drainage, adequate sunlight, and consistent watering.
We wholeheartedly encourage you to give this DIY trick a try. It’s a fun, educational, and ultimately rewarding experience. Not only will you be contributing to a more sustainable environment, but you’ll also be enjoying the delicious and nutritious benefits of homegrown kale.
Don’t be afraid to get creative and personalize your plastic bottle garden. Paint the bottles, add decorative elements, or even create a vertical garden wall. The only limit is your imagination!
Once you’ve successfully grown your own kale in plastic bottles, we’d love to hear about your experience! Share your photos, tips, and tricks with us in the comments section below. Let’s build a community of sustainable gardeners and inspire others to embrace this innovative approach to growing their own food. Let us know what challenges you faced and how you overcame them. Did you find a particular type of kale thrived better than others in the bottle environment? Did you experiment with different watering techniques? Your insights will be invaluable to other aspiring gardeners.
Remember, gardening is a journey, not a destination. There will be successes and setbacks along the way. But with a little patience, persistence, and a willingness to learn, you can create a thriving plastic bottle garden that provides you with fresh, healthy kale for months to come. So, grab those plastic bottles, gather your seeds, and get ready to embark on a rewarding gardening adventure! We are confident that you will find this method of growing kale to be both efficient and enjoyable. Happy gardening!
Frequently Asked Questions (FAQ)
What kind of plastic bottles are best for growing kale?
The ideal plastic bottles are those that are sturdy and opaque or semi-opaque. Avoid using thin, flimsy bottles that might collapse easily. Two-liter soda bottles or larger water bottles work well. Opaque bottles are preferable because they help prevent algae growth inside the bottle, which can compete with the kale for nutrients. However, if you only have clear bottles, you can wrap them in dark-colored tape or paint them to block out some of the light. Make sure the bottles are clean and free of any residue before using them. Thoroughly rinse them with soap and water.
How much sunlight does kale grown in plastic bottles need?
Kale thrives in full sun, which means it needs at least 6 hours of direct sunlight per day. If you’re growing your kale indoors, you’ll need to supplement with grow lights. Place the plastic bottle gardens in a location that receives ample sunlight, such as a south-facing window or a sunny balcony. If you notice the kale leaves are pale or leggy, it’s a sign that they’re not getting enough sunlight. Rotate the bottles regularly to ensure all sides of the plant receive equal exposure.
What kind of soil should I use for growing kale in plastic bottles?
A well-draining potting mix is essential for growing kale in plastic bottles. Avoid using garden soil, as it can be too heavy and compact, leading to poor drainage and root rot. A good potting mix will contain a blend of peat moss, perlite, and vermiculite. You can also add compost to the mix to provide extra nutrients. Make sure the potting mix is slightly acidic, with a pH between 6.0 and 7.0. You can test the pH of your soil using a soil testing kit.
How often should I water my kale plants in plastic bottles?
Water your kale plants regularly, keeping the soil consistently moist but not waterlogged. The frequency of watering will depend on the weather conditions and the size of the plastic bottle. In hot, dry weather, you may need to water daily. In cooler, wetter weather, you may only need to water every few days. Check the soil moisture by sticking your finger into the soil. If the top inch of soil feels dry, it’s time to water. When watering, water slowly and deeply, allowing the water to drain out of the drainage holes.
How do I fertilize kale grown in plastic bottles?
Kale is a heavy feeder, so it’s important to fertilize it regularly. You can use a balanced liquid fertilizer, such as a 10-10-10 or 20-20-20, diluted to half strength. Fertilize every two to three weeks, following the instructions on the fertilizer label. You can also add compost tea to the soil to provide extra nutrients. Avoid over-fertilizing, as this can burn the roots of the plant.
How do I deal with pests and diseases on kale grown in plastic bottles?
Kale can be susceptible to pests such as aphids, cabbage worms, and flea beetles. To prevent pest infestations, inspect your plants regularly and remove any pests you find. You can also use insecticidal soap or neem oil to control pests. To prevent diseases, ensure good air circulation around the plants and avoid overwatering. If you notice any signs of disease, such as yellowing leaves or spots, remove the affected leaves immediately.
How long does it take for kale to grow in plastic bottles?
Kale typically takes about 50 to 60 days to mature from seed. However, you can start harvesting leaves as soon as they are large enough to eat. The more you harvest, the more the plant will produce. To harvest kale, simply cut off the outer leaves, leaving the inner leaves to continue growing.
Can I grow kale in plastic bottles indoors?
Yes, you can grow kale in plastic bottles indoors, but you’ll need to provide adequate light. Place the bottles near a sunny window or use grow lights to supplement the natural light. Make sure the plants receive at least 6 hours of light per day. You’ll also need to ensure good air circulation to prevent diseases.
What are some variations I can try with this method?
Consider creating a tiered system by stacking the plastic bottles vertically. This maximizes space and creates an attractive display. You can also experiment with different types of growing mediums, such as coco coir or perlite. Another variation is to add a self-watering system by using a wick to draw water from a reservoir at the bottom of the bottle.
Is growing kale in plastic bottles safe? Are there any concerns about chemicals leaching from the plastic?
This is a valid concern. While most food-grade plastic bottles are considered safe, there’s always a potential for some leaching, especially when exposed to sunlight and heat. To minimize this risk, use BPA-free plastic bottles whenever possible. Avoid using bottles that have been exposed to harsh chemicals or cleaning agents. You can also line the inside of the bottles with a food-grade plastic liner to create a barrier between the soil and the plastic. Ultimately, the decision to grow kale in plastic bottles is a personal one. Weigh the benefits of this method against the potential risks and make an informed choice.
Leave a Comment