

Planting Potatoes in Bags: Unlock the secrets to a bountiful harvest, even without a sprawling garden! Have you ever dreamed of enjoying freshly dug, homegrown potatoes but thought you lacked the space? Well, dream no more! This DIY guide will walk you through the surprisingly simple and incredibly rewarding process of growing potatoes in bags.
The practice of container gardening, including growing potatoes in bags, has roots that stretch back centuries. From the hanging gardens of Babylon to the resourceful urban gardeners of today, people have always found innovative ways to cultivate food in limited spaces. Potatoes themselves, originating in the Andes Mountains, have become a global staple, and now, you can easily bring that global flavor to your own balcony or patio.
Why should you try planting potatoes in bags? Because it’s a game-changer! It’s perfect for apartment dwellers, those with small yards, or anyone looking for a fun and easy gardening project. Plus, it offers better control over soil conditions and minimizes pests and diseases. Imagine the satisfaction of harvesting your own delicious potatoes, knowing you nurtured them from tiny seed potatoes to a plate full of goodness. I’m excited to share my favorite tips and tricks to make your bag-grown potato adventure a resounding success!
Planting Potatoes in Bags: A Bumper Crop on Your Patio!
Hey there, fellow garden enthusiasts! I’m so excited to share one of my favorite gardening hacks with you: growing potatoes in bags! It’s a fantastic way to get a great potato harvest, even if you don’t have a lot of space. Plus, it’s super satisfying to watch those spuds grow and then easily harvest them. Let’s dive in!
Why Grow Potatoes in Bags?
Before we get started, let’s talk about why this method is so awesome:
* Space-Saving: Perfect for balconies, patios, or small gardens. You don’t need a huge plot of land.
* Easy Harvesting: No more digging around in the dirt! Just tip the bag over and collect your potatoes.
* Control Over Soil: You can create the perfect growing environment with the right soil mix.
* Fewer Weeds: Bags help minimize weed growth, saving you time and effort.
* Fun and Educational: A great project for kids and adults alike!
What You’ll Need
Okay, let’s gather our supplies. Here’s what you’ll need to grow your own potato bounty:
* Large Bags: I recommend using sturdy, woven polypropylene bags (like the kind you get animal feed in), burlap sacks, or even heavy-duty trash bags. Aim for bags that are at least 24 inches in diameter and 24 inches tall. The bigger, the better!
* Seed Potatoes: These are potatoes specifically grown for planting. You can find them at your local garden center or online. Choose a variety you love to eat!
* Potting Mix: A well-draining mix is crucial. I like to use a blend of equal parts compost, peat moss (or coco coir), and perlite.
* Water: Essential for keeping your potatoes hydrated.
* Fertilizer (Optional): A balanced, slow-release fertilizer can give your potatoes an extra boost. I often use a fertilizer with an NPK ratio of 10-10-10.
* Scissors or a Knife: For cutting drainage holes in the bags.
* Trowel or Shovel: For scooping soil.
Preparing Your Seed Potatoes
This step is important for getting a head start on your potato growth.
1. Chitting (Sprouting): A few weeks before planting, place your seed potatoes in a cool, bright location (but not direct sunlight). This encourages them to sprout “eyes.” You can use an egg carton or a tray to hold them.
2. Cutting (Optional): If your seed potatoes are large (bigger than an egg), you can cut them into smaller pieces. Make sure each piece has at least one or two “eyes.” Let the cut pieces dry for a day or two to callous over before planting. This helps prevent rot.
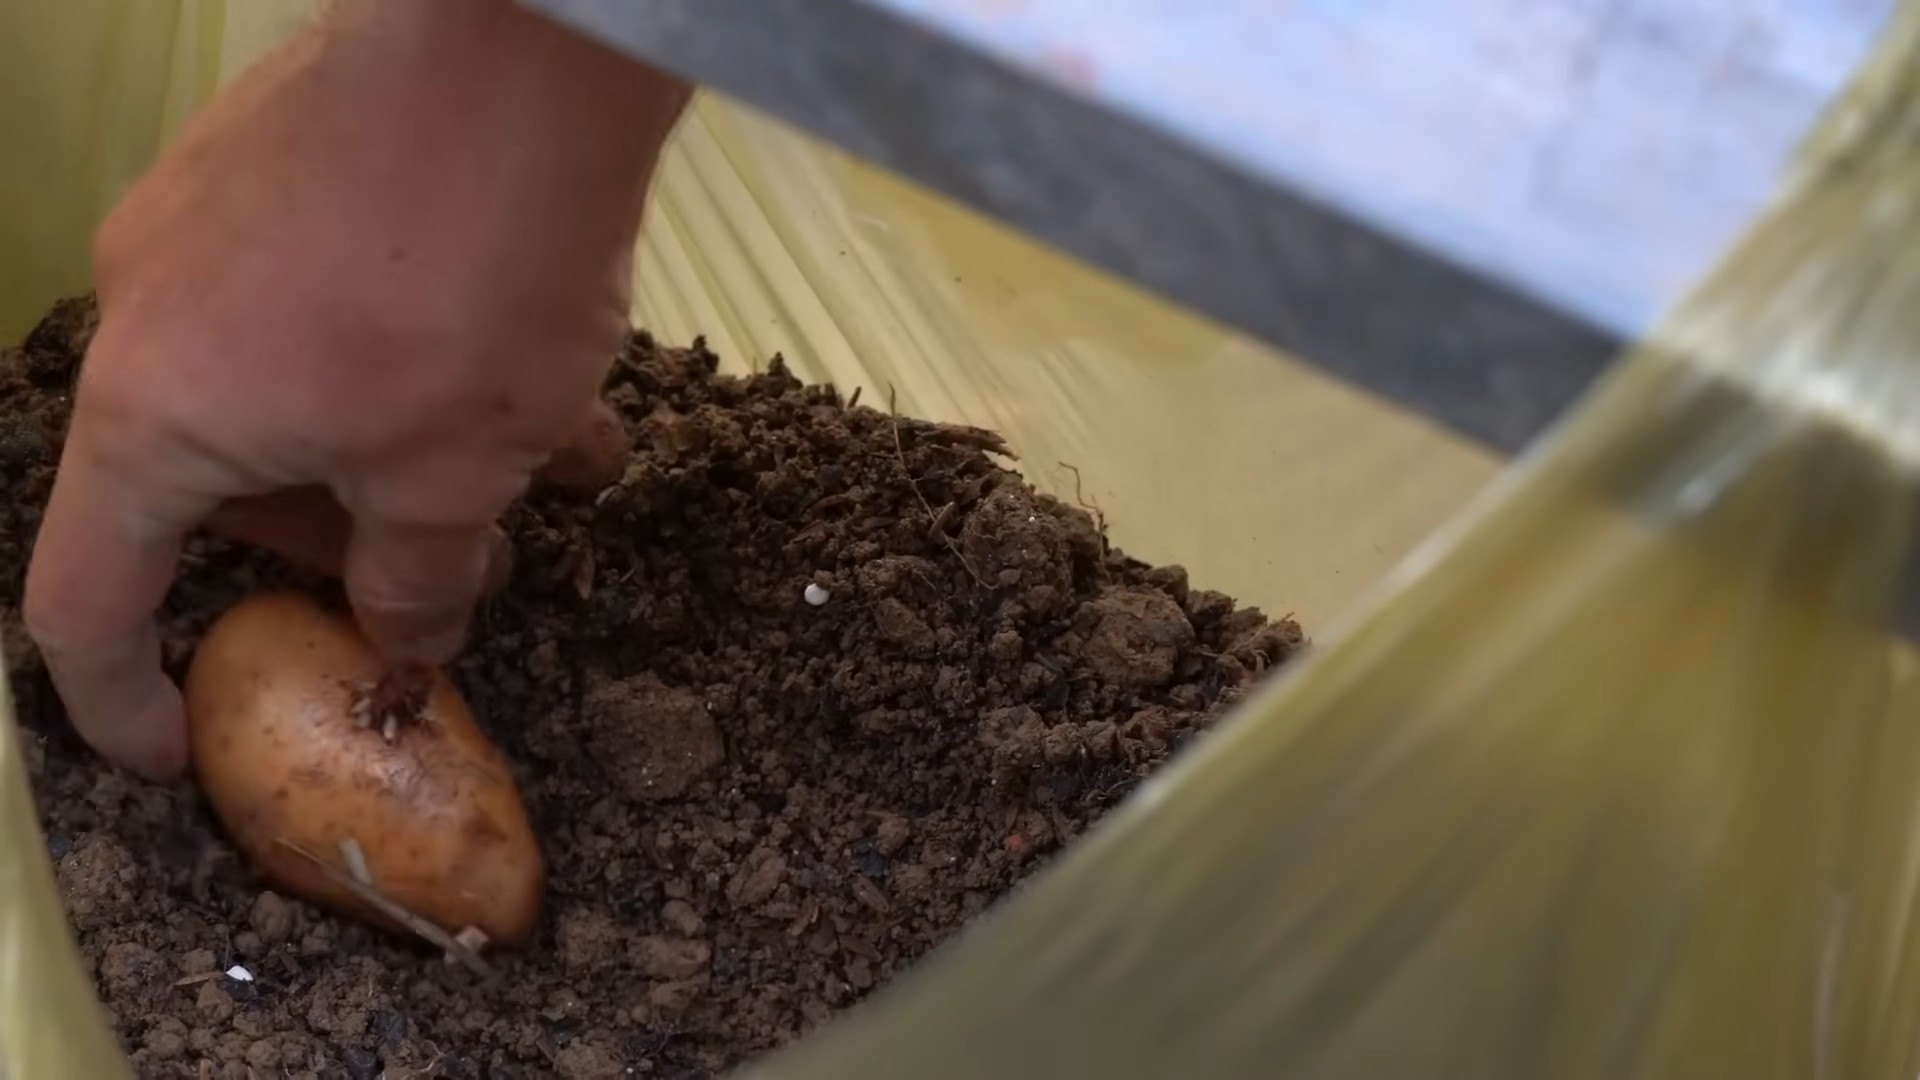
Planting Your Potatoes
Now for the fun part! Let’s get those potatoes in the ground (or, in this case, in the bag!).
1. Prepare the Bag: If you’re using a plastic bag, cut several drainage holes in the bottom. This is crucial to prevent waterlogging.
2. Add Soil: Pour about 4-6 inches of your potting mix into the bottom of the bag.
3. Plant the Seed Potatoes: Place 2-3 seed potato pieces (or whole small seed potatoes) on top of the soil, with the “eyes” facing upwards. Space them evenly apart.
4. Cover with Soil: Cover the seed potatoes with another 4-6 inches of potting mix.
5. Water Thoroughly: Water the soil until it’s moist but not soggy.
The “Hilling” Process: Encouraging More Potatoes
This is the key to getting a big harvest! As your potato plants grow, you’ll need to add more soil to encourage them to produce more potatoes along the stem.
1. Wait for Growth: Once the potato plants have grown about 6-8 inches tall, it’s time to “hill” them.
2. Add More Soil: Add another 4-6 inches of potting mix to the bag, burying the lower part of the stems. Leave the top few inches of leaves exposed.
3. Repeat: Continue this process every 2-3 weeks as the plants grow taller. Each time, add more soil until you reach the top of the bag.
4. Water Regularly: Keep the soil consistently moist, but not waterlogged.
Caring for Your Potato Plants
Here are a few tips to keep your potato plants happy and healthy:
* Sunlight: Potatoes need at least 6-8 hours of sunlight per day. Place your bags in a sunny spot.
* Watering: Water regularly, especially during hot, dry weather. Check the soil moisture by sticking your finger into the soil. If it feels dry an inch or two down, it’s time to water.
* Fertilizing: If you’re using fertilizer, follow the instructions on the package. I usually fertilize every 4-6 weeks.
* Pest Control: Keep an eye out for pests like potato beetles and aphids. You can hand-pick them off the plants or use an organic insecticide if necessary.
* Disease Prevention: Good air circulation can help prevent fungal diseases. Avoid overcrowding the plants and water in the morning so the leaves have time to dry before nightfall.
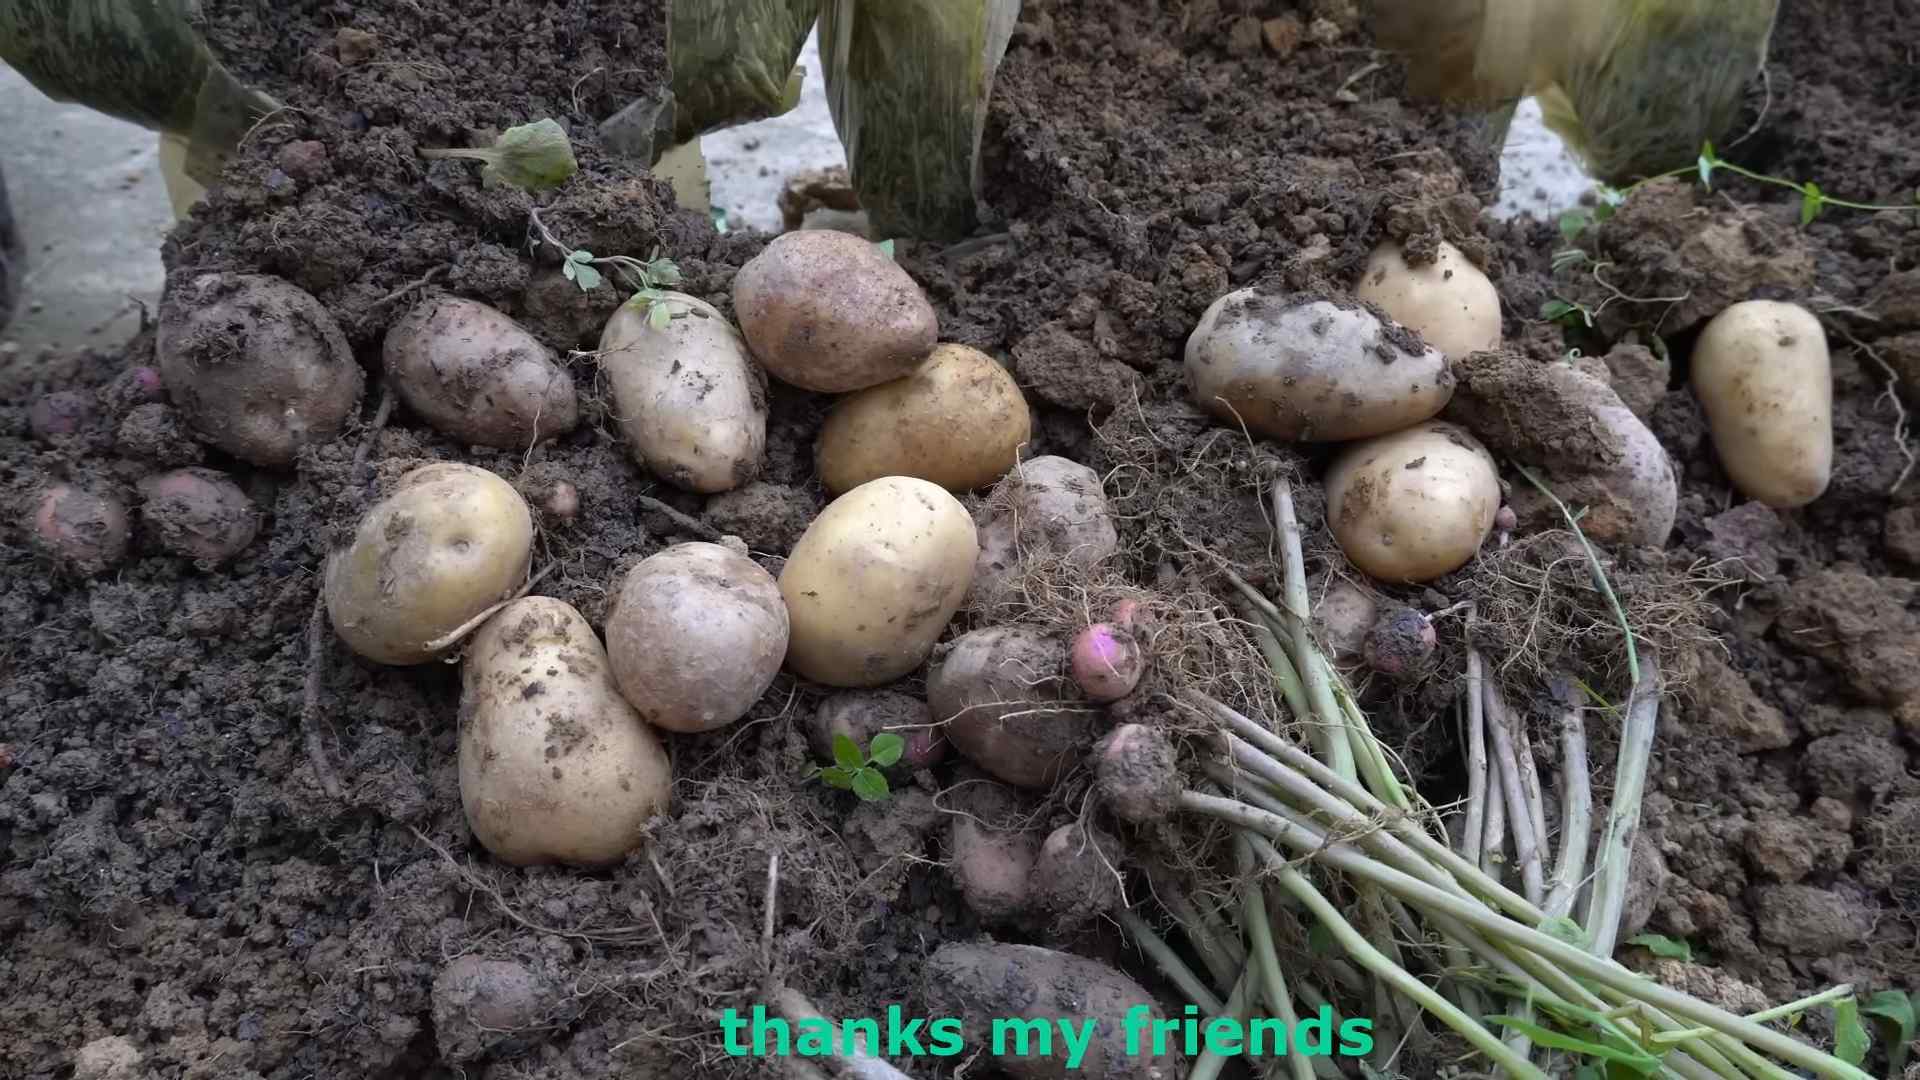
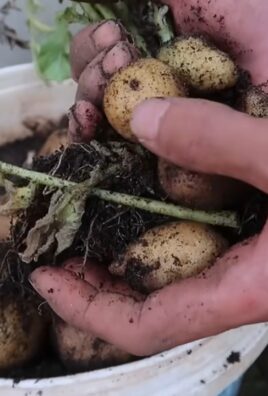
Harvesting Your Potatoes
The moment we’ve all been waiting for! Harvesting your potatoes is so rewarding.
1. When to Harvest: Potatoes are usually ready to harvest about 80-100 days after planting, depending on the variety. You’ll know they’re ready when the plants start to flower and the foliage begins to die back.
2. Stop Watering: About two weeks before harvesting, stop watering the plants. This will help the potatoes develop thicker skins.
3. Harvesting Time: The easiest way to harvest is to simply tip the bag over and sift through the soil to collect your potatoes. You can also reach into the bag and carefully pull out the potatoes.
4. Curing: After harvesting, let the potatoes dry in a cool, dark place for a few days to cure. This will help them store longer.
5. Storage: Store your potatoes in a cool, dark, and well-ventilated place. A root cellar is ideal, but a cool basement or garage will also work.
Troubleshooting
Sometimes things don’t go exactly as planned. Here are a few common problems and how to fix them:
* Yellowing Leaves: This could be a sign of overwatering, underwatering, or nutrient deficiency. Check the soil moisture and fertilize if necessary.
* Potato Beetles: These pesky bugs can quickly defoliate your plants. Hand-pick them off or use an organic insecticide.
* Potato Blight: This fungal disease can cause brown spots on the leaves and tubers. Prevent it by ensuring good air circulation and avoiding overhead watering. If you see signs of blight, remove the affected leaves immediately.
* Small Potatoes: This could be due to insufficient sunlight, water, or nutrients. Make sure your plants are getting enough of all three.
Choosing the Right Potato Variety
Selecting the right potato variety is key to a successful harvest. Here are a few popular choices:
* Yukon Gold: A classic all-purpose potato with a buttery flavor.
* Red Pontiac: A red-skinned potato that’s great for boiling and salads.
* Russet Burbank: The classic baking potato.
* Fingerling Potatoes: These small, elongated potatoes are delicious roasted or steamed.
* Purple Potatoes: Add a pop of color to your plate with these unique potatoes.
Tips for Success
Here are a few extra tips to help you grow the best potatoes ever:
* Use High-Quality Potting Mix: Don’t skimp on the soil! A good potting mix is essential for healthy potato growth.
* Don’t Overwater: Potatoes don’t like soggy soil. Water only when the soil feels dry to the touch.
* Rotate Your Crops: If you’re growing potatoes in the same bags year after year, be sure to rotate your crops to prevent soilborne diseases.
* Have Fun! Gardening should be enjoyable. Don’t be afraid to experiment and try new things.
I hope this guide has inspired you to try growing potatoes in bags. It’s a fun, easy, and rewarding way to get a delicious harvest, even if you have limited space. Happy gardening!
Conclusion
So, there you have it! Planting potatoes in bags isn’t just a gardening trend; it’s a genuinely effective and rewarding way to grow your own delicious spuds, even if you’re short on space or lack a traditional garden plot. The ease of management, the control over soil conditions, and the sheer joy of harvesting a bounty of potatoes from a single bag make this DIY trick a must-try for any aspiring gardener, regardless of experience level.
Think about it: no more back-breaking digging through endless rows of soil, hoping to unearth a few hidden treasures. With bag gardening, the harvest comes to you! You can carefully monitor the potato growth, adding more soil as needed to encourage maximum tuber production. Plus, the portability of the bags means you can chase the sun or protect your precious plants from unexpected frost with ease.
But the benefits don’t stop there. Planting potatoes in bags offers incredible flexibility. Want to experiment with different potato varieties? Go for it! From the creamy Yukon Golds to the vibrant Purple Vikings, the choice is yours. You can even tailor the soil mix to suit the specific needs of your chosen variety, ensuring optimal growth and flavor.
Consider these variations to elevate your bag gardening experience:
* Vertical Gardening Powerhouse: Use larger, sturdier bags and create a multi-tiered potato tower. This maximizes space and adds a visually stunning element to your garden.
* Companion Planting: Plant herbs like basil or thyme around the base of your potato plants. These herbs can help deter pests and improve the overall health of your potato crop.
* Organic Boost: Incorporate compost tea or worm castings into your watering routine for an extra dose of nutrients. This will result in healthier plants and more flavorful potatoes.
* Container Material Experimentation: While grow bags are ideal, you can also use repurposed materials like old feed sacks or even large, sturdy trash bags (with drainage holes, of course!).
Ultimately, the success of your potato bag garden hinges on your willingness to experiment and adapt. Don’t be afraid to try new things, observe your plants closely, and adjust your approach as needed. The learning process is part of the fun!
We are confident that once you experience the satisfaction of harvesting your own homegrown potatoes from a bag, you’ll be hooked. It’s a simple, effective, and incredibly rewarding gardening technique that anyone can master.
So, grab a bag, some seed potatoes, and get ready to embark on a potato-growing adventure! We encourage you to try this DIY trick and share your experiences with us. Post photos of your potato harvests, share your tips and tricks, and let us know what worked best for you. Together, we can create a community of thriving bag gardeners! Let’s get growing and discover the joy of fresh, homegrown potatoes, one bag at a time. Happy planting potatoes in bags!
Frequently Asked Questions (FAQ)
What kind of bag should I use for planting potatoes?
The ideal bag for planting potatoes is a grow bag made from breathable fabric. These bags allow for proper drainage and aeration, which are crucial for healthy potato growth. Look for bags that are at least 10 gallons in size, but larger bags (15-20 gallons) are even better, as they provide more room for the potatoes to develop. You can also use repurposed materials like old feed sacks or sturdy trash bags, but be sure to add plenty of drainage holes.
What kind of soil should I use?
Potatoes thrive in well-draining, slightly acidic soil. A good mix would be equal parts of compost, potting soil, and perlite or vermiculite. The compost provides nutrients, the potting soil provides structure, and the perlite or vermiculite improves drainage and aeration. Avoid using heavy clay soil, as it can become waterlogged and inhibit potato growth.
How many seed potatoes should I plant in each bag?
Generally, you should plant 2-3 seed potatoes in a 10-15 gallon bag. If you’re using a larger bag (20 gallons or more), you can plant up to 4 seed potatoes. Space the seed potatoes evenly around the bag, about 4-6 inches apart.
How deep should I plant the seed potatoes?
Start by placing a few inches of soil in the bottom of the bag. Then, place the seed potatoes on top of the soil, with the “eyes” (small buds) facing upwards. Cover the seed potatoes with another 4-6 inches of soil. As the potato plants grow, continue to add more soil to the bag, burying the stems as they emerge. This encourages the plants to produce more potatoes along the buried stems.
How often should I water my potato plants?
Water your potato plants regularly, especially during hot, dry weather. The soil should be consistently moist, but not waterlogged. Check the soil moisture by sticking your finger into the soil. If the top inch or two feels dry, it’s time to water. Avoid overwatering, as this can lead to root rot.
How much sunlight do potato plants need?
Potato plants need at least 6-8 hours of sunlight per day. Choose a location for your potato bags that receives plenty of direct sunlight. If you live in a particularly hot climate, you may need to provide some afternoon shade to prevent the plants from overheating.
When should I harvest my potatoes?
You can start harvesting “new potatoes” (small, immature potatoes) about 2-3 weeks after the plants flower. To harvest new potatoes, carefully reach into the bag and remove a few potatoes from the top layer of soil. For mature potatoes, wait until the foliage starts to die back and turn yellow or brown. This usually happens about 80-100 days after planting. To harvest mature potatoes, simply dump the contents of the bag onto a tarp or into a wheelbarrow and collect the potatoes.
What are some common pests and diseases that affect potato plants?
Some common pests that affect potato plants include aphids, potato beetles, and flea beetles. Common diseases include early blight, late blight, and potato scab. To prevent pests and diseases, choose disease-resistant potato varieties, practice good sanitation (remove any dead or diseased foliage), and use organic pest control methods if necessary.
Can I reuse the soil from my potato bags?
Yes, you can reuse the soil from your potato bags, but it’s important to amend it with fresh compost and other organic matter to replenish the nutrients that were used by the potato plants. You may also want to sterilize the soil to kill any potential pests or diseases. You can do this by baking the soil in the oven at 200 degrees Fahrenheit for 30 minutes or by solarizing it in a black plastic bag for several weeks.
What if I don’t have seed potatoes? Can I use potatoes from the grocery store?
While you *can* try using potatoes from the grocery store, it’s generally not recommended. Grocery store potatoes are often treated with chemicals to prevent sprouting, which can inhibit their growth. They may also carry diseases that could affect your potato crop. It’s best to use certified seed potatoes, which are specifically grown for planting and are guaranteed to be disease-free. You can purchase seed potatoes from garden centers, nurseries, or online retailers.

Leave a Comment