

Growing Garlic in Water? Yes, you read that right! Forget the sprawling garden beds and back-breaking digging. I’m about to let you in on a little secret that will revolutionize your kitchen and bring the fresh, pungent flavor of garlic right to your windowsill. For centuries, garlic has been revered not only for its culinary prowess but also for its medicinal properties, tracing back to ancient Egypt where it was even used as currency! But who knew this humble bulb could thrive in just a glass of water?
In today’s fast-paced world, who has the time (or space!) for a traditional garden? That’s where this DIY trick comes in. Imagine having a constant supply of fresh garlic greens to snip and sprinkle on your salads, soups, and stir-fries. It’s not just convenient; it’s incredibly rewarding to watch something so flavorful grow right before your eyes. Plus, growing garlic in water is a fantastic way to recycle those leftover cloves that might otherwise sprout in your pantry. So, ditch the dirt and get ready to unlock the surprisingly simple secrets to cultivating your own indoor garlic garden. I promise, you’ll be amazed at how easy and satisfying it is!
Growing Garlic in Water: A Fun and Easy DIY Project
Hey there, fellow plant enthusiasts! Ever thought about growing garlic without soil? It’s easier than you think, and it’s a fantastic way to get fresh garlic greens for your cooking while also enjoying a little botanical experiment. I’m going to walk you through the whole process, step-by-step, so you can have your own little garlic garden thriving in water.
What You’ll Need
Before we dive in, let’s gather our supplies. This is a pretty low-key project, so you probably have most of this stuff already!
* Garlic Cloves: Choose organic garlic if possible. You want firm, healthy cloves with no signs of mold or sprouting. I usually pick the biggest ones from the bulb – they seem to have the most energy to get started.
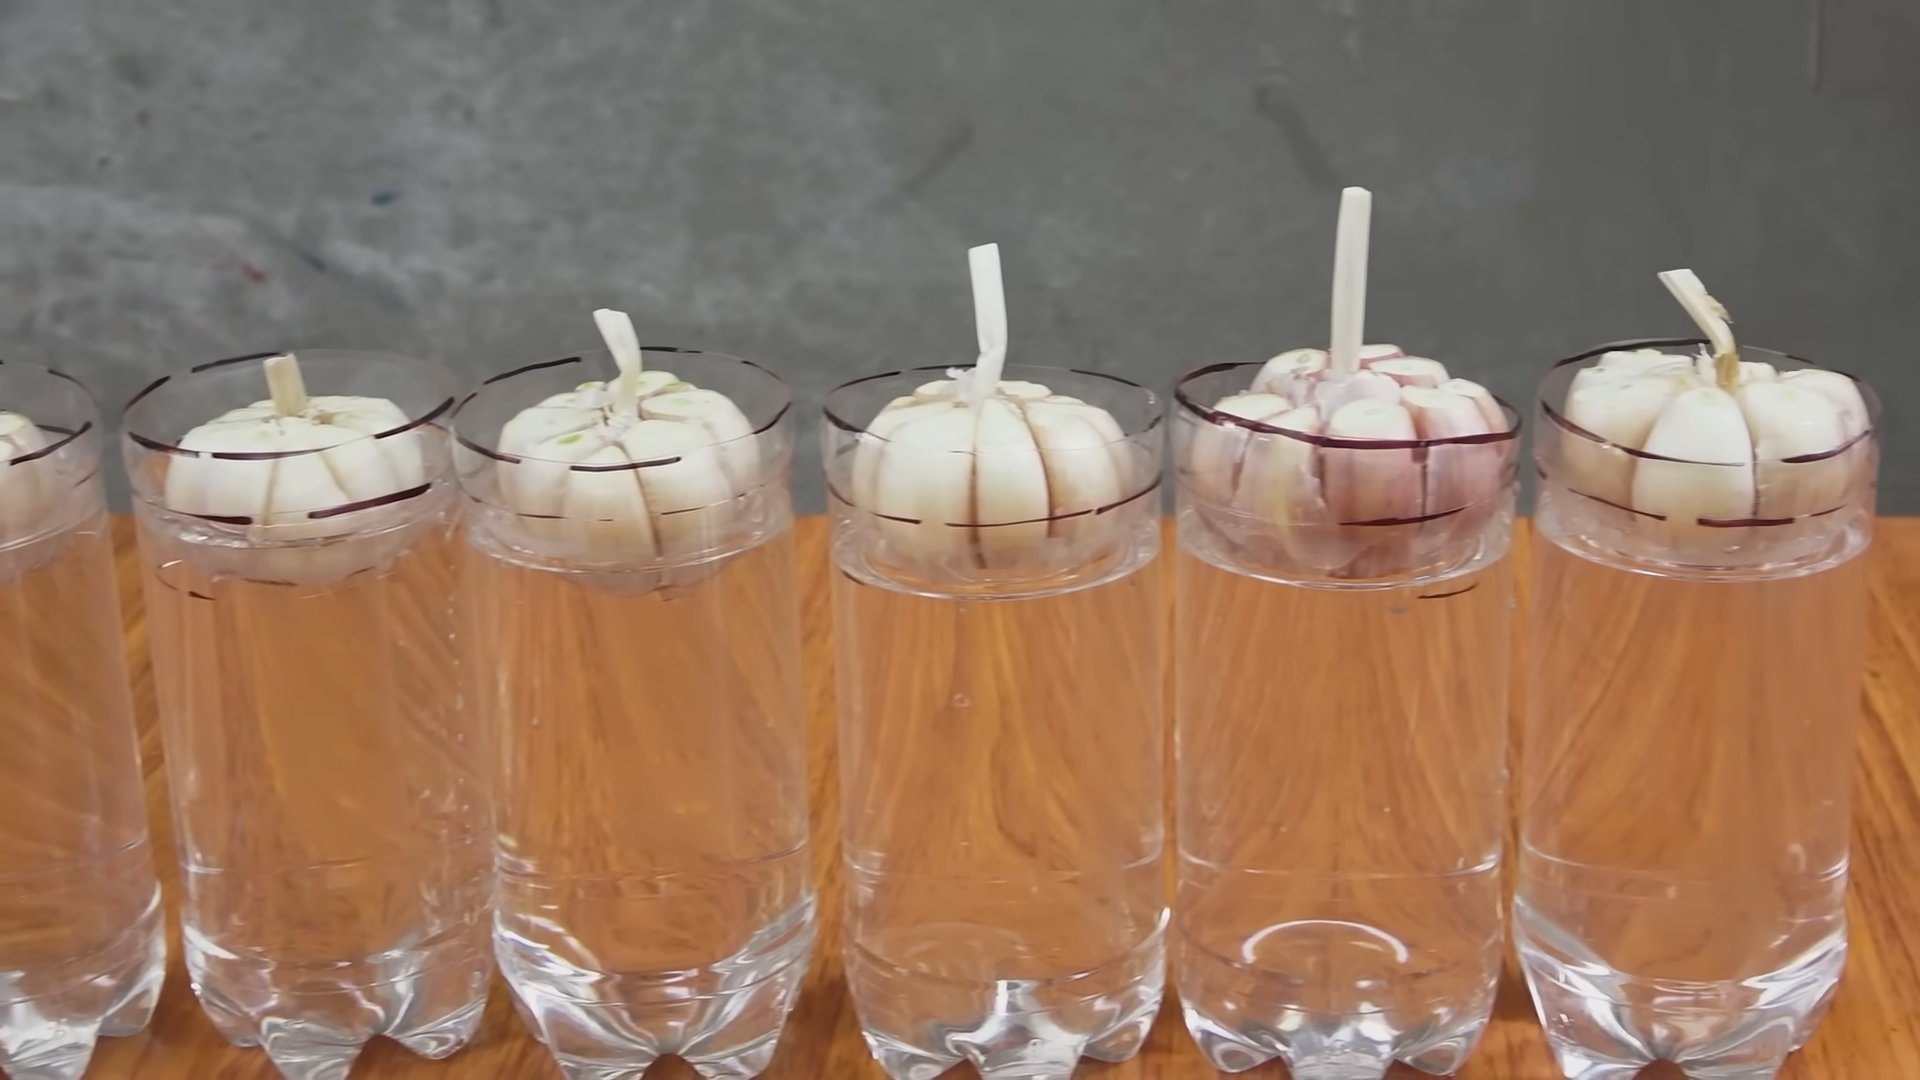
* A Glass or Jar: Any glass or jar will do, as long as it’s wide enough to hold the garlic clove(s) and deep enough to keep the bottom submerged in water. I like using mason jars, but old jam jars work great too!
* Water: Tap water is fine, but if your tap water is heavily chlorinated, let it sit out for 24 hours before using it. Filtered water is even better.
* Toothpicks (Optional): These are helpful for suspending the garlic clove if your jar opening is too wide.
* A Sunny Spot: Garlic needs sunlight to grow, so find a bright windowsill or a spot under a grow light.
Choosing Your Garlic Cloves
This is a crucial first step! The quality of your cloves directly impacts your success.
* Look for Firmness: Gently squeeze the cloves. They should feel firm and plump, not soft or mushy.
* Check for Mold: Avoid cloves with any signs of mold, discoloration, or damage.
* Consider Sprouting: If you see a tiny green sprout emerging from the top of the clove, that’s a good sign! It means the clove is ready to grow. However, unsprouted cloves will also work just fine.
* Organic is Best: Organic garlic is less likely to have been treated with chemicals that could inhibit growth.
Step-by-Step Instructions: Growing Garlic in Water
Alright, let’s get our hands dirty (well, not really, since we’re using water!). Here’s the breakdown:
1. Prepare Your Garlic Cloves: Gently separate the cloves from the garlic bulb. Be careful not to damage the root end (the flat end where the roots will emerge). You don’t need to peel the cloves. The papery skin actually helps protect them.
2. Prepare Your Jar: Clean your glass or jar thoroughly with soap and water. Rinse it well to remove any soap residue.
3. Add Water: Fill the jar with enough water to cover the bottom of the garlic clove, about ¼ to ½ inch. You only want the root end submerged.
4. Position the Garlic: Place the garlic clove in the jar with the root end facing down. If the opening of your jar is too wide and the clove keeps falling in, use toothpicks to suspend it. Insert three or four toothpicks around the middle of the clove, evenly spaced, and rest them on the rim of the jar. This will keep the root end submerged while the rest of the clove stays dry.
5. Find a Sunny Spot: Place the jar in a bright, sunny location. A windowsill that gets at least 6 hours of sunlight per day is ideal. If you don’t have a sunny windowsill, you can use a grow light.
6. Change the Water Regularly: This is super important! Change the water every 1-2 days to prevent bacteria and mold from growing. This will also provide fresh oxygen to the roots. I usually just dump out the old water and refill the jar with fresh water.
7. Observe and Wait: Within a few days, you should start to see roots emerging from the bottom of the clove and green shoots sprouting from the top. This is so exciting!
8. Harvesting Garlic Greens: Once the green shoots are several inches tall (usually after a week or two), you can start harvesting them. Use scissors to snip off the greens, leaving about an inch or two of growth. This will encourage more growth. The greens taste like mild garlic and are delicious in salads, soups, and stir-fries.
9. Continuing the Growth: Keep changing the water regularly and providing plenty of sunlight. You can continue to harvest the garlic greens for several weeks. Eventually, the clove will start to decompose, and the growth will slow down.
Troubleshooting
Even with the best intentions, things don’t always go as planned. Here are some common issues you might encounter and how to fix them:
* Mold: If you see mold growing on the garlic clove or in the water, it’s usually a sign that you’re not changing the water frequently enough. Remove the clove from the jar, rinse it thoroughly, and clean the jar with soap and water. Then, refill the jar with fresh water and place the clove back in. Make sure to change the water every day or two.
* No Growth: If you don’t see any roots or shoots after a week or two, it could be that the garlic clove is not viable. Try using a different clove. Also, make sure the clove is getting enough sunlight.
* Yellowing Leaves: Yellowing leaves can be a sign of overwatering or lack of nutrients. Make sure you’re not submerging the entire clove in water. Only the root end should be submerged. You can also try adding a tiny amount of liquid fertilizer to the water (use a very diluted solution).
* Slimy Roots: Slimy roots are usually a sign of bacterial growth. Change the water more frequently and make sure the jar is clean.
Tips for Success
Here are a few extra tips to help you get the most out of your garlic-growing experiment:
* Experiment with Different Varieties: Try growing different varieties of garlic to see which ones you like best. Softneck garlic tends to produce more greens than hardneck garlic.
* Rotate Your Garlic: If you’re growing multiple cloves, rotate them every few days to ensure they all get equal sunlight.
* Don’t Overharvest: Avoid harvesting too many greens at once, as this can weaken the plant.
* Consider Hydroponic Nutrients: While not strictly necessary, adding a very diluted hydroponic nutrient solution to the water can help boost growth. Follow the instructions on the nutrient package carefully.
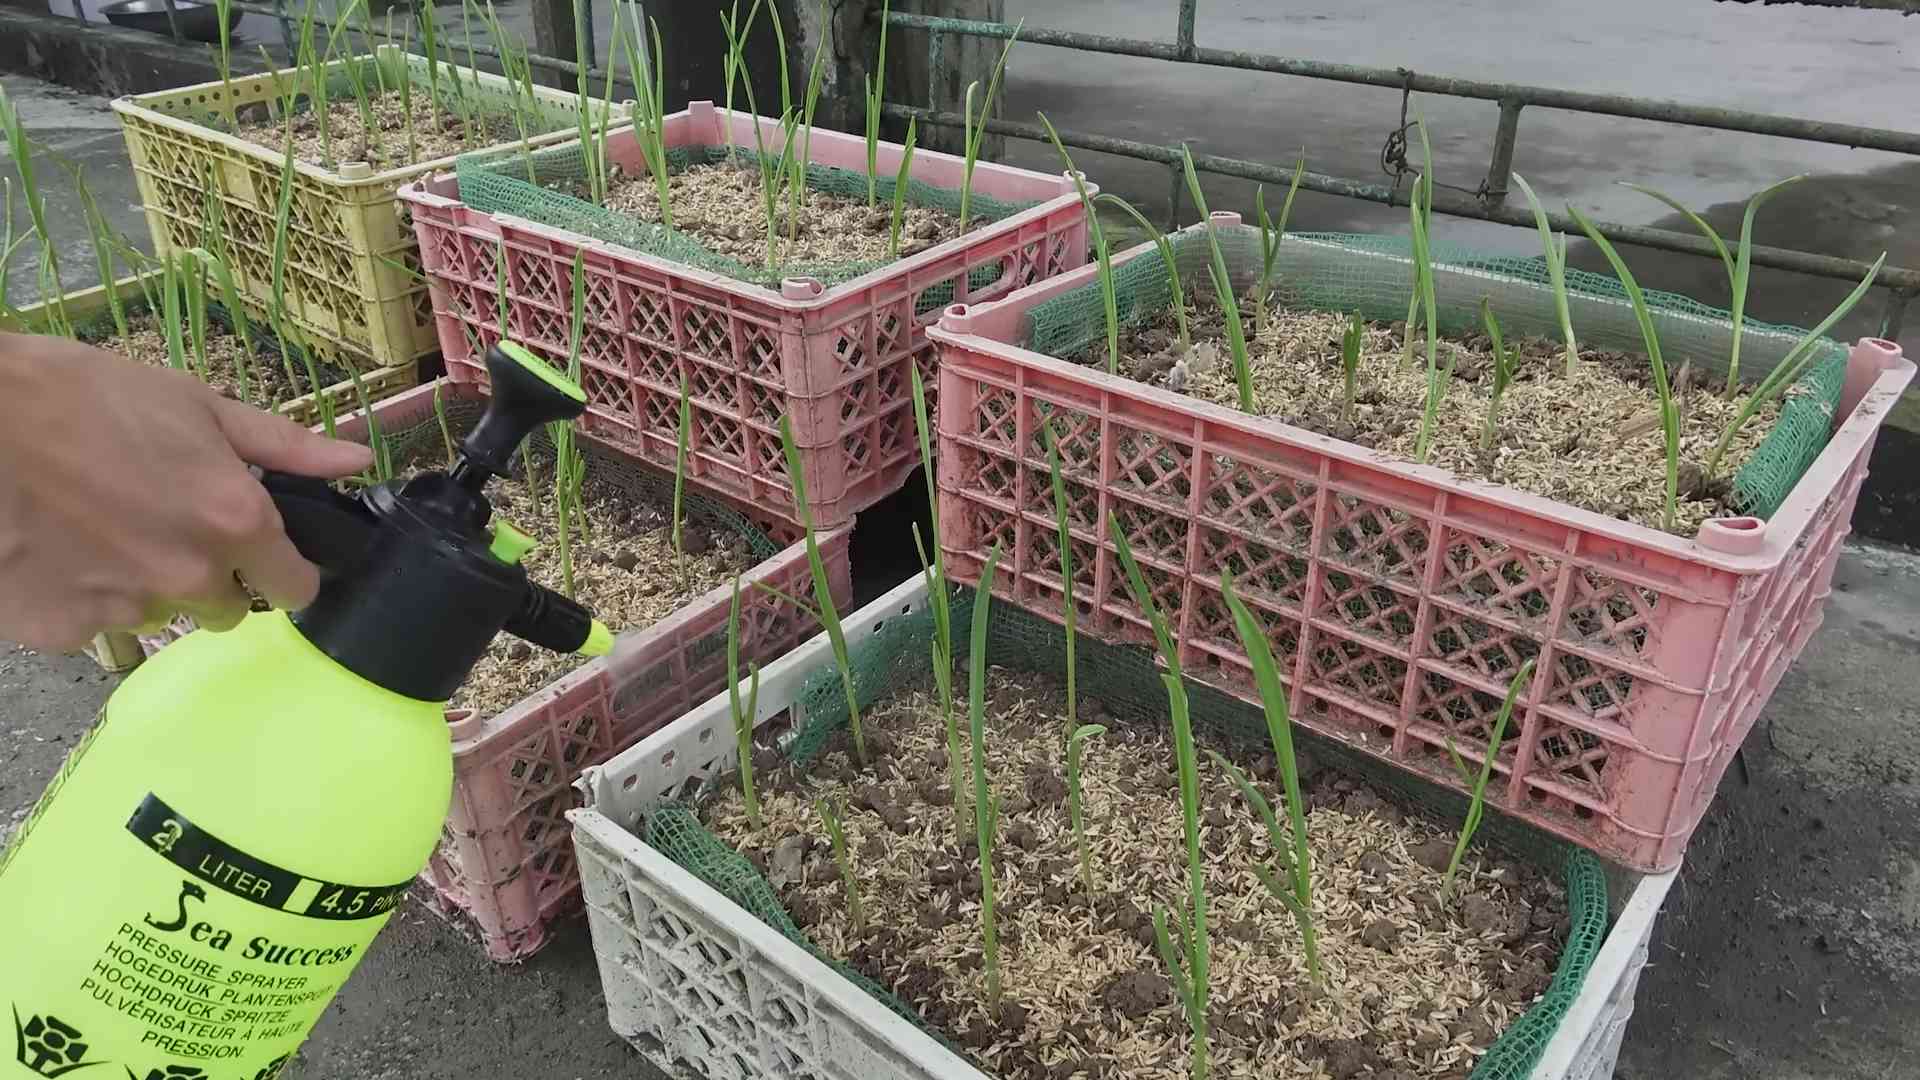
* Plant in Soil Later: Once the roots are well-developed, you can transplant the garlic clove into a pot of soil. This will allow it to develop a bulb. However, keep in mind that garlic grown from a clove in water may not produce as large of a bulb as garlic grown directly in soil.
Why Grow Garlic in Water?
You might be wondering, why bother growing garlic in water when you can just plant it in the ground? Well, there are several reasons why this is a fun and rewarding project:
* It’s Easy: Growing garlic in water is incredibly easy and requires very little effort.
* It’s Fast: You can start harvesting garlic greens in just a week or two.
* It’s Educational: It’s a great way to learn about plant growth and observe the development of roots and shoots.
* It’s Sustainable: You can use kitchen scraps (garlic cloves) to grow your own food.
* It’s Fun! It’s a fun and engaging project for kids and adults alike.
Beyond the Greens: What Happens Next?
While you’re primarily growing garlic in water for the greens, you might be curious about what happens if you let it grow longer. Here’s the deal:
* Bulb Development: While it’s possible for a small bulb to develop, it’s unlikely to be a full-sized bulb like you’d get from planting directly in soil. The water environment simply doesn’t provide the necessary nutrients and support for optimal bulb growth.
* Transplanting to Soil: As I mentioned earlier, you *can* transplant the garlic clove to soil once the roots are established. This will give it a better chance of developing a bulb, but don’t expect a huge harvest.
* Flowering: In some cases, the garlic might even produce a flower stalk (a scape). If this happens, you can either let it flower or cut it off to encourage bulb development (if you’ve transplanted to soil). Garlic scapes are also edible and have a delicious, mild garlic flavor.
Final Thoughts
Growing garlic in water is a simple, fun, and rewarding project that anyone can do. It’s a great way to get fresh garlic greens for your cooking, learn about plant growth, and add a little greenery to your home. So, grab a garlic clove, a jar, and some water, and get started! I hope you enjoy this little experiment as
Conclusion
So, there you have it! Growing garlic in water is not just a quirky experiment; it’s a surprisingly effective way to enjoy fresh, flavorful garlic greens right from your kitchen. This simple DIY trick transforms otherwise discarded garlic cloves into a continuous supply of delicious shoots, perfect for adding a zesty kick to your favorite dishes.
Why is this a must-try? Firstly, it’s incredibly easy. No green thumb is required! If you can place a clove in water, you can grow garlic greens. Secondly, it’s sustainable. You’re repurposing something you’d normally throw away, reducing waste and maximizing the use of your produce. Thirdly, it’s convenient. Imagine having fresh garlic flavor at your fingertips, ready to be snipped and added to your meals whenever you desire. No more last-minute trips to the store for garlic!
But the benefits don’t stop there. Growing garlic in water is also a fantastic way to add a touch of greenery to your home. The vibrant green shoots are visually appealing and can brighten up any windowsill or countertop. It’s a mini-garden that requires minimal effort and provides maximum reward.
Looking for variations? Experiment with different types of garlic. While most varieties will sprout, some may produce more robust greens than others. Try using organic garlic for the purest flavor. You can also try adding a diluted liquid fertilizer to the water every few weeks to boost growth. Just be sure to use a fertilizer specifically formulated for herbs and vegetables, and follow the instructions carefully. Another fun variation is to plant the sprouted garlic clove in soil after you’ve enjoyed the greens for a while. This will allow the bulb to develop further, potentially yielding a full head of garlic.
Don’t be afraid to get creative with how you use your garlic greens. They’re delicious in salads, soups, stir-fries, omelets, and as a garnish for just about anything. Chop them finely and mix them into dips or spreads for an extra layer of flavor. You can even use them to make a flavorful garlic oil.
We wholeheartedly encourage you to try this simple yet rewarding DIY trick. It’s a fun, easy, and sustainable way to enjoy fresh garlic flavor year-round. Once you experience the joy of harvesting your own garlic greens, you’ll wonder why you didn’t try it sooner.
So, grab a few garlic cloves, a glass of water, and get started! We’re confident that you’ll be delighted with the results. And most importantly, we want to hear about your experience! Share your photos, tips, and recipes with us in the comments below. Let’s build a community of garlic-growing enthusiasts and inspire others to discover the magic of growing garlic in water. What are you waiting for? Let’s get growing!
Frequently Asked Questions (FAQ)
What kind of garlic should I use for growing in water?
You can use most types of garlic for growing in water. However, organic garlic is often recommended as it hasn’t been treated with chemicals that might inhibit sprouting. Softneck varieties tend to produce more greens, but hardneck varieties will also work. Experiment with different types to see which ones you prefer. Avoid using garlic that has been refrigerated for a long time, as it may not sprout as readily. Fresh, firm cloves are your best bet.
How long does it take for garlic to sprout in water?
Generally, you’ll start to see sprouts within a few days to a week. The exact time will depend on factors such as the variety of garlic, the temperature of your home, and the freshness of the cloves. Be patient, and make sure the base of the clove is consistently submerged in water. If you don’t see any sprouts after two weeks, try using a different clove.
How much light does the garlic need?
Garlic greens need bright, indirect sunlight to thrive. Place your glass or jar near a sunny window, but avoid direct sunlight, which can scorch the leaves. If you don’t have a sunny window, you can use a grow light to provide supplemental light. Rotate the container regularly to ensure that all sides of the greens receive adequate light.
How often should I change the water?
Change the water every 2-3 days to prevent the growth of bacteria and mold. This will also help to keep the water fresh and oxygenated, which is essential for healthy growth. When changing the water, gently rinse the garlic cloves to remove any debris.
Can I eat the garlic bulb after I’ve harvested the greens?
While you can technically eat the garlic bulb, it will likely be smaller and less flavorful than a bulb that has been grown in soil. The bulb will have expended a lot of its energy to produce the greens. However, you can plant the sprouted bulb in soil to allow it to develop further and potentially yield a full head of garlic.
How do I harvest the garlic greens?
Harvest the garlic greens by snipping them off with scissors or kitchen shears. Cut them close to the base of the clove, but leave about an inch or two of growth so that the plant can continue to produce more greens. Harvest regularly to encourage new growth.
Are there any pests or diseases that affect garlic grown in water?
Growing garlic in water is generally pest-free, as there’s no soil involved. However, you may occasionally encounter mold or mildew. To prevent this, ensure that the water is changed regularly and that the garlic cloves are not overcrowded in the container. If you notice any mold, remove the affected cloves and clean the container thoroughly.
Can I use tap water for growing garlic in water?
Yes, you can use tap water, but it’s best to let it sit for 24 hours before using it to allow the chlorine to evaporate. Alternatively, you can use filtered water or rainwater. Avoid using softened water, as it contains high levels of sodium, which can be harmful to plants.
How long will the garlic greens continue to grow?
The garlic greens will continue to grow for several weeks, or even months, as long as you provide them with adequate light, water, and nutrients. Eventually, the clove will exhaust its energy reserves, and the greens will start to decline. At this point, you can either plant the clove in soil or start with a fresh clove.
Can I add fertilizer to the water?
Yes, you can add a diluted liquid fertilizer to the water every few weeks to boost growth. Use a fertilizer specifically formulated for herbs and vegetables, and follow the instructions carefully. Over-fertilizing can damage the plants, so it’s best to err on the side of caution. A balanced fertilizer with an NPK ratio of 10-10-10 is a good choice.
What if my garlic cloves start to rot?
If your garlic cloves start to rot, it’s usually a sign that the water is not being changed frequently enough or that the cloves are overcrowded. Remove the rotten cloves immediately and clean the container thoroughly. Use fresh cloves and change the water every 1-2 days to prevent further rotting.
Is growing garlic in water a good way to get a lot of garlic?
Growing garlic in water is primarily for harvesting the greens, not for producing large garlic bulbs. While you can plant the sprouted cloves in soil to grow full heads of garlic, the primary benefit of growing in water is the continuous supply of fresh garlic greens. If you’re looking to grow a lot of garlic bulbs, it’s best to plant them directly in the ground in the fall.

Leave a Comment