

Grow Beetroot on Terrace: Imagine stepping onto your terrace and harvesting vibrant, earthy beetroot, fresh from your own little garden oasis. Sounds idyllic, right? Well, it’s more achievable than you might think! For centuries, humans have cultivated gardens in even the most unexpected places, from rooftop farms in ancient Babylon to the hanging gardens of legend. This deep-rooted connection to growing our own food is experiencing a modern resurgence, and I’m here to show you how to participate, even if you only have a terrace to work with.
In today’s fast-paced world, knowing where your food comes from and having control over its quality is more important than ever. Store-bought vegetables, while convenient, often lack the freshness and flavor of homegrown produce. Plus, the satisfaction of nurturing a plant from seed to harvest is incredibly rewarding. This DIY guide will provide you with simple, effective tricks and hacks to successfully grow beetroot on terrace, regardless of your gardening experience. We’ll cover everything from choosing the right containers and soil to providing optimal sunlight and watering techniques. Get ready to transform your terrace into a thriving edible landscape and enjoy the delicious, nutritious rewards of your labor!
Growing Beetroot on the Terrace: Your DIY Guide for a Bountiful Harvest!
Hey gardening friends! Do you feel like turning your terrace into a little paradise for beetroot? I’ll show you how you can easily do it yourself. Beetroot is not only super healthy but also incredibly versatile in the kitchen. And the best part: you don’t need a huge garden to grow it! Let’s get started!
What You Need for Growing Beetroot on the Terrace
Before we begin, here is a list of everything you’ll need:
- Seeds: Choose a variety of beetroot that is suitable for growing in pots. There are many different varieties, such as ‘Detroit Dark Red’ or ‘Boltardy’, which are well-suited.
- Planters: Large pots or containers with a diameter of at least 30 cm and a depth of 20 cm are ideal. Beetroot needs space to develop its tubers.
- Soil: High-quality vegetable soil is a must. It should be loose, well-draining, and rich in nutrients.
- Fertilizer: Organic fertilizer like compost or horn shavings provides the plants with essential nutrients. Liquid fertilizer for vegetables is also a good option.
- Watering can or garden hose: For regular watering.
- Gloves: To keep your hands clean.
- Shovel or trowel: For filling the pots and planting the seeds.
- Mulch material (optional): Straw or wood chips help to retain moisture in the soil and suppress weeds.
- Plant labels: To keep track of your different varieties.
The Preparation: How to Create the Perfect Foundation
- Choosing the right planters: As mentioned, size is important! The larger the pot, the better the tubers can develop. Make sure the pots have drainage holes so that excess water can run off. Waterlogging is poison for beetroot!
- Preparing the soil: Fill the pots with the vegetable soil. Mix in some compost or horn shavings to enrich the soil with nutrients. This is like a little energy boost for your future plants!
- Choosing the location: Beetroot loves the sun! Choose a sunny spot on your terrace where the plants will get at least 6 hours of sun per day. A partially shaded spot is also possible, but the harvest will be slightly smaller.
Sowing: Let’s Get Started!
- Preparing the seeds: Beetroot seeds are actually small fruit clusters that contain several seeds. You can either sow them directly or soak them overnight in lukewarm water beforehand. This speeds up germination.
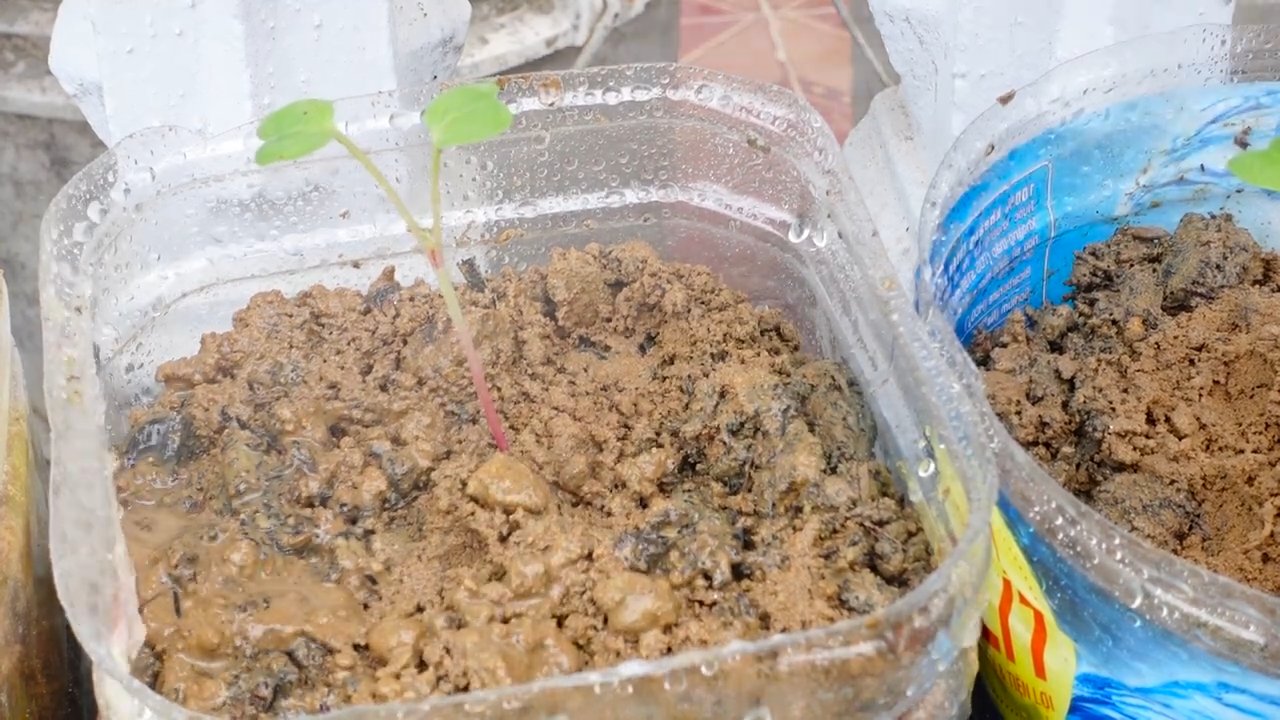
- Sowing the seeds: Use your finger to press small depressions (about 2-3 cm deep) into the soil. Place 2-3 seeds in each depression. Cover the seeds with soil and press down lightly.
- Watering: Water the soil gently so that the seeds are not washed away. The soil should be moist, but not wet.
- Be patient: Now it’s time to wait! Germination usually takes 1-2 weeks. Keep the soil moist during this time.
The Care: Keeping Your Plants Healthy and Strong
- Watering: Beetroot needs regular water, especially during dry periods. It’s best to water in the morning or evening so the water doesn’t evaporate as quickly. Avoid waterlogging!
- Fertilizing: Fertilize the plants every 2-3 weeks with a liquid fertilizer for vegetables. Be sure to follow the dosage instructions on the packaging.
- Thinning out: When the seedlings are about 5 cm tall, you should thin them out. This means removing the weakest plants so that the strongest have enough space to grow. Leave a distance of about 10-15 cm between the plants.
- Weeding: Keep the pots free of weeds. Weeds compete with the beetroot plants for nutrients and water.
- Mulching (optional): A layer of mulch helps to retain moisture in the soil and suppress weeds.
Protection from Pests and Diseases
Beetroot is relatively robust, but it can still be affected by pests and diseases. Here are some tips on how to protect your plants:
- Aphids: Aphids can infest the leaves of the beetroot plants. You can spray them off with a jet of water or combat them with an organic insecticide.
- Flea beetles: Flea beetles eat small holes in the leaves. You can cover them with a fine net or combat them with an organic insecticide.
- Fungal diseases: In damp weather, fungal diseases can occur. Ensure good ventilation and avoid waterlogging. You can use a fungicide if necessary.
The Harvest: The Reward for Your Effort
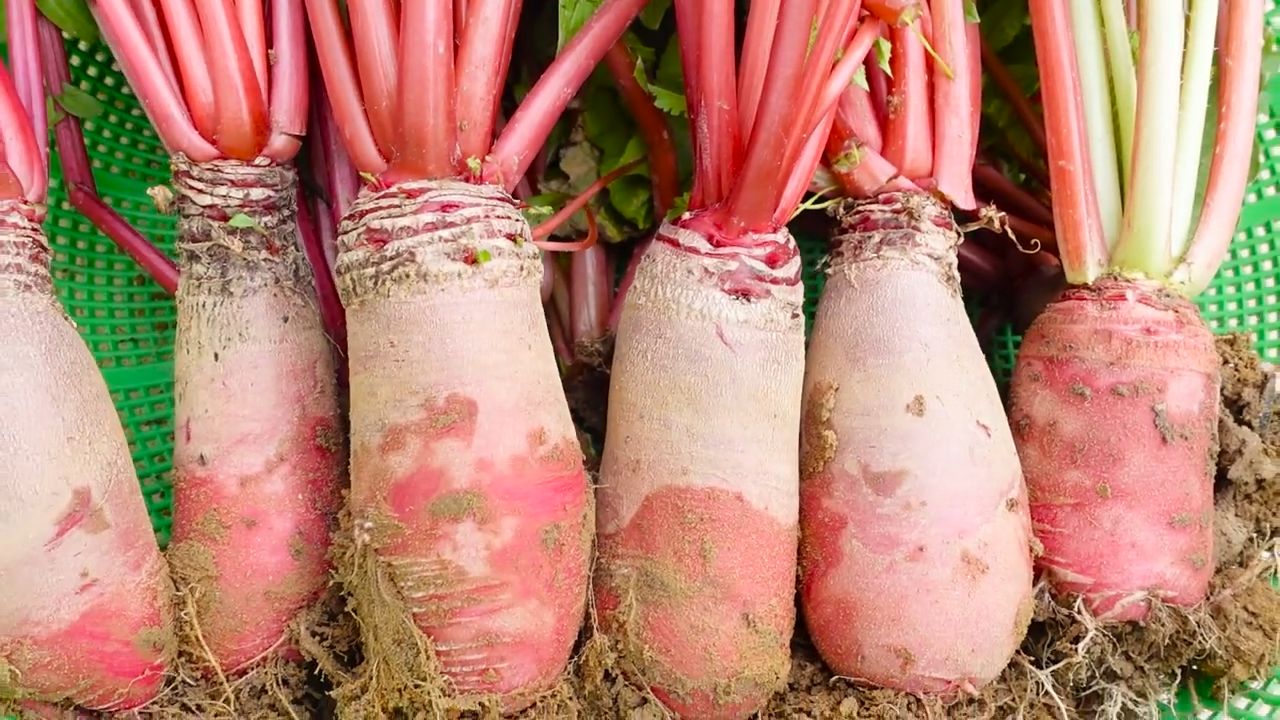
- Recognizing the right time: The harvest time depends on the variety and growing conditions. As a rule, you can harvest beetroot 8-10 weeks after sowing. The tubers should have a diameter of about 5-8 cm.
- Harvesting: Carefully pull the tubers out of the soil. You can also use a digging fork to loosen the soil.
- Removing the leaves: Cut the leaves about 2-3 cm above the tuber. By the way, the leaves are also edible! You can prepare them like spinach.
- Cleaning the tubers: Remove the soil from the tubers.
- Storage: Beetroot stores well. You can store it in the refrigerator or in a cool, dark cellar. Wrap the tubers in damp paper or place them in a box with sand.
Extra Tips for a Successful Harvest
- Practice crop rotation: Don’t plant beetroot in the same spot every year. Rotate your crops to prevent diseases and pests.
- Companion plants: Plant marigolds or chamomile near your beetroot plants. They repel pests and promote growth.
- Check regularly: Inspect your plants regularly for pests and diseases. The sooner you identify problems, the better you can combat them.
- Don’t give up: Even if things don’t go so well, don’t be discouraged! Gardening is a learning process. With a little practice, you’ll soon be bringing in a bountiful harvest.
Beetroot in the Kitchen: Versatile and Delicious!
Beetroot is not only healthy but also incredibly versatile in the kitchen. You can eat it raw, cooked, roasted, or pickled. Here are a few ideas:
- Beetroot salad: A classic! Beetroot, apple, onion, vinegar, and oil.
- Beetroot soup: A warming soup for cold days.
- Beetroot chips: A healthy alternative to potato chips.
- Beetroot juice: A real power drink!
- Pickled beetroot: A delicious side dish for many meals.
I hope this guide has helped you to successfully grow beetroot on your terrace. Have fun gardening and enjoy your meal!
Conclusion
So, there you have it! Growing beetroot on your terrace isn’t just a whimsical gardening dream; it’s a surprisingly achievable reality that brings a burst of color and fresh, earthy flavor right to your doorstep. We’ve walked through the essential steps, from selecting the right varieties and preparing the perfect soil mix to nurturing your plants and harvesting those vibrant roots. But why should you actually take the plunge and dedicate a portion of your precious terrace space to this root vegetable?
Firstly, consider the unparalleled freshness. Store-bought beetroot simply can’t compare to the taste of freshly harvested, homegrown beetroot. The subtle sweetness is amplified, the earthy notes are more pronounced, and the texture is undeniably superior. Imagine adding these vibrant gems to your salads, roasting them with herbs, or even pickling them for a tangy treat. The possibilities are endless!
Secondly, growing your own beetroot allows you to control every aspect of the process, ensuring that your plants are nurtured with organic methods, free from harmful pesticides and chemicals. This is especially important if you’re conscious about the quality of your food and want to provide your family with the healthiest possible options.
Thirdly, let’s not forget the sheer joy and satisfaction that comes from nurturing a plant from seed to harvest. Watching those tiny seedlings emerge, tending to their growth, and finally reaping the rewards of your labor is an incredibly rewarding experience. It’s a fantastic way to connect with nature, de-stress, and add a touch of green to your urban environment.
But the beauty of growing beetroot on your terrace lies in its adaptability. Feel free to experiment with different varieties to discover your personal favorites. Consider planting cylindrical varieties like ‘Cylindra’ if you’re short on space, or opt for colorful varieties like ‘Golden’ or ‘Chioggia’ for a visually stunning harvest. You can also try companion planting beetroot with other vegetables like onions, garlic, or lettuce to maximize your terrace garden’s potential.
Don’t be afraid to get creative with your containers, either. While standard pots and planters work perfectly well, you can also repurpose old buckets, tubs, or even grow bags to create a unique and sustainable growing environment. Just make sure that your chosen container has adequate drainage to prevent waterlogging.
Growing beetroot on your terrace is more than just a gardening project; it’s an investment in your health, your well-being, and your connection to nature. It’s a chance to experience the joy of growing your own food, to savor the unparalleled taste of fresh, homegrown produce, and to add a touch of vibrant color to your urban landscape.
So, what are you waiting for? Grab your seeds, prepare your soil, and get ready to embark on a beetroot-growing adventure! We’re confident that you’ll be amazed by the results. And once you’ve harvested your first batch of homegrown beetroot, we encourage you to share your experience with us. Tell us about your favorite varieties, your growing tips, and your delicious beetroot recipes. Let’s create a community of terrace gardeners who are passionate about growing their own food and sharing their knowledge with others. Happy gardening!
Frequently Asked Questions (FAQs)
What is the best time of year to plant beetroot on my terrace?
The best time to plant beetroot depends on your local climate. Generally, beetroot thrives in cooler temperatures, so the ideal planting times are spring and fall. For a spring crop, sow seeds directly into your containers 2-3 weeks before the last expected frost. For a fall crop, sow seeds 6-8 weeks before the first expected frost. In warmer climates, you can even grow beetroot throughout the winter. Check your local weather patterns and adjust your planting schedule accordingly. If you live in a very hot climate, provide some afternoon shade to prevent the soil from overheating.
What kind of soil is best for growing beetroot in containers?
Beetroot prefers well-draining, fertile soil with a slightly acidic to neutral pH (around 6.0-7.0). A good potting mix for beetroot should be loose and airy to allow for proper root development. You can create your own mix by combining equal parts of compost, peat moss (or coconut coir), and perlite or vermiculite. Compost provides essential nutrients, peat moss (or coconut coir) helps retain moisture, and perlite or vermiculite improves drainage. Avoid using heavy clay soil, as it can compact and restrict root growth. You can also purchase pre-made potting mixes specifically formulated for vegetables.
How much sunlight does beetroot need to grow well on a terrace?
Beetroot requires at least 6 hours of direct sunlight per day to thrive. Choose a sunny spot on your terrace that receives ample sunlight throughout the day. If your terrace is partially shaded, try to position your containers in the area that receives the most sunlight. If you’re growing beetroot indoors or in a very shaded area, you may need to supplement with artificial grow lights. Rotate your containers regularly to ensure that all sides of the plants receive adequate sunlight.
How often should I water my beetroot plants?
Beetroot needs consistent moisture to grow well, but avoid overwatering, which can lead to root rot. Water your plants deeply whenever the top inch of soil feels dry to the touch. The frequency of watering will depend on the weather conditions, the size of your containers, and the type of soil you’re using. During hot, dry weather, you may need to water your plants daily. In cooler, wetter weather, you may only need to water them every few days. Use a watering can or a hose with a gentle spray nozzle to avoid damaging the delicate leaves.
Do I need to fertilize my beetroot plants?
Beetroot benefits from regular fertilization, especially during the early stages of growth. Use a balanced, water-soluble fertilizer diluted to half strength every 2-3 weeks. Look for a fertilizer with a higher phosphorus content, as this promotes root development. You can also amend your soil with compost or other organic matter to provide a slow-release source of nutrients. Avoid over-fertilizing, as this can lead to excessive foliage growth at the expense of root development.
How do I know when my beetroot is ready to harvest?
Beetroot is typically ready to harvest 7-8 weeks after planting, depending on the variety and growing conditions. The size of the roots will vary depending on the variety, but generally, they should be about 2-3 inches in diameter. You can gently loosen the soil around the roots and pull them out by hand. If the soil is compacted, you may need to use a garden fork to lift them out. Don’t wait too long to harvest your beetroot, as they can become tough and woody if left in the ground for too long. You can also harvest the beetroot greens, which are delicious and nutritious.
Can I grow beetroot in the same container as other vegetables?
Yes, you can companion plant beetroot with other vegetables in the same container. Good companion plants for beetroot include onions, garlic, lettuce, radishes, and bush beans. These plants can help deter pests, improve soil health, and maximize space utilization. Avoid planting beetroot near pole beans or mustard greens, as they can inhibit growth. When companion planting, make sure to provide adequate spacing between plants to allow for proper air circulation and sunlight penetration.
What are some common pests and diseases that affect beetroot?
Beetroot is generally a relatively pest-resistant crop, but it can be susceptible to certain pests and diseases, such as flea beetles, leaf miners, and fungal diseases. Flea beetles can damage the leaves, while leaf miners can tunnel inside the leaves. Fungal diseases can cause leaf spots and root rot. To prevent pests and diseases, practice good garden hygiene, such as removing weeds and debris, and providing adequate air circulation. You can also use organic pest control methods, such as insecticidal soap or neem oil, to control pests. If you notice any signs of disease, remove the affected leaves or plants immediately.
Can I grow beetroot from seed or do I need to buy seedlings?
You can grow beetroot from seed or buy seedlings. Growing from seed is generally more economical and allows you to choose from a wider variety of cultivars. However, starting from seedlings can be a good option if you’re short on time or want to get a head start on the growing season. When buying seedlings, choose healthy, vigorous plants with well-developed root systems.
How do I store harvested beetroot?
To store harvested beetroot, remove the leaves, leaving about an inch of stem attached. Gently brush off any excess soil, but do not wash the roots. Store the beetroot in a cool, dark, and humid place, such as a refrigerator or a root cellar. You can wrap the beetroot in a damp cloth or store them in a perforated plastic bag to help retain moisture. Properly stored beetroot can last for several weeks or even months. You can also pickle, can, or freeze beetroot for longer-term storage.

Leave a Comment