

Snap Pea Kitchen Garden: Imagine stepping outside your back door and plucking fresh, crisp snap peas straight from the vine for your salad or stir-fry. Sounds dreamy, right? Well, it doesn’t have to be just a dream! I’m here to show you how to create your very own thriving snap pea kitchen garden, even if you’re a complete beginner.
For centuries, kitchen gardens have been a staple in cultures worldwide, providing families with fresh, readily available produce. Think of the cottage gardens of England or the potagers of France – beautiful, functional spaces brimming with life. While we might not all have sprawling estates, the spirit of those gardens can live on in our own backyards, balconies, or even windowsills.
Why snap peas, you ask? They’re incredibly easy to grow, even for novice gardeners, and they offer a delicious, healthy snack right at your fingertips. Plus, growing your own food is incredibly rewarding! In today’s world, where we’re increasingly conscious of where our food comes from, having a snap pea kitchen garden allows you to control the quality and freshness of your produce. It’s a fantastic way to reduce your carbon footprint, save money, and connect with nature. So, let’s dive into some simple DIY tricks and hacks that will have you harvesting your own sweet snap peas in no time!
Creating Your Own Thriving Snap Pea Kitchen Garden
Okay, so you want to grow your own delicious snap peas right in your kitchen? Awesome! It’s easier than you think, and there’s nothing quite like the taste of freshly picked, homegrown snap peas. I’m going to walk you through everything you need to know to create a successful snap pea kitchen garden, even if you don’t have a ton of space or experience. Let’s get started!
What You’ll Need
Before we dive into the nitty-gritty, let’s gather our supplies. This will make the whole process smoother and less stressful. Trust me, nothing’s worse than realizing you’re missing something halfway through!
* Snap Pea Seeds: Choose a variety that suits your space. Bush varieties are great for containers, while vining varieties need more support. I personally love ‘Sugar Snap’ for its sweetness and productivity.
* Containers: You’ll need pots or containers that are at least 6 inches deep. The bigger, the better, especially for vining varieties. Make sure they have drainage holes!
* Potting Mix: Use a high-quality potting mix, not garden soil. Potting mix is lighter and drains better, which is crucial for healthy snap pea growth.
* Support Structure (for vining varieties): This could be a small trellis, bamboo stakes, or even some sturdy twigs. Snap peas need something to climb on!
* Watering Can or Spray Bottle: For gentle watering.
* Plant Food (optional): A balanced liquid fertilizer can give your snap peas a boost.
* Sunny Location: Snap peas need at least 6 hours of sunlight per day. A south-facing window is ideal.
* Spray bottle with water: For misting the seedlings.
* Small shovel or trowel: For planting the seeds.
Planting Your Snap Pea Seeds
This is where the magic begins! Getting the planting right is key to a successful harvest.
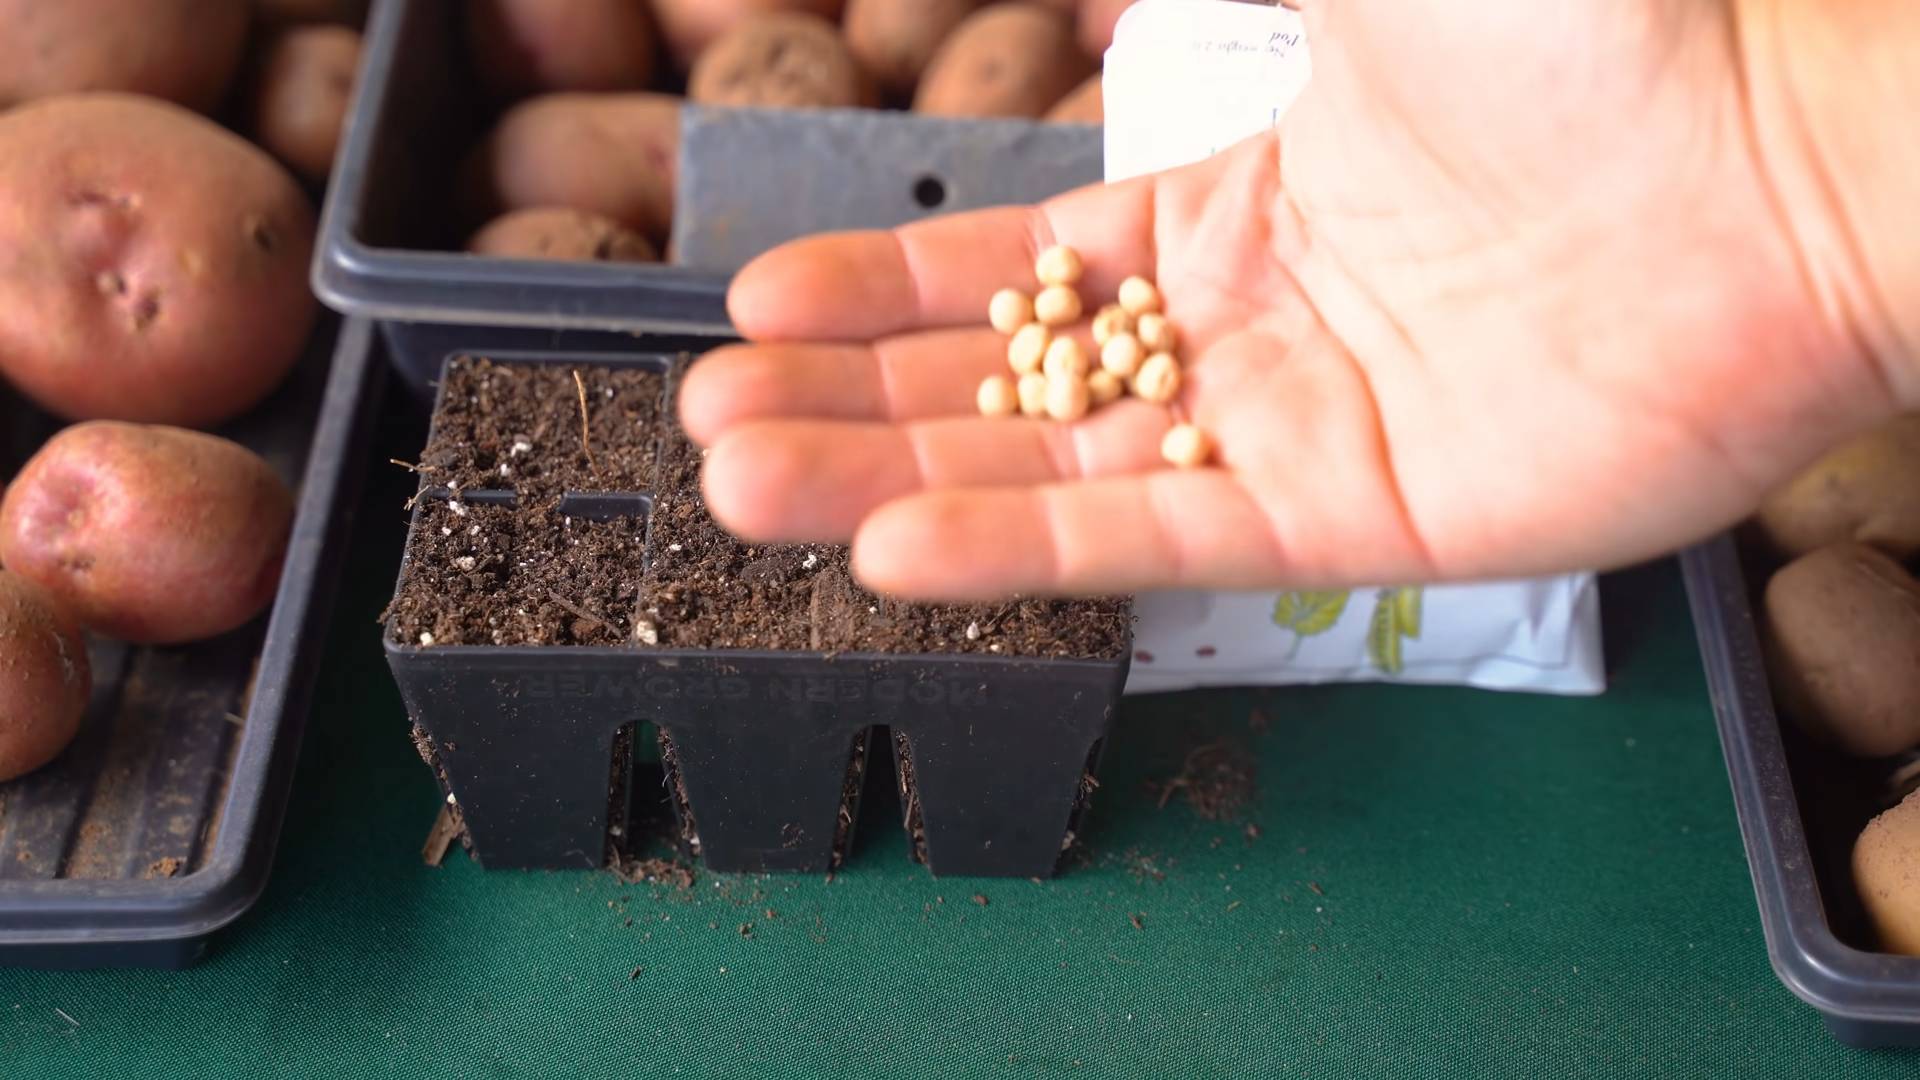
1. Prepare Your Containers: Fill your containers with potting mix, leaving about an inch of space at the top. Gently tap the container to settle the soil.
2. Sow the Seeds: Plant the snap pea seeds about 1 inch deep and 1-2 inches apart. If you’re using a larger container, you can plant them in rows.
3. Water Gently: Water the soil thoroughly but gently, making sure not to dislodge the seeds. You want the soil to be moist, but not soggy.
4. Find a Sunny Spot: Place your containers in a sunny location where they’ll receive at least 6 hours of direct sunlight each day.
5. Keep the Soil Moist: Check the soil moisture daily and water as needed to keep it consistently moist. Don’t let it dry out completely.
6. Wait Patiently: Snap peas usually germinate within 7-14 days, depending on the temperature. Be patient, and you’ll soon see little sprouts emerging!
Caring for Your Snap Pea Plants
Once your snap peas have sprouted, it’s time to give them the care they need to thrive.
1. Provide Support (for vining varieties): As your snap pea plants grow, they’ll need something to climb on. Install your trellis or stakes early on to give them a head start. Gently guide the tendrils towards the support structure.
2. Water Regularly: Snap peas need consistent moisture, especially during flowering and pod development. Water deeply whenever the top inch of soil feels dry.
3. Fertilize (optional): If you choose to fertilize, use a balanced liquid fertilizer diluted to half strength. Apply it every 2-3 weeks.
4. Pinch Off the Growing Tips: Once your plants reach the top of their support structure, pinch off the growing tips to encourage bushier growth and more pod production.
5. Watch Out for Pests: Keep an eye out for common pests like aphids and slugs. If you spot any, you can try spraying them with insecticidal soap or handpicking them off.
6. Ensure good air circulation: Proper air circulation is important to prevent fungal diseases. Make sure your plants aren’t too crowded and that there’s good airflow around them.
Harvesting Your Snap Peas
This is the best part! Harvesting your own snap peas is incredibly rewarding.
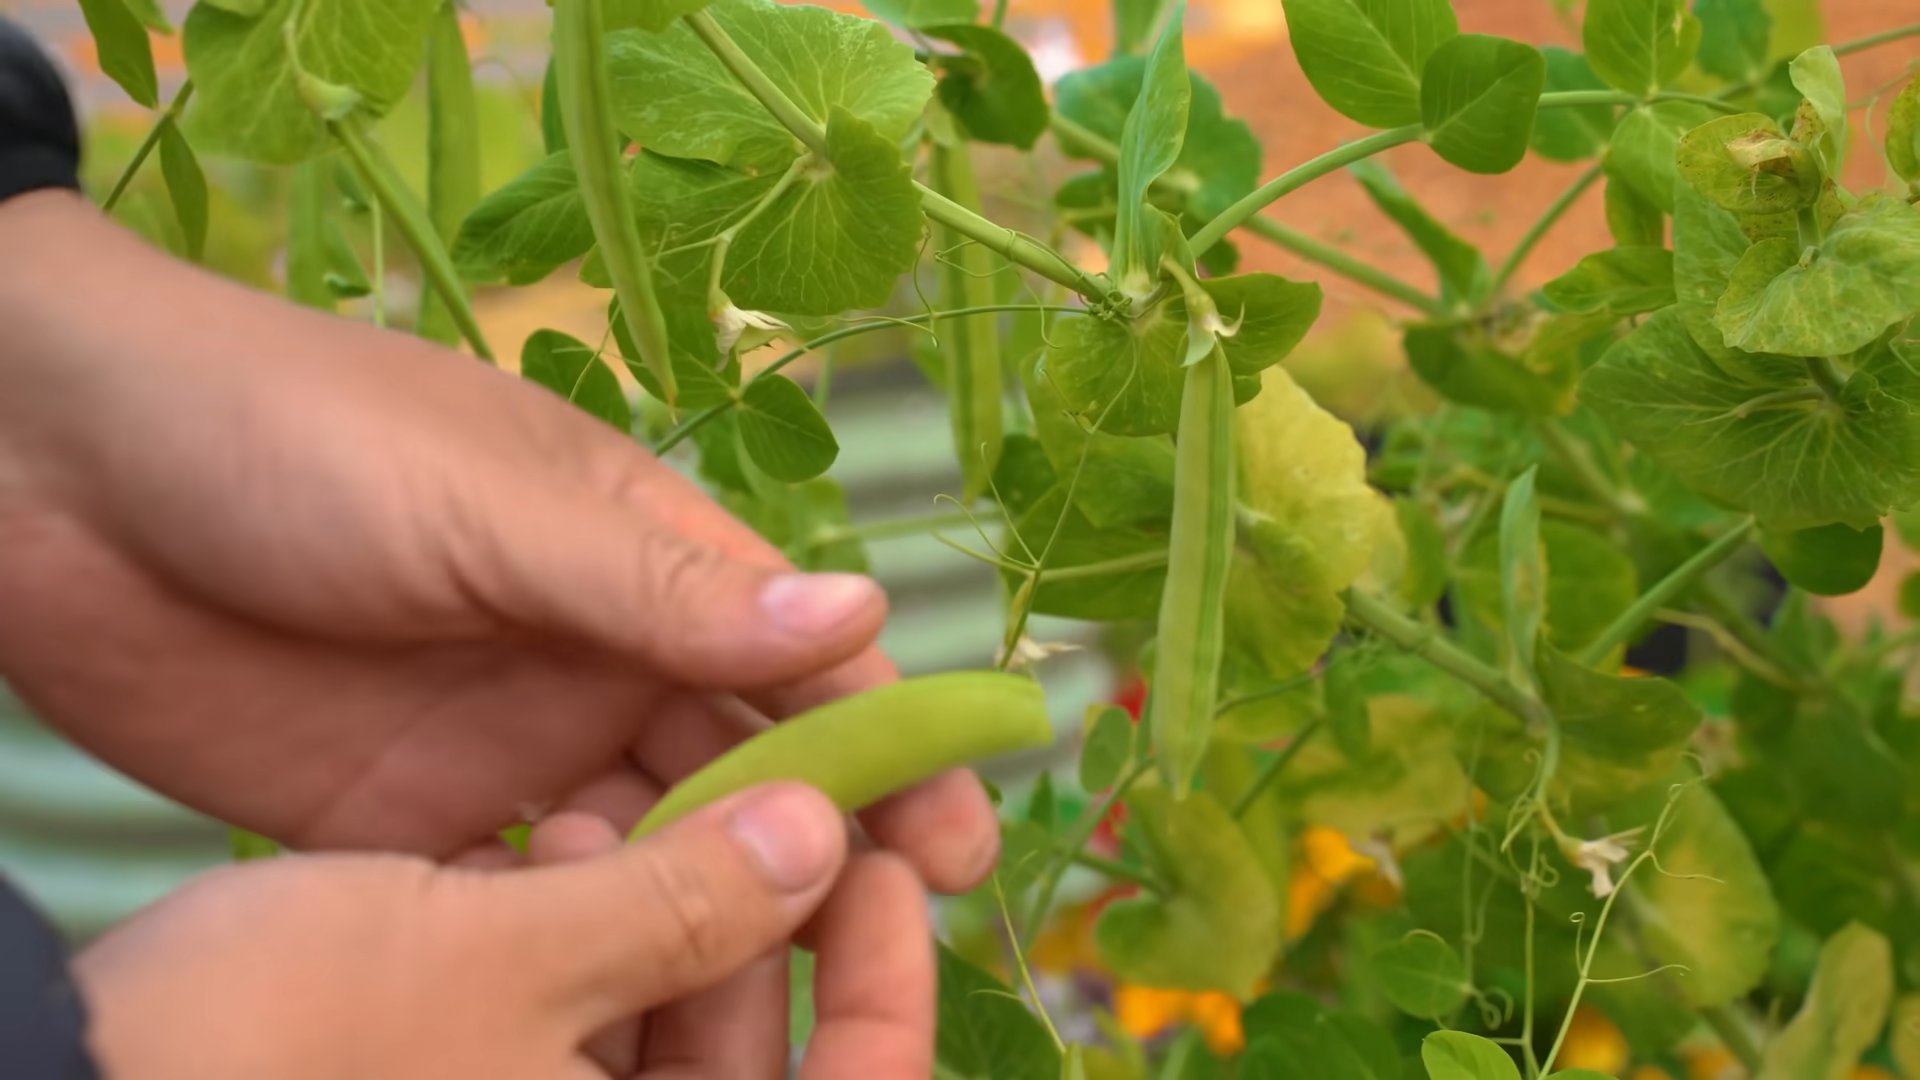
1. Harvest When Pods are Full: Snap peas are ready to harvest when the pods are plump and the peas inside are well-developed. The pods should be bright green and crisp.
2. Pick Regularly: Harvest your snap peas regularly to encourage continued production. The more you pick, the more they’ll produce!
3. Use Scissors or Pruners: Use scissors or pruners to cut the pods from the vine, being careful not to damage the plant.
4. Enjoy Fresh: Snap peas are best enjoyed fresh, right after picking. You can eat them raw, stir-fried, or steamed.
5. Store Properly: If you can’t eat all your snap peas right away, store them in the refrigerator in a plastic bag for up to a week.
Troubleshooting Common Problems
Even with the best care, you might encounter a few challenges along the way. Here are some common problems and how to address them:
* Yellowing Leaves: This could be a sign of overwatering, underwatering, or nutrient deficiency. Check the soil moisture and adjust your watering accordingly. If the soil is consistently moist, it could be overwatering. If it’s dry, you need to water more. If you suspect a nutrient deficiency, try fertilizing with a balanced liquid fertilizer.
* Lack of Pod Production: This could be due to insufficient sunlight, poor pollination, or stress. Make sure your plants are getting enough sunlight and that there are pollinators around (you can attract them by planting flowers nearby). If the plants are stressed (e.g., from extreme temperatures or lack of water), try to address the underlying cause.
* Pest Infestations: As mentioned earlier, keep an eye out for pests like aphids and slugs. Treat them promptly with insecticidal soap or other appropriate methods.
* Fungal Diseases: Fungal diseases can be a problem in humid conditions. Ensure good air circulation and avoid overwatering. If you spot any signs of fungal disease (e.g., powdery mildew), you can try spraying with a fungicide.
Section: Choosing the Right Snap Pea Variety
Not all snap peas are created equal! Selecting the right variety for your space and growing conditions is crucial for success. Here’s a breakdown of some popular options:
* Sugar Snap: This is a classic variety known for its sweet flavor and crisp texture. It’s a vining variety, so it needs a trellis or other support. It’s also relatively disease-resistant.
* Sugar Ann: This is an early-maturing bush variety, making it a great choice for smaller spaces and shorter growing seasons. It’s also very productive.
* Super Sugar Snap: This is an improved version of Sugar Snap, with even sweeter flavor and better disease resistance. It’s also a vining variety.
* Cascadia: This is another popular bush variety that’s known for its high yields and disease resistance. It’s a good choice for beginners.
* Little Sweetie: As the name suggests, this is a compact bush variety that’s perfect for containers. It produces small, sweet pods.
When choosing a variety, consider your space, growing season, and personal preferences. Bush varieties are generally easier to grow in containers, while vining varieties require more support but can produce higher yields.
Section: Maximizing Your Harvest
Want to get the most out of your snap pea kitchen garden? Here are a few tips to maximize your harvest:
* Succession Planting: Plant new seeds every 2-3 weeks to ensure a continuous harvest throughout the growing season.
* Provide Adequate Sunlight: Snap peas need at least 6 hours of sunlight per day to produce well. If you don’t have a sunny window, you can supplement with grow lights.
* Water Consistently: Snap peas need consistent moisture, especially during flowering and pod development. Water deeply whenever the top inch of soil feels dry.
* Fertilize Regularly: A balanced liquid fertilizer can give your snap peas a boost and encourage more pod production.
* Harvest Frequently: Harvest your snap peas regularly to encourage continued production. The more you pick, the more they’ll produce!
* Mulch: Adding a layer of mulch around your snap pea plants can help retain moisture, suppress weeds, and regulate soil temperature.
* Rotate Crops: If you’re growing snap peas in the same container year after year, consider rotating them with other crops to prevent soil depletion and disease buildup.
Section: Dealing with Pests and Diseases Organically
I always prefer to deal with pests and diseases using organic methods whenever possible. Here are a few tips for keeping your snap
Conclusion
So, there you have it! Transforming a simple bag of snap peas into a thriving kitchen garden is not just a fun project; it’s a gateway to fresh, flavorful ingredients right at your fingertips. We’ve walked you through the process, highlighting the ease and accessibility of this DIY trick. But why is this a must-try?
First and foremost, it’s about the unparalleled freshness. Store-bought snap peas, while convenient, often lack the vibrant sweetness and crispness of homegrown varieties. Imagine plucking plump, juicy snap peas directly from your mini-garden, knowing exactly where they came from and how they were grown. That’s a taste experience you simply can’t replicate.
Beyond the flavor, this project is incredibly rewarding. Nurturing a plant from seed to harvest is a deeply satisfying experience, connecting you to the natural world in a tangible way. It’s a fantastic activity for families, teaching children about the life cycle of plants and the importance of sustainable food practices. Plus, it’s a budget-friendly way to enjoy fresh produce, especially if you regularly buy snap peas.
And let’s not forget the versatility! While we’ve focused on snap peas, this method can be adapted for other edible plants like microgreens, herbs, or even small salad greens. Experiment with different varieties to create a diverse and flavorful kitchen garden. Consider adding companion plants like marigolds to deter pests naturally. You could also try different containers – from repurposed yogurt containers to stylish terracotta pots – to match your aesthetic.
Ready to take your snap pea game to the next level? Don’t be intimidated by the idea of gardening. This DIY trick is designed to be simple and accessible, even for beginners. With just a few basic supplies and a little bit of patience, you can create your own thriving kitchen garden.
We encourage you to give this a try. Start small, follow the steps outlined in this article, and watch your snap peas flourish. And most importantly, share your experience with us! We’d love to see your kitchen gardens, hear about your successes (and challenges!), and learn any tips or variations you’ve discovered. Tag us on social media or leave a comment below. Let’s build a community of snap pea enthusiasts!
This isn’t just about growing snap peas; it’s about embracing a more sustainable, flavorful, and rewarding way of eating. It’s about connecting with your food and experiencing the joy of homegrown goodness. So, grab a bag of snap peas, gather your supplies, and get ready to embark on a delicious adventure. Your very own snap pea kitchen garden awaits!
Frequently Asked Questions (FAQ)
1. What kind of snap peas are best for growing a kitchen garden?
The best snap peas for a kitchen garden are bush varieties, as they tend to be more compact and don’t require extensive trellising. Look for varieties like ‘Sugar Ann,’ ‘Sugar Snap,’ or ‘Super Sugar Snap.’ These are known for their sweetness, productivity, and relatively short growing season. You can typically find seeds for these varieties at your local garden center or online. Avoid pole varieties unless you have ample vertical space and a suitable trellis system.
2. How much sunlight do snap peas need?
Snap peas thrive in full sun, which means they need at least 6-8 hours of direct sunlight per day. If you’re growing them indoors, place them near a south-facing window or supplement with grow lights. Insufficient sunlight can lead to leggy growth, reduced flowering, and smaller, less flavorful pods. If you notice your plants stretching towards the light, it’s a sign they need more sun.
3. What kind of soil is best for snap peas in containers?
Use a well-draining potting mix specifically formulated for containers. Avoid using garden soil, as it can become compacted in containers and hinder drainage. A good potting mix will provide adequate aeration and nutrients for your snap peas. You can also amend the potting mix with compost or other organic matter to improve its fertility and water-holding capacity.
4. How often should I water my snap pea kitchen garden?
Water your snap peas regularly, keeping the soil consistently moist but not waterlogged. Check the soil moisture daily by sticking your finger about an inch deep. If the soil feels dry, it’s time to water. Water deeply, allowing the water to drain out of the bottom of the container. Avoid overhead watering, as this can promote fungal diseases. During hot, dry weather, you may need to water more frequently.
5. Do I need to fertilize my snap peas?
Snap peas are relatively light feeders, but they will benefit from occasional fertilization. Use a balanced, water-soluble fertilizer diluted to half strength. Fertilize every 2-3 weeks, starting when the plants are about 6 inches tall. Avoid over-fertilizing, as this can lead to excessive foliage growth at the expense of pod production. You can also amend the soil with compost or other organic matter to provide a slow-release source of nutrients.
6. How long does it take for snap peas to mature and produce pods?
Snap peas typically mature in 50-70 days from planting. However, this can vary depending on the variety, growing conditions, and climate. You can start harvesting snap peas when the pods are plump and the peas inside are just beginning to develop. Regular harvesting will encourage the plant to produce more pods.
7. What are some common pests and diseases that affect snap peas?
Common pests that can affect snap peas include aphids, pea weevils, and slugs. Aphids can be controlled with insecticidal soap or a strong spray of water. Pea weevils can be picked off by hand or controlled with neem oil. Slugs can be deterred with slug bait or by creating barriers around your plants. Common diseases include powdery mildew and root rot. Powdery mildew can be prevented by ensuring good air circulation and avoiding overhead watering. Root rot can be prevented by using well-draining soil and avoiding overwatering.
8. Can I grow snap peas indoors year-round?
Yes, you can grow snap peas indoors year-round, provided you have adequate light and temperature control. Use grow lights to supplement natural sunlight, especially during the winter months. Maintain a temperature between 60-70°F (15-21°C). Ensure good air circulation to prevent fungal diseases. You may need to hand-pollinate the flowers to ensure pod production.
9. How do I know when my snap peas are ready to harvest?
Snap peas are ready to harvest when the pods are plump, bright green, and the peas inside are just beginning to develop. The pods should be firm and snap easily when bent. Avoid harvesting pods that are yellowing or have become tough. Regular harvesting will encourage the plant to produce more pods.
10. What can I do with my harvested snap peas?
Snap peas can be eaten raw, steamed, stir-fried, or added to salads and soups. They are a versatile and nutritious vegetable that can be enjoyed in a variety of ways. Store harvested snap peas in the refrigerator for up to a week. You can also freeze snap peas for longer storage. Simply blanch them in boiling water for a few minutes, then transfer them to an ice bath to stop the cooking process. Drain well and freeze in airtight containers.

Leave a Comment