

Salt hacks – who knew something so simple could be so powerful? I’m always amazed by the hidden potential in everyday items, and salt is definitely one of those unsung heroes. From the kitchen to the garden, this humble mineral has a surprising number of uses beyond just seasoning our food.
For centuries, salt has been a vital part of human civilization. It was once so valuable that it was used as currency! Think about the Roman soldiers being paid in “salarium” – salt money! While we might not be trading salt for goods these days, its versatility remains undeniable.
Are you tired of struggling with stubborn stains, dealing with pesky pests, or simply looking for ways to make your life a little easier? Then you’re in the right place! This article is packed with incredible salt hacks that will transform the way you think about this common household staple. I’m going to share some of my favorite DIY tricks that will save you time, money, and a whole lot of frustration. Get ready to unlock the hidden potential of salt and discover how it can simplify your everyday life!
Unlocking the Magic of Salt: DIY Hacks for a Better Life
Hey there, fellow DIY enthusiast! Salt. It’s not just for seasoning your fries, you know. This humble mineral is a powerhouse of potential, and I’m here to share some amazing DIY hacks that will transform how you see this kitchen staple. Get ready to be amazed!
Cleaning Powerhouse: Salt to the Rescue!
Salt’s abrasive texture and chemical properties make it a fantastic natural cleaner. Forget harsh chemicals; let’s harness the power of salt!
Cleaning a Scorched Pot or Pan
We’ve all been there – distracted by a phone call or a captivating TV show, only to return to the kitchen and find a burnt mess in our favorite pot. Don’t despair! Salt can help.
1. Assess the Damage: First, let the pot cool down completely. Trying to clean a hot pot is a recipe for disaster (and potential burns!).
2. Generous Salt Application: Pour a generous amount of salt into the bottom of the scorched pot. I usually use about half a cup, but adjust based on the size and severity of the burn.
3. Add a Little Water: Add just enough water to moisten the salt, creating a paste-like consistency. You don’t want it swimming in water.
4. Gentle Scrubbing: Using a non-abrasive sponge or cloth (avoid steel wool, as it can scratch), gently scrub the burnt areas. Apply firm, even pressure. You might need to put some elbow grease into it, especially for stubborn burns.
5. Patience is Key: If the burn is really bad, let the salt paste sit in the pot for a few hours, or even overnight. This will help loosen the burnt residue.
6. Rinse and Repeat: Rinse the pot thoroughly with warm water. If any burnt spots remain, repeat the process.
7. Dish Soap Finish: Once you’ve removed the burnt residue, wash the pot with dish soap and water as usual to remove any lingering salt.
Reviving Tarnished Copper
Copper cookware and decorative items can add a touch of elegance to your home, but they’re prone to tarnishing. Salt, vinegar, and flour to the rescue!
1. Gather Your Supplies: You’ll need salt, white vinegar, flour, a bowl, a soft cloth, and some elbow grease.
2. Make the Cleaning Paste: In the bowl, combine equal parts salt, white vinegar, and flour. Start with about a tablespoon of each and adjust the quantities as needed to create a thick paste. The consistency should be similar to toothpaste.
3. Apply the Paste: Using the soft cloth, apply the paste to the tarnished copper item. Make sure to cover all the tarnished areas.
4. Let it Sit: Allow the paste to sit on the copper for about 15-30 minutes. This gives the vinegar and salt time to work their magic and break down the tarnish.
5. Scrub Gently: After the waiting period, gently scrub the copper item with the cloth. You’ll start to see the tarnish lifting away.
6. Rinse Thoroughly: Rinse the copper item thoroughly with warm water to remove all traces of the cleaning paste.
7. Dry and Polish: Dry the copper item completely with a clean, soft cloth. For an extra shine, you can polish it with a copper polishing cloth.
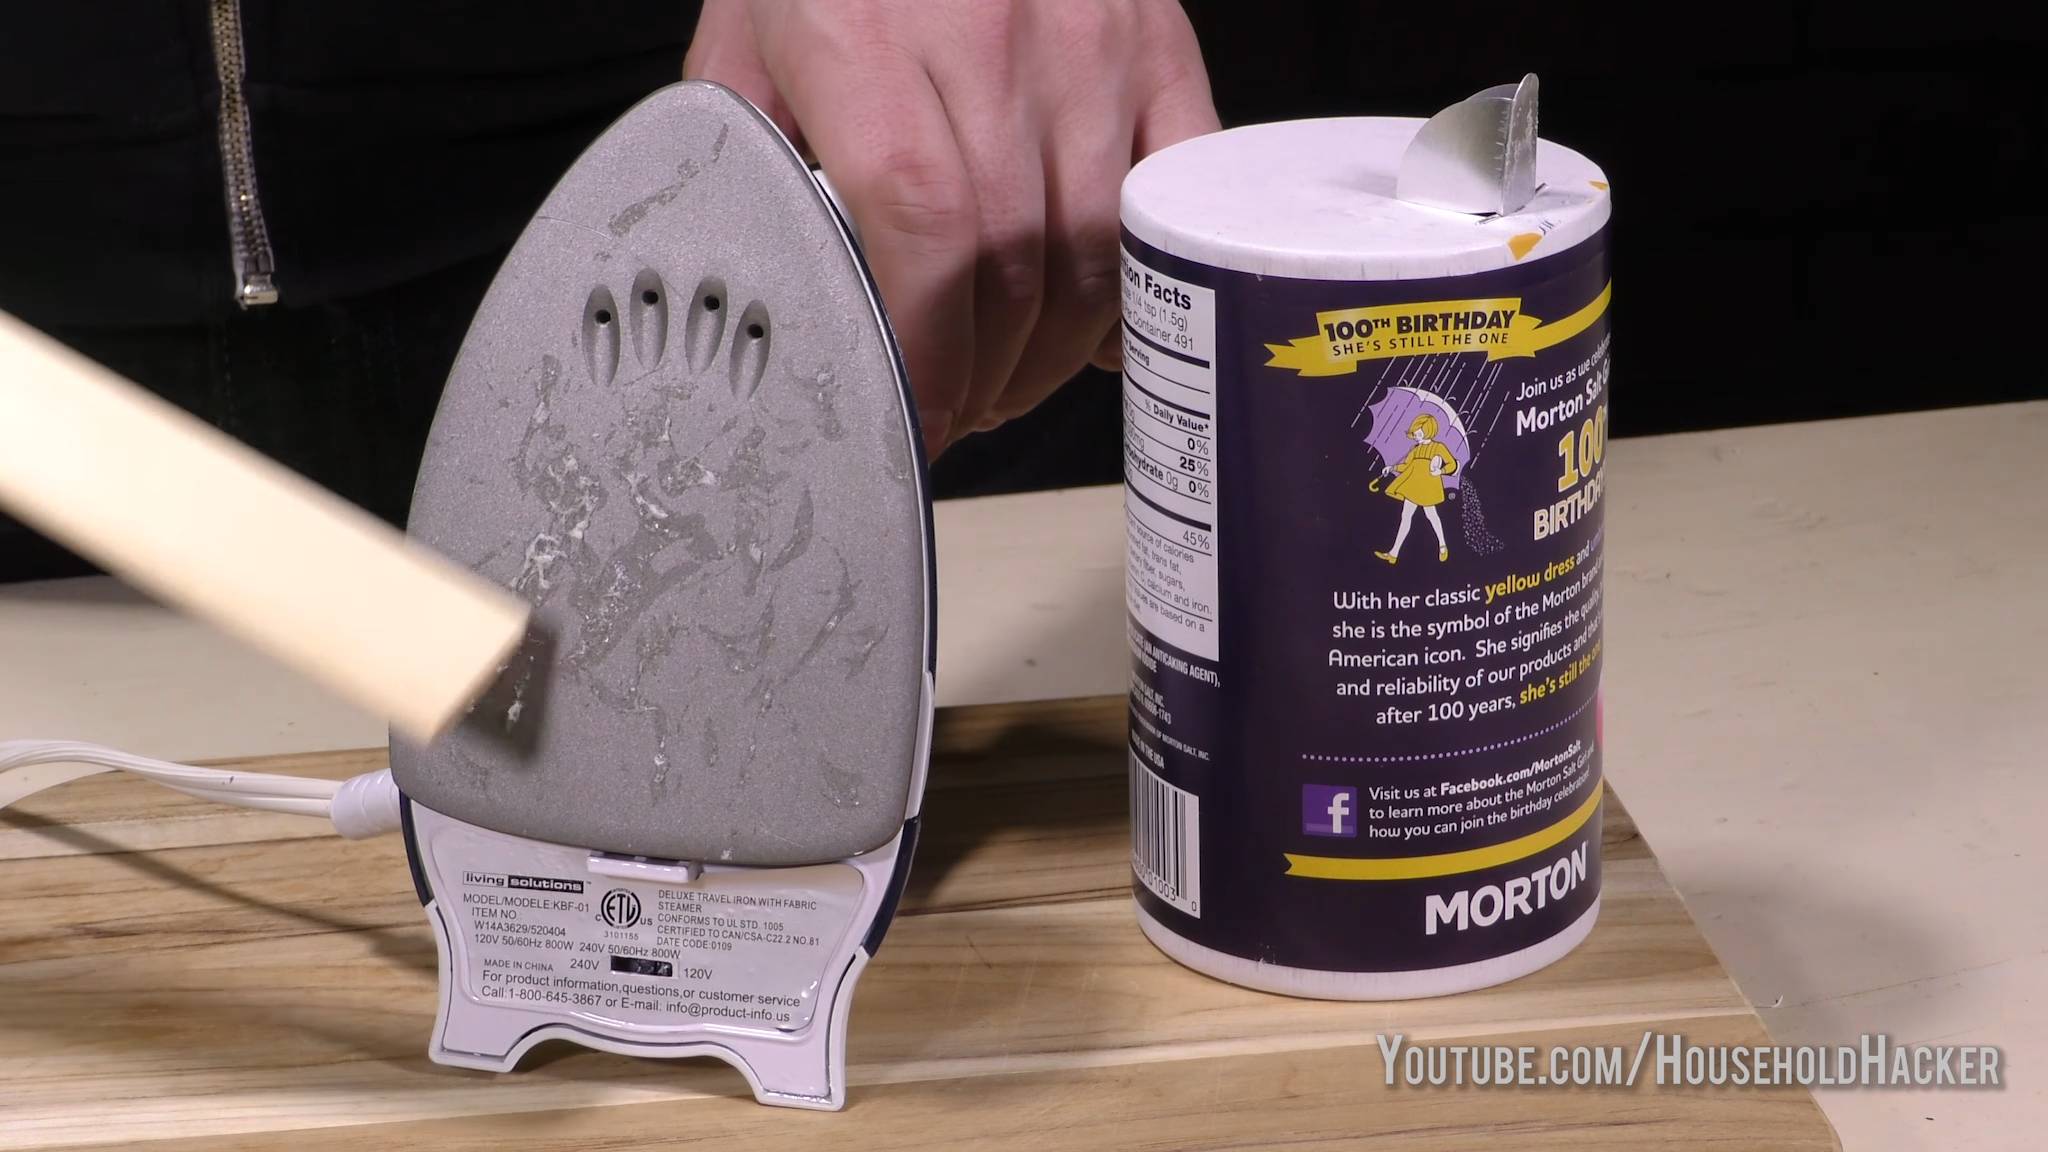
Cleaning Your Iron
A dirty iron can leave marks on your clothes, which is definitely not ideal. Salt can help keep your iron clean and functioning properly.
1. Prepare Your Ironing Board: Cover your ironing board with a clean, cotton cloth or towel.
2. Sprinkle Salt: Generously sprinkle a layer of salt onto the cloth. Make sure the salt is evenly distributed.
3. Heat the Iron: Turn your iron on to the highest setting, but make sure the steam function is turned off.
4. Iron the Salt: Carefully iron over the salt-covered cloth in a circular motion. The salt will help to loosen and remove any residue or buildup on the iron’s soleplate.
5. Wipe Clean: Once you’ve ironed over the salt for a few minutes, turn off the iron and let it cool down slightly. Then, use a clean, damp cloth to wipe the soleplate clean.
6. Repeat if Necessary: If there’s still residue on the iron, repeat the process.
Household Helpers: Salt for Everyday Tasks
Beyond cleaning, salt can be a surprisingly useful tool for a variety of household tasks.
Testing Egg Freshness
Unsure if those eggs in your fridge are still good? Salt can help you find out!
1. Prepare the Water: Fill a glass or bowl with cold water.
2. Add Salt: Add about two tablespoons of salt to the water and stir to dissolve.
3. Submerge the Egg: Gently place the egg in the saltwater solution.
4. Observe: If the egg sinks to the bottom and lies flat, it’s fresh. If it sinks but stands on one end, it’s still good but should be used soon. If it floats, it’s bad and should be discarded. The salt water increases the density of the water, making it easier to determine the egg’s freshness based on its buoyancy.
Extinguishing Grease Fires
Grease fires are scary, but knowing how to handle them can prevent a disaster. Never use water on a grease fire! Salt is a much safer option.
1. Stay Calm: The most important thing is to stay calm. Panicking will only make the situation worse.
2. Turn Off the Heat: Immediately turn off the burner or heat source.
3. Smother the Flames: Carefully pour a generous amount of salt onto the flames. The salt will smother the fire by cutting off the oxygen supply.
4. Cover the Pan: After pouring the salt, cover the pan with a lid or a baking sheet to further smother the flames.
5. Let it Cool: Allow the pan to cool completely before attempting to move it.
Keeping Ants at Bay
Ants can be a real nuisance, especially during the warmer months. Salt can act as a natural deterrent.
1. Identify Ant Entry Points: Observe where the ants are entering your home. Common entry points include cracks in walls, windowsills, and doorways.
2. Create a Salt Barrier: Sprinkle a line of salt along the ant trails and entry points. The salt will disrupt their scent trails and deter them from entering.
3. Reapply as Needed: Reapply the salt barrier every few days, especially after rain or if you notice ants returning.
Beauty and Wellness: Salt’s Surprising Benefits
Believe it or not, salt can also be incorporated into your beauty and wellness routine.
Soothing Sore Throats
A saltwater gargle is a classic remedy for sore throats.
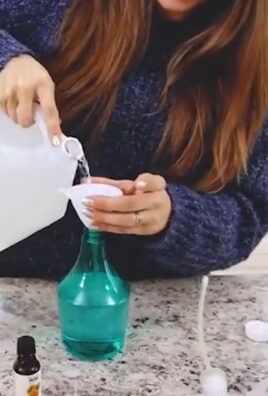
1. Prepare the Solution: Dissolve about half a teaspoon of salt in a glass of warm water.
2. Gargle: Gargle with the saltwater solution for about 30 seconds, making sure to reach the back of your throat.
3. Spit: Spit out the solution. Do not swallow it.
4. Repeat: Repeat the gargling process several times a day, especially after meals. The salt helps to draw out fluid from the inflamed tissues in your throat, providing relief.
Exfoliating Skin Scrub
Salt’s abrasive texture makes it a great natural exfoliant.
1. Choose Your Salt: You can use fine sea salt or Epsom salt for this scrub. Avoid using table salt, as it can be too harsh.
2. Combine with Oil: Mix the salt with a carrier oil, such as olive oil, coconut oil, or almond oil. Use about two parts salt to one part oil.
3. Add Essential Oils (Optional): For added benefits and fragrance, you can add a few drops of your favorite essential oils, such as lavender, peppermint, or eucalyptus.
4. Apply to Skin: Gently massage the scrub onto your skin in a circular motion. Focus on areas that are dry or rough, such as elbows, knees, and feet.
5. Rinse Thoroughly: Rinse your skin thoroughly with warm water.
6. Moisturize: After exfoliating, apply a moisturizer to keep your skin hydrated.
Foot Soak for Tired Feet
A salt foot soak can help soothe tired, achy feet.
1. Prepare the Soak: Fill a basin or tub with warm water.
2. Add Salt: Add about half a cup of Epsom salt or sea salt to the water and stir to dissolve.
3. Soak Your Feet: Soak your feet in the saltwater solution for about 15-20 minutes.
4. Dry and Moisturize:

Conclusion
So, there you have it! These aren’t just salt hacks; they’re game-changers for your home, your beauty routine, and even your cooking. From banishing stubborn stains to creating spa-worthy scrubs, the humble salt shaker holds more power than you ever imagined. The sheer versatility and affordability of salt make these DIY tricks a must-try for anyone looking to simplify their life and embrace a more natural approach to everyday problems.
Why is this a must-try? Because it’s effective, economical, and readily available. You likely already have salt in your pantry, meaning you can start experimenting with these solutions right now. Forget expensive specialty cleaners or complicated beauty treatments; salt offers a simple, natural alternative that delivers impressive results. Plus, many of these hacks are eco-friendly, reducing your reliance on harsh chemicals and contributing to a more sustainable lifestyle.
But don’t stop there! The beauty of these salt hacks lies in their adaptability. Feel free to experiment with different types of salt – coarse sea salt for a more invigorating scrub, Epsom salt for muscle relaxation, or even flavored salts to add a unique twist to your culinary creations. For example, if you’re making a salt scrub, consider adding a few drops of your favorite essential oil for an aromatherapy boost. Lavender for relaxation, peppermint for invigoration, or tea tree for its antibacterial properties – the possibilities are endless. Similarly, when using salt to clean, you can add a squeeze of lemon juice for extra degreasing power and a fresh, citrusy scent.
Another variation to consider is the concentration of salt used. For delicate surfaces, start with a diluted solution and gradually increase the concentration until you achieve the desired results. Always test a small, inconspicuous area first to ensure that the salt doesn’t damage the material. Remember, a little experimentation can go a long way in finding the perfect balance for your specific needs.
We’re confident that once you experience the transformative power of these salt hacks, you’ll wonder how you ever lived without them. They’re simple, effective, and incredibly versatile, making them an indispensable addition to your household arsenal.
Now, it’s your turn! We encourage you to try these DIY salt hacks and discover their magic for yourself. Don’t be afraid to get creative and experiment with different variations to find what works best for you. And most importantly, we want to hear about your experiences! Share your successes, your failures, and any unique twists you’ve added in the comments below. Let’s build a community of salt-savvy individuals who are passionate about simplifying their lives and embracing the power of natural solutions. Your insights could inspire others to discover the amazing potential of salt and unlock a world of possibilities. So, go ahead, grab that salt shaker, and get ready to be amazed! Let us know what you think of these salt hacks.
FAQ
What kind of salt is best for these hacks?
The type of salt you use will depend on the specific hack. For cleaning purposes, regular table salt or sea salt works well. For beauty treatments like scrubs, coarse sea salt or Epsom salt is often preferred for its exfoliating properties. Epsom salt is also great for soothing sore muscles in a bath. For cooking, kosher salt is a popular choice due to its larger crystals and clean taste. Ultimately, it’s best to experiment and see what works best for you and your specific needs. Just be mindful of the texture and purity of the salt, especially when using it on your skin.
Are these salt hacks safe for all surfaces?
Not necessarily. While salt is generally safe, it can be abrasive on certain surfaces. Always test a small, inconspicuous area first before applying salt to the entire surface. Avoid using salt on delicate materials like polished wood, painted surfaces, or certain types of fabrics, as it could cause scratches or discoloration. For these surfaces, a diluted salt solution or a gentler cleaning method may be more appropriate. When in doubt, consult the manufacturer’s instructions or a professional cleaner.
Can I use iodized salt for these hacks?
Yes, you can use iodized salt for most of these hacks. However, some people prefer to use non-iodized salt, especially for cooking, as they believe it has a purer taste. For cleaning and beauty purposes, the iodine content is unlikely to make a significant difference. If you’re concerned about the taste, opt for non-iodized salt for culinary applications.
How often can I use a salt scrub?
It depends on your skin type. If you have sensitive skin, it’s best to limit salt scrubs to once or twice a week. If you have normal or oily skin, you can use them more frequently, up to three or four times a week. Always listen to your skin and adjust the frequency accordingly. If you experience any irritation or redness, reduce the frequency or discontinue use. Remember to moisturize your skin after each scrub to keep it hydrated and healthy.
Can salt really remove stains from fabric?
Yes, salt can be surprisingly effective at removing certain types of stains from fabric, especially fresh stains. Salt works by absorbing the stain and preventing it from setting into the fibers. For best results, apply salt to the stain as soon as possible and let it sit for several hours or even overnight. Then, vacuum or brush away the salt and launder the garment as usual. Salt is particularly effective on stains like red wine, grease, and blood. However, it may not be as effective on older, set-in stains.
Is it safe to ingest salt water for a sore throat?
Gargling with salt water is a common remedy for a sore throat, and it’s generally considered safe for adults and older children. The salt helps to draw out fluid from the tissues in the throat, which can reduce inflammation and pain. However, it’s important to use the correct concentration of salt – too much salt can be irritating, while too little may not be effective. A good rule of thumb is to dissolve about 1/4 teaspoon of salt in 8 ounces of warm water. Be sure to gargle the solution and spit it out; do not swallow it. If your sore throat persists or worsens, consult a doctor.
Can salt help with ant problems?
Yes, salt can be a natural and effective way to deter ants. Ants are repelled by salt, so sprinkling salt along their trails or around entry points can help to keep them away. You can also create a salt water solution and spray it directly on ants or their nests. While salt may not completely eliminate an ant infestation, it can be a helpful deterrent and a more natural alternative to chemical pesticides.
Are there any risks associated with using salt for cleaning?
While salt is generally safe for cleaning, there are a few risks to be aware of. As mentioned earlier, salt can be abrasive on certain surfaces, so it’s important to test it in an inconspicuous area first. Also, avoid using salt on electrical appliances or electronics, as it could cause damage. Finally, be careful when using salt around children and pets, as they may be tempted to ingest it. Keep salt out of their reach and supervise them closely when using it for cleaning.
How long will these salt hacks last?
The longevity of these salt hacks depends on the specific application. For example, a salt scrub will only last for a single use, while a salt solution used for cleaning can be stored for a few days. In general, it’s best to prepare these solutions fresh each time to ensure their effectiveness. However, if you do need to store them, keep them in a sealed container in a cool, dark place. Be sure to label the container clearly and discard any solutions that show signs of spoilage.

Leave a Comment