

Growing Red Cabbage might seem intimidating, but trust me, it’s a rewarding experience that adds a vibrant splash of color and nutrition to your garden and your plate! Have you ever dreamt of harvesting your own beautiful, deep purple heads of cabbage, ready to be transformed into delicious slaws, braised dishes, or even fermented delights? This isn’t just about gardening; it’s about connecting with a tradition that stretches back centuries.
Cabbage, in general, has been cultivated for thousands of years, with roots tracing back to wild cabbage varieties along the Mediterranean coast. Red cabbage, specifically, offers not only a unique visual appeal but also boasts higher levels of antioxidants than its green counterparts. But let’s be honest, sometimes getting those perfect, tightly packed heads can feel like a real challenge. That’s where this DIY guide comes in!
I’m going to share my favorite home gardening tricks and hacks that will help you succeed in growing red cabbage, even if you’re a beginner. We’ll cover everything from soil preparation and seed starting to pest control and harvesting. Forget expensive store-bought cabbage; with a little know-how, you can enjoy fresh, organic red cabbage straight from your backyard. Let’s get started and unlock the secrets to a bountiful red cabbage harvest!
Growing Red Cabbage: A Beginner’s Guide to a Vibrant Harvest
Okay, so you want to grow red cabbage? Awesome! It’s a fantastic addition to any garden, adding a pop of color and a whole lot of nutrients to your plate. I’ve grown red cabbage for years, and I’m excited to share my tips and tricks with you. Don’t worry if you’re a beginner; this guide will walk you through everything you need to know, from seed to harvest.
Choosing the Right Variety
Before we dive into the nitty-gritty, let’s talk about choosing the right red cabbage variety. There are a few popular options, each with its own characteristics:
* ‘Red Acre’: This is a classic choice, known for its good storage ability and medium-sized heads. It matures relatively quickly, making it a great option for shorter growing seasons.
* ‘Ruby Ball’: If you’re looking for a smaller, more compact cabbage, ‘Ruby Ball’ is an excellent choice. It’s also known for its vibrant color and sweet flavor.
* ‘Red Express’: As the name suggests, this variety is a fast grower, perfect if you’re impatient like me! It produces smaller heads, but they’re packed with flavor.
* ‘Primero Red’: This is an early maturing variety, great for getting a head start on the season. It’s known for its good disease resistance.
I usually go with ‘Red Acre’ because it stores well, but feel free to experiment and find the variety that works best for you and your climate.
Starting Your Red Cabbage
You can either start your red cabbage seeds indoors or directly sow them in your garden. I prefer starting them indoors because it gives them a head start and protects them from pests when they’re most vulnerable.
Starting Seeds Indoors
1. Gather Your Supplies: You’ll need seed starting trays or small pots, seed starting mix (not regular potting soil!), red cabbage seeds, a spray bottle, and a grow light (optional, but highly recommended).
2. Sow the Seeds: Fill your trays or pots with seed starting mix, leaving about half an inch of space at the top. Moisten the mix with your spray bottle – you want it damp, not soggy. Sow 2-3 seeds per cell or pot, about ¼ inch deep. Gently cover the seeds with more mix and lightly water again.
3. Provide Warmth and Light: Red cabbage seeds germinate best in warm conditions (around 65-75°F). Place your trays or pots in a warm location, like on top of your refrigerator or near a heat vent. If you have a grow light, position it a few inches above the trays. This will prevent the seedlings from becoming leggy.
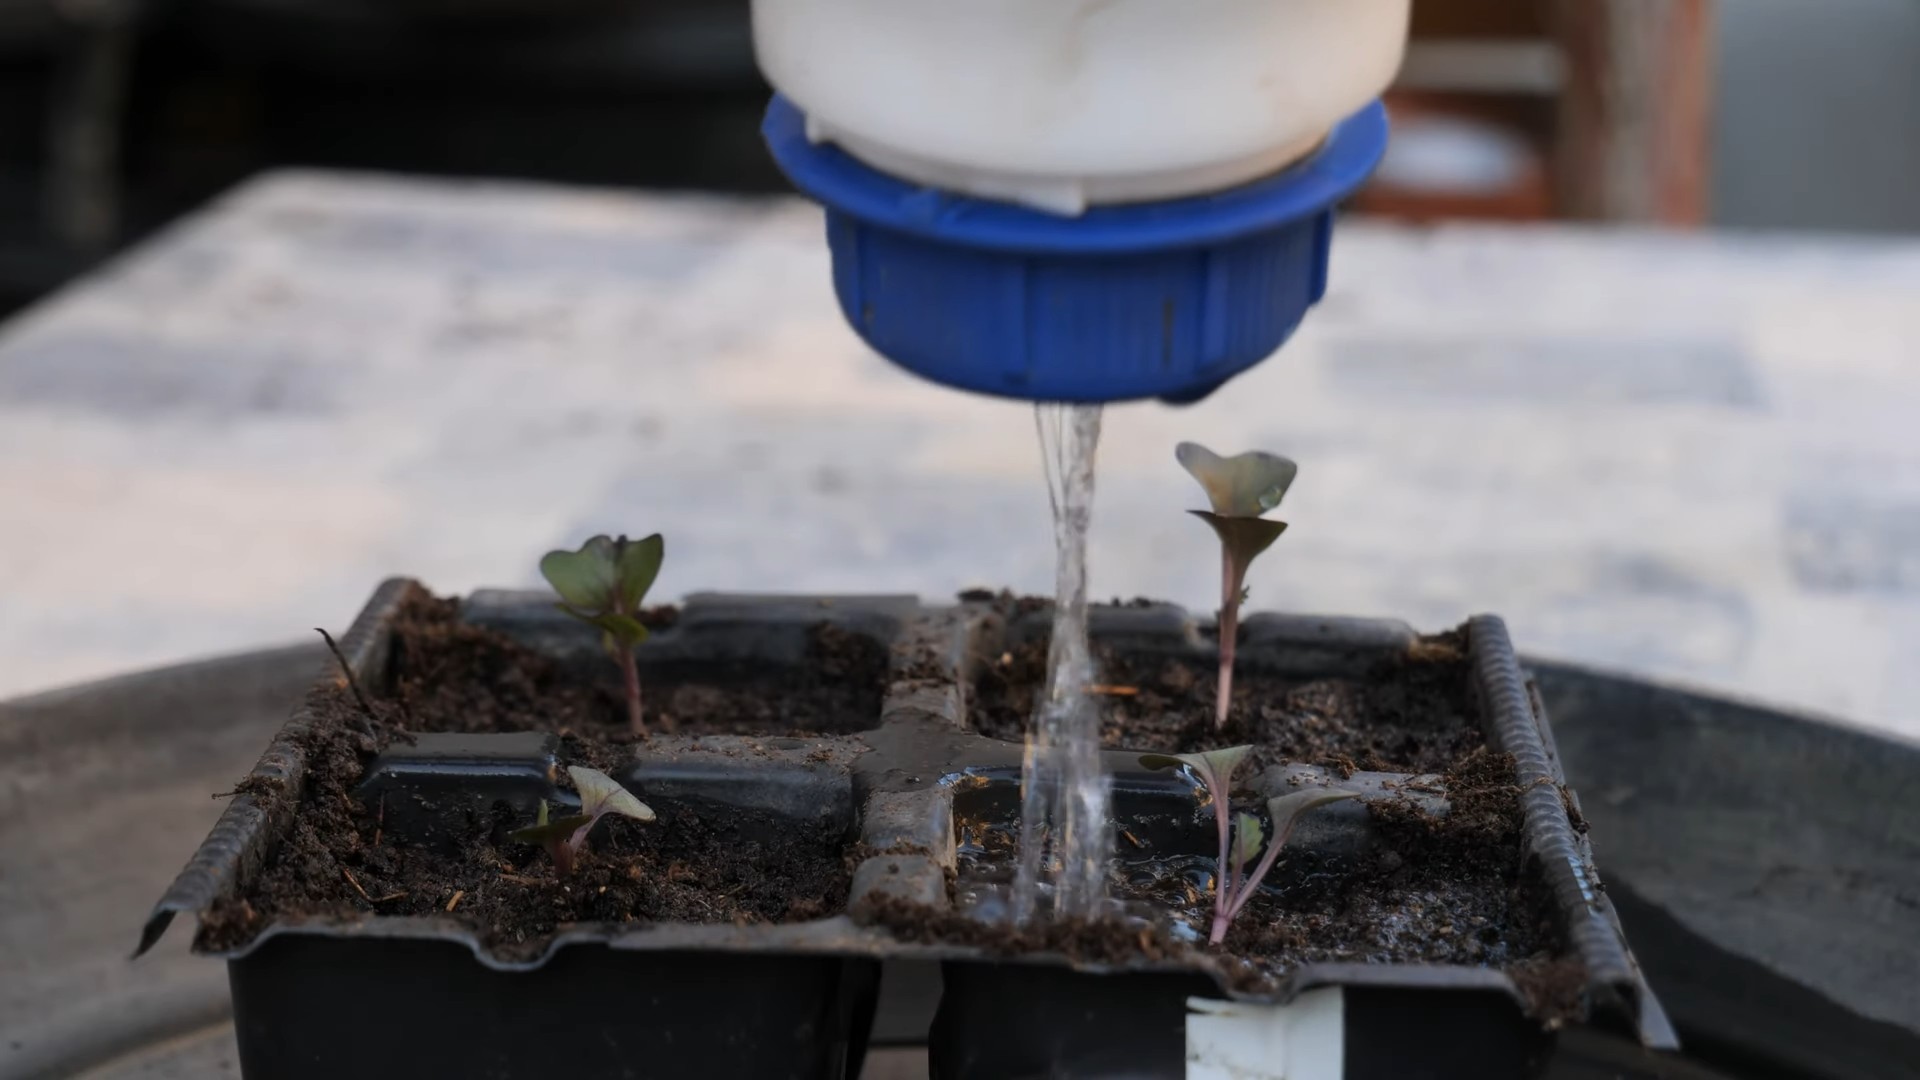
4. Keep the Soil Moist: Check the soil moisture daily and water as needed to keep it consistently damp. Don’t let it dry out completely, but also avoid overwatering, which can lead to damping off (a fungal disease that kills seedlings).
5. Thin the Seedlings: Once the seedlings have emerged and have a couple of true leaves (the second set of leaves), thin them to one seedling per cell or pot. Snip off the weaker seedlings at the soil line with scissors – don’t pull them out, as this can disturb the roots of the remaining seedling.
6. Harden Off the Seedlings: About a week before you plan to transplant your seedlings outdoors, you’ll need to harden them off. This process gradually acclimates them to outdoor conditions. Start by placing the trays or pots outdoors in a sheltered location for a few hours each day, gradually increasing the amount of time they spend outside. Protect them from direct sunlight and strong winds.
Direct Sowing
If you live in a region with a long growing season, you can directly sow your red cabbage seeds in your garden.
1. Prepare the Soil: Choose a sunny location with well-drained soil. Amend the soil with compost or other organic matter to improve its fertility and drainage.
2. Sow the Seeds: Sow the seeds about ¼ inch deep and 1-2 inches apart in rows that are 18-24 inches apart.
3. Keep the Soil Moist: Water the soil regularly to keep it consistently damp.
4. Thin the Seedlings: Once the seedlings have emerged and have a couple of true leaves, thin them to one seedling every 18-24 inches.
Transplanting Your Red Cabbage Seedlings
Whether you started your seeds indoors or bought seedlings from a nursery, transplanting them into your garden is a crucial step.
1. Choose the Right Time: Transplant your red cabbage seedlings outdoors when they are about 4-6 weeks old and have 4-6 true leaves. The last frost date should have passed, and the soil should be warm enough to work.
2. Prepare the Planting Site: Choose a sunny location with well-drained soil. Red cabbage needs at least 6 hours of sunlight per day. Amend the soil with compost or other organic matter to improve its fertility and drainage. Cabbage prefers a slightly acidic soil pH of 6.0 to 7.0.
3. Dig the Holes: Dig holes that are slightly larger than the root balls of your seedlings, spacing them 18-24 inches apart.
4. Transplant the Seedlings: Gently remove the seedlings from their trays or pots, being careful not to damage the roots. Place each seedling in a hole and backfill with soil, gently firming it around the base of the plant.
5. Water Thoroughly: Water the newly transplanted seedlings thoroughly to help them settle in.
6. Mulch: Apply a layer of mulch around the plants to help retain moisture, suppress weeds, and regulate soil temperature. I like to use straw or shredded leaves.
Caring for Your Red Cabbage Plants
Once your red cabbage plants are in the ground, it’s important to provide them with the care they need to thrive.
1. Watering: Red cabbage needs consistent moisture, especially during hot, dry weather. Water deeply and regularly, aiming to keep the soil consistently damp but not soggy. Avoid overhead watering, as this can promote fungal diseases.
2. Fertilizing: Red cabbage is a heavy feeder, so it’s important to fertilize it regularly. Apply a balanced fertilizer (like 10-10-10) every 2-3 weeks, following the instructions on the package. You can also side-dress with compost or other organic matter.
3. Weeding: Keep the area around your red cabbage plants free of weeds, as weeds can compete with the plants for nutrients and water. Hand-pull weeds regularly or use a hoe to cultivate the soil.
4. Pest Control: Red cabbage is susceptible to several pests, including cabbage worms, aphids, and flea beetles. Inspect your plants regularly for signs of infestation and take action promptly.
* Cabbage Worms: These green caterpillars can quickly devour your cabbage leaves. Hand-pick them off the plants or use Bacillus thuringiensis (Bt), a natural insecticide that is effective against cabbage worms.
* Aphids: These small, sap-sucking insects can weaken your plants. Spray them off with a strong stream of water or use insecticidal soap.
* Flea Beetles: These tiny beetles can create small holes in your cabbage leaves. Cover your plants with row covers to prevent flea beetles from reaching them.
5. Disease Control: Red cabbage can also be affected by several diseases, including black rot and clubroot.
* Black Rot: This bacterial disease can cause yellowing and wilting of the leaves. Plant disease-resistant varieties and avoid overhead watering to prevent black rot.
* Clubroot: This fungal disease causes swollen, distorted roots. Rotate your crops and amend the soil with lime to raise the pH to prevent clubroot.
Harvesting Your Red Cabbage
The moment you’ve been waiting for! Harvesting your red cabbage is the reward for all your hard work.
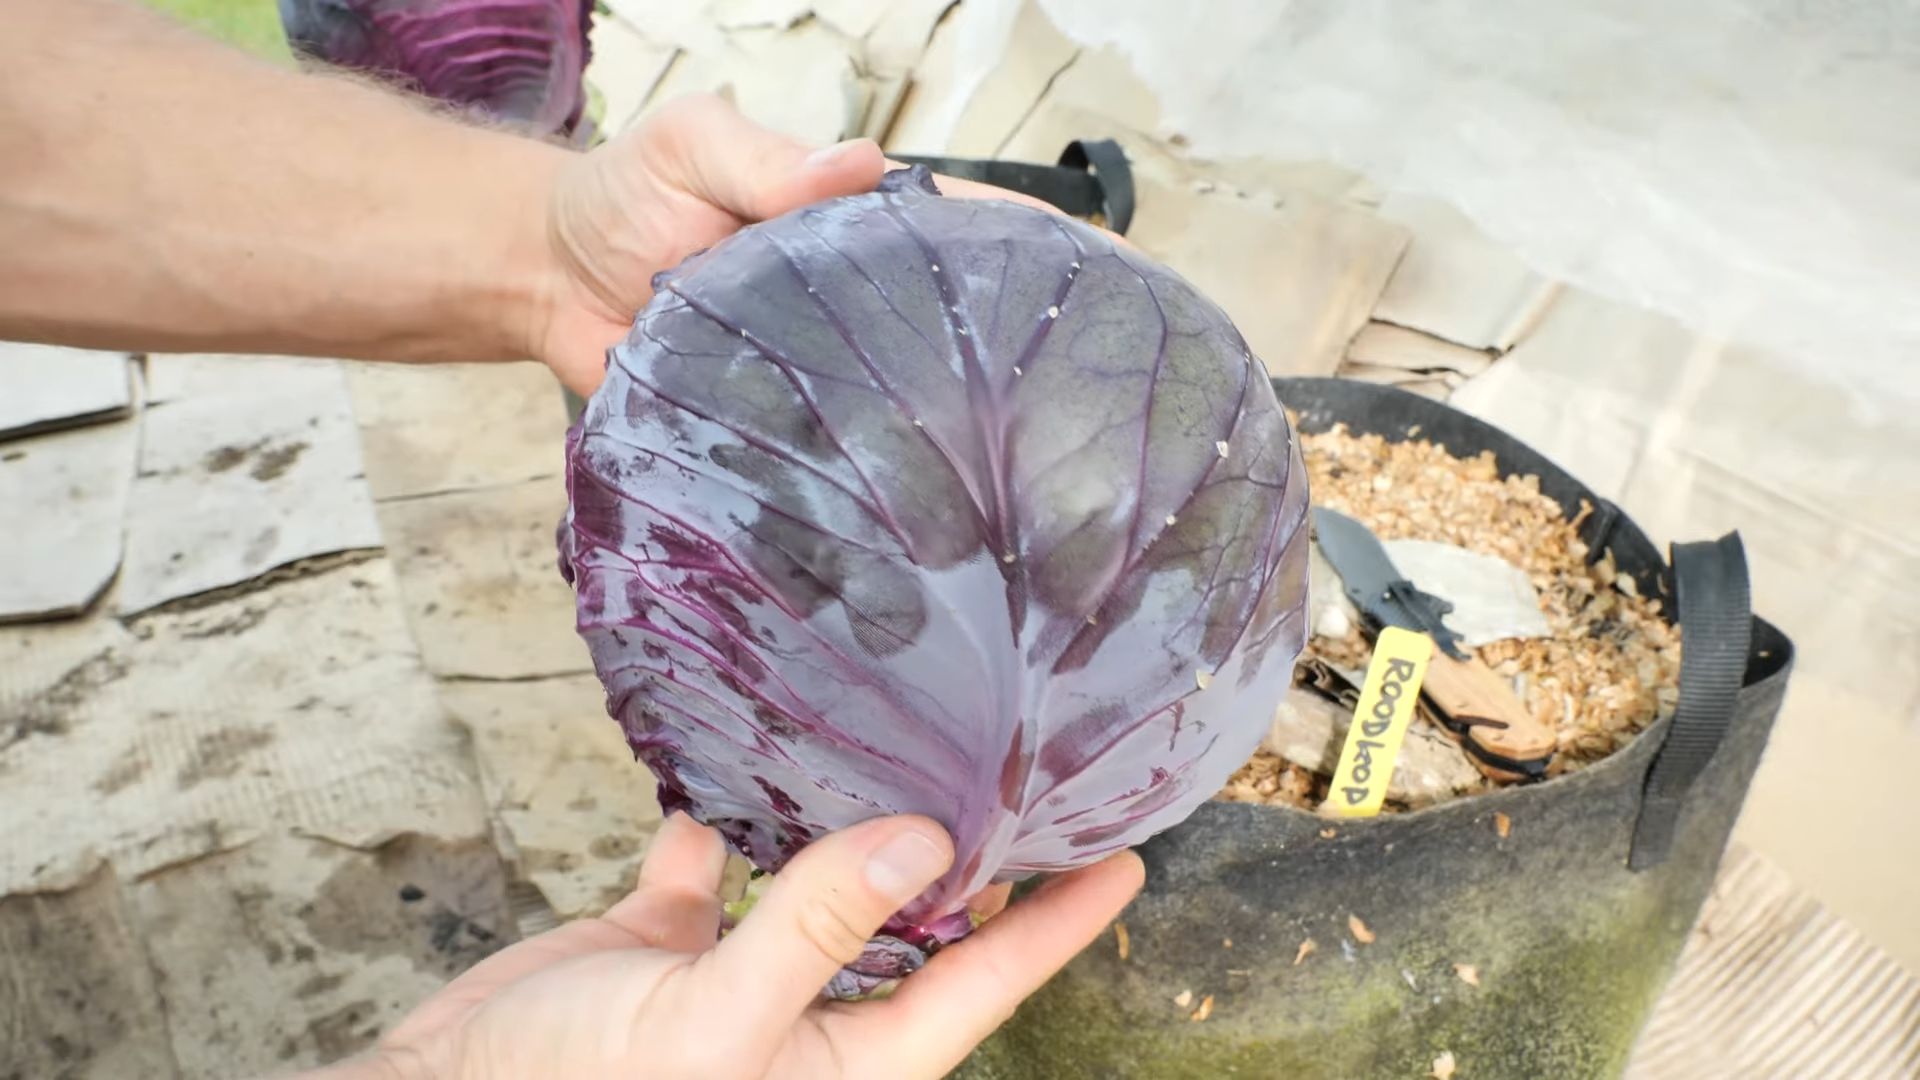
1. When to Harvest: Red cabbage is typically ready to harvest 70-100 days after transplanting, depending on the variety. The heads should be firm and solid, and the color should be deep and vibrant.
2. How to Harvest: Use a sharp knife to cut the cabbage head from the stem, leaving a few outer leaves attached.
3. Storage: Red cabbage can be stored in a cool, dry place for several weeks. Wrap the heads in newspaper or plastic wrap to prevent them from drying out. You can also shred and freeze red cabbage for longer storage.
Troubleshooting
Even with the best care, you might encounter some problems while growing red cabbage. Here are a few common issues and how to address them:
* Heads Not Forming: If your red cabbage plants are growing well but not forming heads, it could be due to a lack of nutrients or water. Make sure you’re fertilizing and watering regularly.
*
Conclusion
So, there you have it! Growing red cabbage at home, while it might seem daunting at first, is a surprisingly rewarding experience. We’ve walked you through the entire process, from selecting the right seeds and preparing your soil to nurturing your seedlings and harvesting your vibrant, homegrown red cabbage. But why should you bother with all this effort when you can simply buy red cabbage at the store?
The answer lies in the unparalleled freshness and flavor you simply can’t replicate with store-bought produce. Imagine the crisp, slightly peppery taste of a red cabbage you’ve nurtured from seed, knowing exactly where it came from and how it was grown. Think of the vibrant color it will add to your salads, slaws, and stir-fries – a visual feast as well as a culinary delight.
Beyond the superior taste and appearance, growing your own red cabbage offers a connection to nature and a sense of accomplishment that is deeply satisfying. It’s a chance to get your hands dirty, learn about the natural world, and enjoy the fruits (or rather, vegetables) of your labor. Plus, you’ll be reducing your carbon footprint by avoiding the transportation and packaging associated with commercially grown produce.
But the benefits don’t stop there. When you grow your own red cabbage, you have complete control over the growing process. You can choose to use organic methods, avoiding harmful pesticides and herbicides. You can select varieties that are best suited to your local climate and soil conditions. And you can harvest your cabbage at its peak ripeness, ensuring maximum flavor and nutritional value.
This DIY red cabbage growing trick is a must-try for anyone who values fresh, flavorful, and sustainable food.
Feeling adventurous? Consider experimenting with different varieties of red cabbage. ‘Red Acre’ is a popular choice for its early maturity and good storage qualities. ‘Ruby Perfection’ is known for its deep red color and excellent flavor. ‘Langedijker Dauer’ is a late-maturing variety that is ideal for winter storage.
You can also try companion planting to improve the health and yield of your red cabbage. Plant it alongside herbs like rosemary, thyme, and sage to deter pests. Marigolds are also effective at repelling nematodes and other soil-borne pests.
And don’t forget about the versatility of red cabbage in the kitchen! Use it in salads, slaws, stir-fries, soups, and stews. Pickle it for a tangy condiment. Or ferment it into sauerkraut for a probiotic-rich treat. The possibilities are endless!
We encourage you to give this DIY red cabbage growing trick a try. It’s easier than you might think, and the rewards are well worth the effort. Once you’ve tasted the difference between homegrown and store-bought red cabbage, you’ll never go back.
So, grab your seeds, prepare your soil, and get ready to embark on a rewarding gardening adventure. And don’t forget to share your experiences with us! We’d love to hear about your successes, your challenges, and your favorite ways to use your homegrown red cabbage. Share your photos and stories on social media using #HomegrownRedCabbage and inspire others to join the movement. Happy gardening!
Frequently Asked Questions (FAQ)
What is the best time of year to plant red cabbage?
The best time to plant red cabbage depends on your climate. In general, red cabbage is a cool-season crop that thrives in temperatures between 60°F and 70°F (15°C and 21°C). For spring crops, start seeds indoors 6-8 weeks before the last expected frost. Transplant seedlings outdoors 2-3 weeks before the last frost. For fall crops, start seeds indoors in mid-summer and transplant seedlings outdoors in late summer or early fall. Check your local frost dates to determine the best planting time for your area.
How much sunlight does red cabbage need?
Red cabbage needs at least 6 hours of direct sunlight per day to thrive. Choose a planting location that receives full sun for optimal growth and color development. If you live in a hot climate, some afternoon shade may be beneficial to prevent the cabbage from bolting (going to seed prematurely).
What kind of soil is best for growing red cabbage?
Red cabbage prefers well-drained, fertile soil that is rich in organic matter. The ideal soil pH is between 6.0 and 7.0. Before planting, amend your soil with compost, aged manure, or other organic matter to improve its fertility and drainage. You can also add a slow-release fertilizer to provide essential nutrients throughout the growing season.
How often should I water red cabbage?
Red cabbage needs consistent moisture to thrive. Water deeply and regularly, especially during dry periods. Aim to keep the soil consistently moist but not waterlogged. Mulching around the plants can help to retain moisture and suppress weeds. Check the soil moisture regularly by sticking your finger into the soil. If the top inch feels dry, it’s time to water.
What are some common pests and diseases that affect red cabbage?
Red cabbage is susceptible to a variety of pests and diseases, including cabbage worms, aphids, flea beetles, clubroot, and black rot. To prevent pest and disease problems, practice good garden hygiene, such as removing plant debris and weeds. Use row covers to protect young plants from pests. Inspect your plants regularly for signs of pests or diseases and take action promptly. Organic pest control methods, such as insecticidal soap and neem oil, can be effective against many common pests. Choose disease-resistant varieties whenever possible.
How do I know when my red cabbage is ready to harvest?
Red cabbage is typically ready to harvest 70-100 days after transplanting, depending on the variety. The head should be firm and solid to the touch. Check the size of the head against the expected size for the variety you are growing. To harvest, use a sharp knife to cut the head from the stem, leaving a few outer leaves intact.
How do I store red cabbage?
Red cabbage can be stored for several months if properly stored. Choose heads that are firm, solid, and free from blemishes. Wrap the heads individually in newspaper or plastic wrap and store them in a cool, dark, and humid place, such as a root cellar or refrigerator. The ideal storage temperature is between 32°F and 40°F (0°C and 4°C). Check the cabbage regularly for signs of spoilage and remove any damaged leaves.
Can I grow red cabbage in containers?
Yes, you can grow red cabbage in containers, but you’ll need to choose a large container that is at least 12 inches in diameter and 12 inches deep. Use a well-draining potting mix and provide regular watering and fertilization. Container-grown red cabbage may require more frequent watering than plants grown in the ground.
What are some good companion plants for red cabbage?
Good companion plants for red cabbage include herbs like rosemary, thyme, and sage, which can help to deter pests. Marigolds are also effective at repelling nematodes and other soil-borne pests. Other beneficial companion plants include dill, chamomile, and onions. Avoid planting red cabbage near other members of the brassica family, such as broccoli, cauliflower, and kale, as they can attract the same pests and diseases.
My red cabbage is not turning red. What could be the problem?
The red color in red cabbage is due to anthocyanins, which are pigments that are affected by soil pH. If your soil is too alkaline (high pH), the cabbage may not develop its characteristic red color. Test your soil pH and amend it with sulfur or other acidifying agents if necessary. Also, ensure that your plants are receiving enough sunlight, as sunlight is essential for anthocyanin production. Some varieties are also naturally more intensely colored than others.
Leave a Comment