

Regrow celery from scraps? Yes, you read that right! Imagine never having to buy celery again, or at least, significantly reducing your grocery bill. It sounds like magic, but it’s a simple and rewarding DIY project that anyone can do, even if you don’t have a green thumb. For centuries, resourceful gardeners have been finding ways to propagate plants from cuttings and scraps, a practice rooted in both necessity and a deep connection to the earth. Think of the victory gardens of World War II, where every scrap was utilized to feed families and communities.
Today, we’re bringing that same spirit of resourcefulness to your kitchen counter. Why spend money on celery when you can easily regrow celery from scraps? This isn’t just about saving a few dollars; it’s about reducing food waste, connecting with nature, and experiencing the satisfaction of nurturing new life. Plus, it’s a fantastic project to do with kids, teaching them about plant life cycles and the importance of sustainability. In this article, I’ll guide you through the easy steps to transform that leftover celery base into a thriving plant, bringing fresh, crunchy goodness right to your table. Let’s get started!
Regrow Celery From Scraps: A Beginner’s Guide
Hey there, fellow eco-conscious DIYers! Are you tired of throwing away the base of your celery stalks? Did you know you can actually regrow celery from those seemingly useless scraps? It’s a super easy and rewarding project, perfect for beginners and a fantastic way to reduce food waste. I’m going to walk you through the whole process, step-by-step, so you can have your own little celery farm going in no time!
What You’ll Need
Before we dive in, let’s gather our supplies. Don’t worry, you probably already have most of these things lying around:
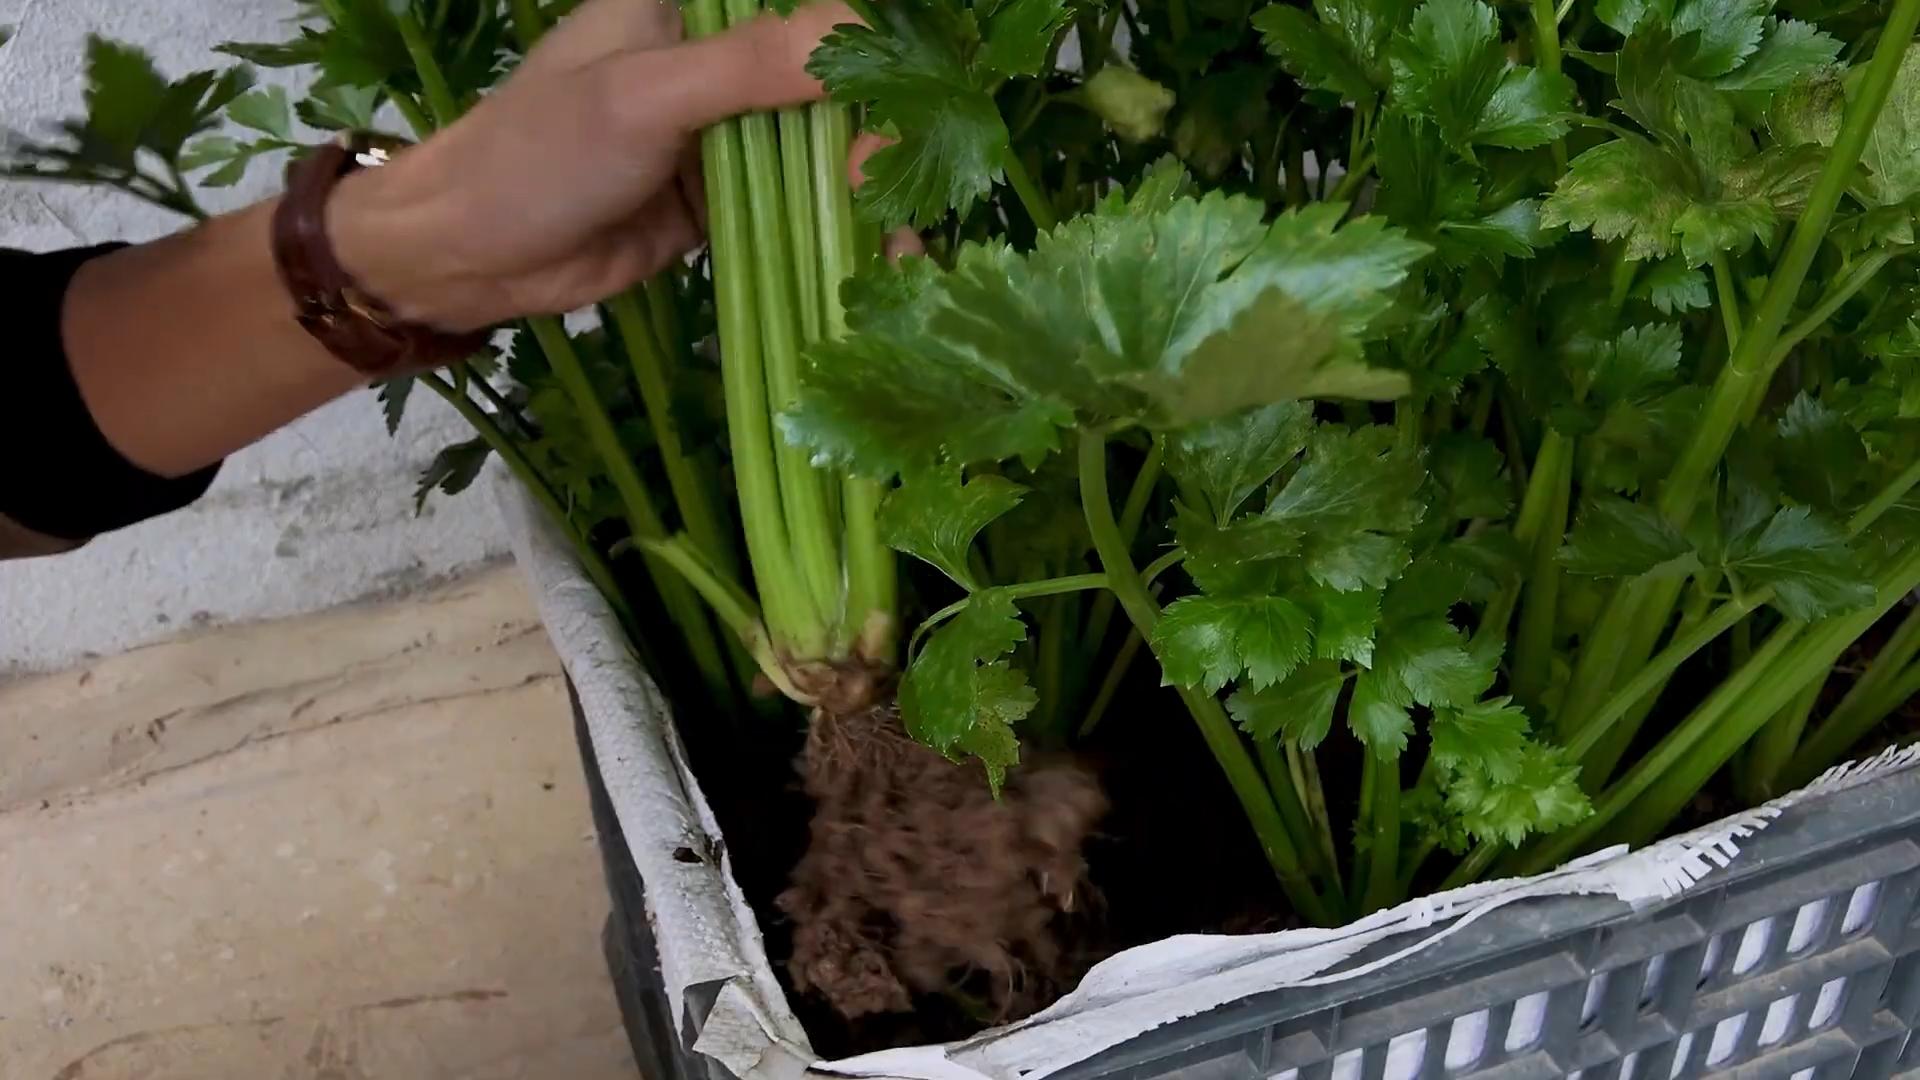
- Celery Base: The bottom 2-3 inches of a celery stalk, where the stalks are connected. Make sure it’s firm and healthy-looking, not mushy or slimy.
- Shallow Dish or Bowl: Something to hold water and the celery base. A pie plate, a small Tupperware container, or even a saucer will work.
- Water: Tap water is fine!
- Spray Bottle (Optional): For misting the celery.
- Potting Soil: Once the roots develop, you’ll need potting soil to plant your celery.
- Pot: Choose a pot that’s at least 6 inches in diameter to give your celery enough room to grow.
- Sunny Location: Celery loves sunshine! A windowsill or a spot in your garden that gets at least 6 hours of sunlight a day is ideal.
Phase 1: Rooting Your Celery Base
This is where the magic happens! We’re going to coax those little roots out of the celery base.
- Prepare the Celery Base: First, give your celery base a little trim. Cut the stalks down to about 1-2 inches above the base. This will encourage the plant to focus its energy on root growth rather than trying to support those long stalks.
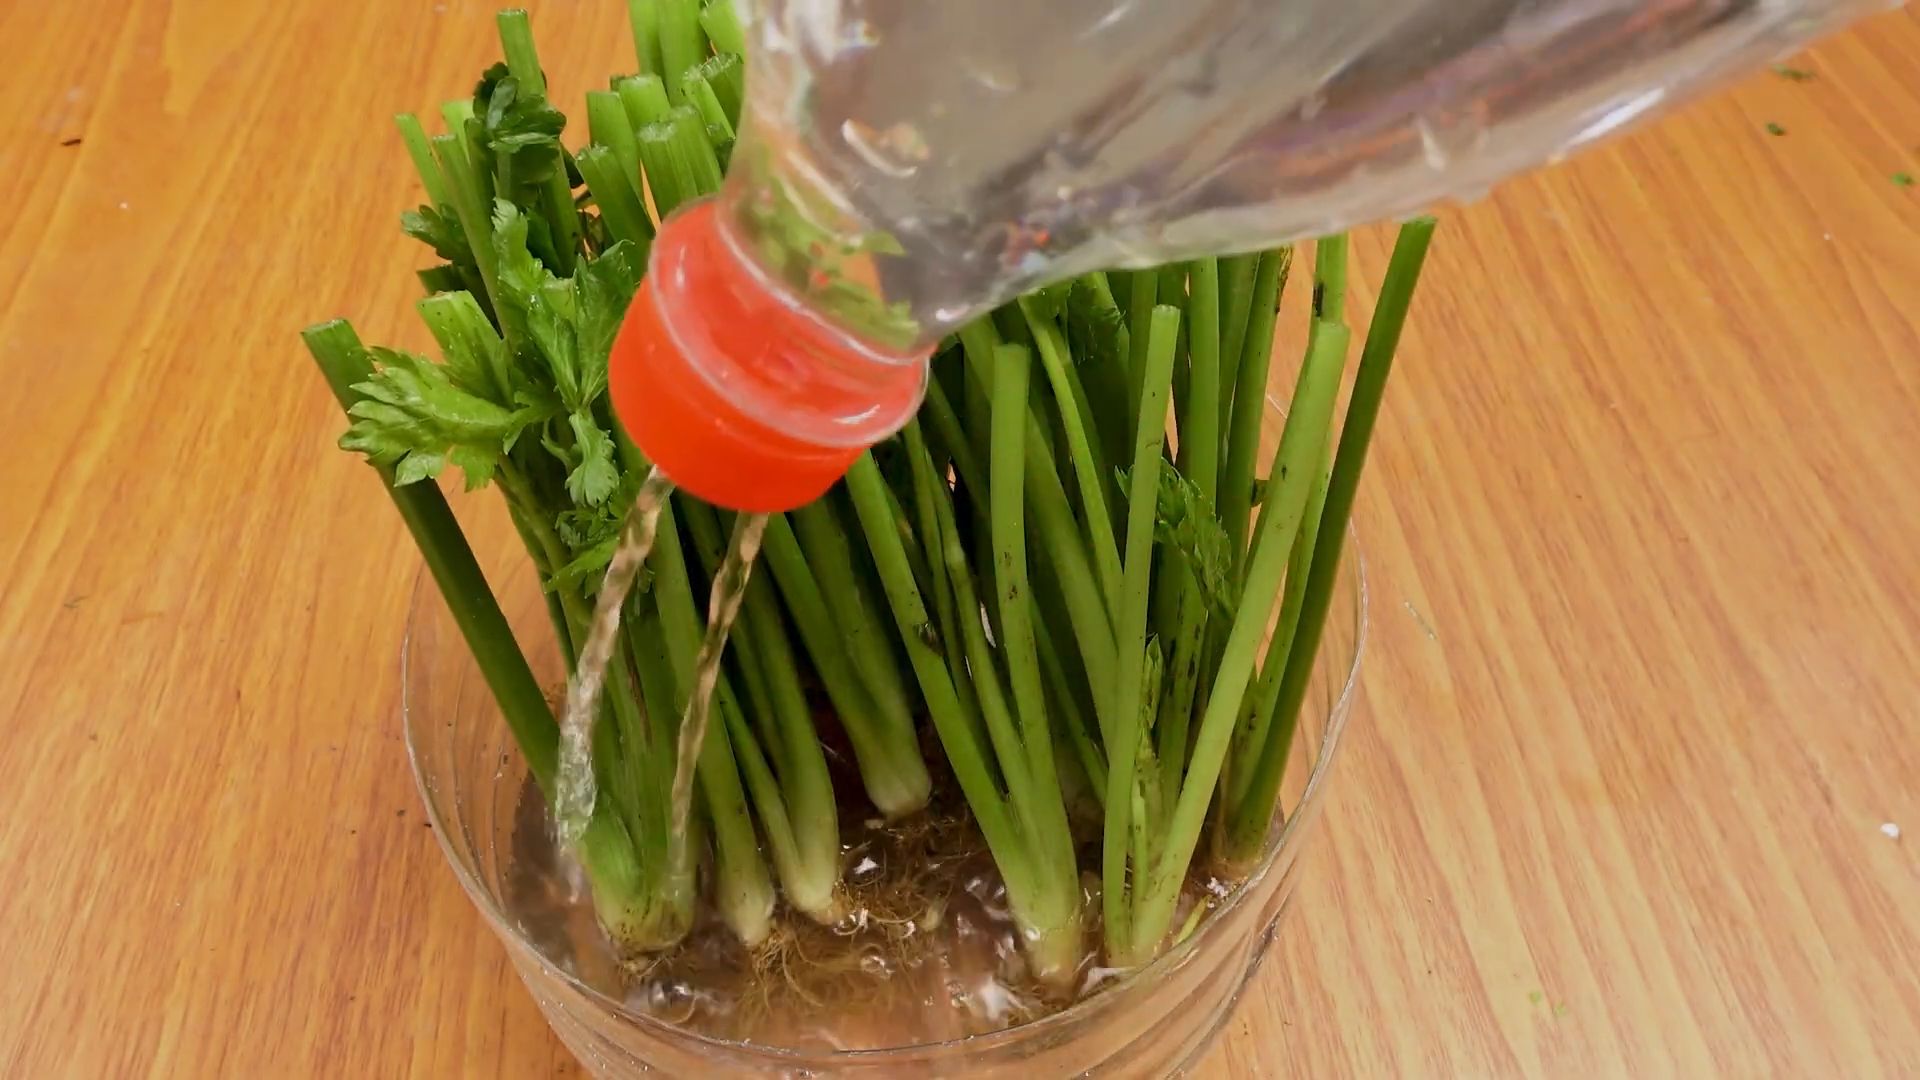
- Place in Water: Now, put the celery base in your shallow dish or bowl. Add enough water so that the bottom inch or so of the base is submerged. Be careful not to completely cover the base, as this can lead to rot.
- Find a Sunny Spot: Place the dish with the celery base in a bright, sunny location. A windowsill that gets plenty of sunlight is perfect.
- Change the Water Regularly: This is important! Change the water every 1-2 days to keep it fresh and prevent bacteria from growing. This will also provide the celery with fresh oxygen.
- Mist the Top (Optional): If you live in a dry climate, you can mist the top of the celery base with water every day or two to keep it from drying out.
- Be Patient: It usually takes about 5-7 days for roots to start appearing. You’ll see small, white roots emerging from the bottom of the celery base. Don’t get discouraged if it takes a little longer; just keep changing the water and providing sunlight.
Phase 2: Planting Your Celery
Once you have a good set of roots (about an inch or two long), it’s time to move your celery to a pot with soil.
- Prepare the Pot: Fill your pot with potting soil, leaving about an inch of space at the top. Gently pat the soil down to remove any air pockets.
- Make a Hole: Use your finger or a small trowel to create a hole in the center of the pot, large enough to accommodate the celery base and its roots.
- Plant the Celery: Carefully remove the celery base from the water and gently place it in the hole. Make sure the roots are spread out and not bunched together.
- Cover with Soil: Fill the hole with soil, covering the celery base up to where the stalks begin. Gently pat the soil around the base to secure it in place.
- Water Thoroughly: Water the soil thoroughly until water drains out of the bottom of the pot. This will help settle the soil and provide the celery with the moisture it needs.
Phase 3: Caring for Your Regrown Celery
Now that your celery is planted, it’s time to give it the TLC it needs to thrive.
- Sunlight: Continue to keep your celery in a sunny location. It needs at least 6 hours of sunlight per day to grow properly.
- Watering: Celery needs consistent moisture, but it doesn’t like to be waterlogged. Water your celery when the top inch of soil feels dry to the touch. Avoid overwatering, as this can lead to root rot.
- Fertilizing (Optional): If you want to give your celery a boost, you can fertilize it every few weeks with a balanced liquid fertilizer. Follow the instructions on the fertilizer package.
- Harvesting: You can start harvesting your celery when the stalks are about 6-8 inches tall. Simply cut off the stalks you need, leaving the base intact. The celery will continue to grow and produce more stalks.
- Pest Control: Keep an eye out for pests like aphids or slugs. If you notice any pests, you can try spraying your celery with insecticidal soap or hand-picking them off.
Troubleshooting
Sometimes things don’t go exactly as planned. Here are a few common problems you might encounter and how to fix them:
- Celery Base Rotting: If your celery base starts to turn brown or mushy, it’s likely rotting. This can be caused by using a celery base that’s already past its prime, or by not changing the water frequently enough. Try starting with a fresh celery base and make sure to change the water every day.
- Slow Growth: If your celery isn’t growing as quickly as you’d like, it could be due to a lack of sunlight, water, or nutrients. Make sure your celery is getting enough sunlight and water, and consider fertilizing it every few weeks.
- Yellowing Leaves: Yellowing leaves can be a sign of overwatering or underwatering. Check the soil moisture and adjust your watering accordingly. Yellowing leaves can also be a sign of nutrient deficiency, so consider fertilizing your celery.
Tips and Tricks for Success
Here are a few extra tips to help you get the most out of your celery-growing adventure:
- Choose a Healthy Celery Base: Start with a celery base that’s firm, crisp, and free of blemishes. Avoid celery bases that are mushy, slimy, or have brown spots.
- Use Filtered Water: If your tap water is heavily chlorinated, consider using filtered water to avoid damaging the celery.
- Provide Good Air Circulation: Good air circulation will help prevent fungal diseases. Make sure your celery is not overcrowded and that there’s plenty of space around it for air to circulate.
- Rotate Your Celery: If you’re growing your celery indoors, rotate the pot every few days to ensure that all sides of the plant get equal sunlight.
- Don’t Overharvest: Avoid harvesting too many stalks at once, as this can weaken the plant. Leave at least a few stalks intact to allow the celery to continue growing.
Beyond the Basics: Taking it to the Next Level
Once you’ve mastered the art of regrowing celery from scraps, you can experiment with different varieties of celery or try growing other vegetables from scraps, like lettuce, green onions, or bok choy. The possibilities are endless!
Growing celery from scraps is a fun, easy, and rewarding project that anyone can do. It’s a great way to reduce food waste, save money, and enjoy fresh, homegrown celery. So, grab a celery stalk, get your hands dirty, and start growing! Happy gardening!
Conclusion
So, there you have it! Regrowing celery from scraps isn’t just a fun science experiment; it’s a practical way to reduce food waste, enjoy fresh celery more often, and even add a touch of green to your kitchen windowsill. It’s a simple, sustainable practice that anyone can master, regardless of their gardening experience.
Why is this DIY trick a must-try? Because it’s incredibly rewarding to witness the magic of regeneration firsthand. You’re taking something destined for the compost bin and giving it a second life, transforming it into a source of fresh, crisp celery stalks. Plus, it’s a fantastic way to teach children about plant life cycles and the importance of reducing waste.
Beyond the basic method, there are several exciting variations you can explore. Try experimenting with different types of celery – perhaps a vibrant red variety or a particularly flavorful heirloom strain. Once your celery base has established roots and new growth, consider transplanting it into a larger pot or even directly into your garden. With proper care, you can harvest full-sized celery stalks.
Another variation involves using the regrown celery leaves in different ways. They add a burst of fresh flavor to salads, soups, and stir-fries. You can even dry them and grind them into a celery salt seasoning. Don’t limit yourself to just the stalks; the entire plant offers culinary possibilities.
Don’t be afraid to experiment with different growing conditions. Some people find that their celery thrives in direct sunlight, while others prefer a more shaded location. Observe your plant closely and adjust its environment accordingly. The key is to provide it with consistent moisture and adequate light.
The beauty of this DIY project lies in its simplicity and accessibility. You don’t need any fancy equipment or specialized knowledge to get started. All you need is a celery base, a glass of water, and a little bit of patience.
We wholeheartedly encourage you to give this DIY celery regrowing trick a try. It’s a small step towards a more sustainable lifestyle and a fun way to connect with nature. And most importantly, we want to hear about your experience! Share your photos, tips, and stories in the comments below. Let’s create a community of celery regrowing enthusiasts and inspire others to embrace this simple yet impactful practice. Did you find a particular method worked best? Did you encounter any challenges along the way? Your insights can help others succeed and further refine this technique.
Remember, even if your first attempt isn’t perfect, don’t give up! Like any skill, regrowing celery takes practice. Keep experimenting, keep learning, and keep sharing your experiences. Together, we can unlock the full potential of this amazing DIY trick and enjoy the benefits of fresh, homegrown celery for years to come. So, grab that celery base, fill up a glass of water, and let the regrowing adventure begin! We are confident that you will find this a rewarding and sustainable way to enjoy fresh celery.
Frequently Asked Questions (FAQ)
1. How long does it take to regrow celery from a base?
The time it takes to see significant regrowth can vary depending on factors like temperature, sunlight, and the initial health of the celery base. Generally, you should start to see new growth emerging from the center of the base within 5-7 days. After about 2-3 weeks, you’ll have a noticeable cluster of leaves and some root development. At this point, you can transplant the celery into soil. Keep in mind that it will take several months to grow a full-sized celery stalk.
2. What kind of water should I use to regrow celery?
Tap water is generally fine for regrowing celery. However, if your tap water is heavily chlorinated, it’s best to let it sit out for 24 hours before using it to allow the chlorine to dissipate. Filtered water or bottled spring water can also be used. The most important thing is to change the water every 1-2 days to prevent bacterial growth and keep the celery base healthy.
3. How much sunlight does the celery base need?
Celery needs plenty of sunlight to thrive. Place the glass with the celery base in a location that receives at least 6 hours of direct sunlight per day. A south-facing windowsill is ideal. If you don’t have access to a sunny spot, you can supplement with a grow light. Insufficient sunlight can result in weak, leggy growth.
4. When should I transplant the celery base into soil?
You should transplant the celery base into soil once it has developed a good root system and a noticeable cluster of new leaves. This typically takes about 2-3 weeks. Choose a pot that is at least 6 inches in diameter and fill it with a well-draining potting mix. Gently remove the celery base from the water and plant it in the pot, making sure to cover the roots completely. Water thoroughly after transplanting.
5. What kind of soil is best for regrowing celery?
Celery prefers a rich, well-draining soil that is high in organic matter. A good potting mix for vegetables will work well. You can also amend your soil with compost or aged manure to improve its fertility and drainage. Avoid using heavy clay soils, as they can become waterlogged and prevent the celery roots from getting enough oxygen.
6. How often should I water the celery after transplanting it into soil?
Celery needs consistent moisture to thrive. Water the plant deeply whenever the top inch of soil feels dry to the touch. Avoid overwatering, as this can lead to root rot. During hot weather, you may need to water the celery more frequently. Mulching around the base of the plant can help to retain moisture in the soil.
7. Can I grow celery indoors permanently?
While you can start the regrowing process indoors, celery typically performs best when grown outdoors in a garden or large container. Indoor conditions may not provide enough sunlight or space for the plant to reach its full potential. If you want to grow celery indoors permanently, you’ll need to provide it with supplemental lighting and a large enough pot to accommodate its root system.
8. What are some common problems when regrowing celery, and how can I fix them?
Some common problems include:
* **Rotting:** This is usually caused by overwatering or using dirty water. Make sure to change the water frequently and avoid letting the celery base sit in standing water.
* **Yellowing leaves:** This can be a sign of nutrient deficiency or insufficient sunlight. Fertilize the plant with a balanced liquid fertilizer and move it to a sunnier location.
* **Pests:** Celery can be susceptible to pests like aphids and spider mites. Inspect the plant regularly and treat any infestations with insecticidal soap or neem oil.
9. Can I harvest celery stalks from a regrown plant?
Yes, you can harvest celery stalks from a regrown plant, but it may take several months for the plant to mature enough to produce full-sized stalks. Once the stalks are thick enough, you can harvest them by cutting them off at the base of the plant. The plant will continue to produce new stalks as long as it is healthy and well-cared for.
10. Is regrowing celery from scraps a sustainable practice?
Absolutely! Regrowing celery from scraps is a highly sustainable practice. It reduces food waste by giving a second life to celery bases that would otherwise be discarded. It also reduces the need to purchase celery from the store, which can save you money and reduce your carbon footprint. By regrowing your own celery, you’re contributing to a more sustainable and environmentally friendly lifestyle.

Leave a Comment