

Grow Potatoes at Home – imagine harvesting a bounty of fresh, earthy potatoes right from your own backyard! Forget those bland, store-bought spuds; with a few simple tricks and a little elbow grease, you can cultivate the most flavorful potatoes you’ve ever tasted.
For centuries, potatoes have been a staple food around the world, originating in the Andes Mountains and playing a crucial role in feeding populations across continents. From comforting mashed potatoes to crispy fries, their versatility is unmatched. But did you know that growing your own potatoes is not only rewarding but also surprisingly easy?
In today’s fast-paced world, knowing where your food comes from is more important than ever. Plus, let’s be honest, who wouldn’t want to impress their friends and family with homegrown potatoes? This DIY guide will walk you through the entire process, from choosing the right variety to harvesting your delicious crop. We’ll share insider tips and tricks to ensure a successful harvest, even if you have limited space or gardening experience. So, grab your gardening gloves, and let’s get started on your journey to grow potatoes at home like a pro!

Grow Your Own Potatoes: A Simple DIY Guide
Hey there, fellow gardening enthusiasts! Ever dreamt of digging up your own fresh, earthy potatoes right in your backyard? Well, dream no more! Growing potatoes at home is surprisingly easy and incredibly rewarding. I’m going to walk you through the whole process, from choosing the right potatoes to harvesting your bounty. Let’s get our hands dirty!
Choosing Your Seed Potatoes
First things first, you can’t just plant any old potato from the grocery store. Those are often treated to prevent sprouting. You need “seed potatoes,” which are potatoes specifically grown for planting. You can find these at your local garden center or online.
* Certified Seed Potatoes: These are the best option. They’re guaranteed to be disease-free and of a specific variety.
* Organic Potatoes: If you can’t find certified seed potatoes, organic potatoes from the grocery store *might* work, but there’s a higher risk of disease. Make sure they haven’t been treated with sprout inhibitors.
* Variety Matters: Consider what kind of potatoes you like to eat. Russets are great for baking and frying, Yukon Golds are creamy and delicious boiled, and red potatoes are perfect for salads.
Sprouting Your Seed Potatoes (Chitting)
This step isn’t strictly necessary, but it gives your potatoes a head start and can result in an earlier harvest. Chitting simply means encouraging your seed potatoes to sprout before planting.
* Timing: Start chitting about 4-6 weeks before your last expected frost.
* The Setup: Place your seed potatoes in a cool, bright, and dry place. An egg carton or a shallow tray works well.
* Light is Key: The light encourages the potatoes to produce short, green sprouts (called “eyes”) rather than long, white, spindly ones.
* Patience: It takes a few weeks for the sprouts to appear. Don’t worry if some potatoes sprout faster than others.
Preparing Your Planting Area
Potatoes need well-drained, loose soil. They also prefer slightly acidic soil (pH 6.0-6.5).
* Sunlight: Choose a spot that gets at least 6-8 hours of sunlight per day.
* Soil Preparation: Dig deep! Potatoes grow underground, so you need to loosen the soil to a depth of at least 12 inches.
* Amendments: Mix in plenty of compost or well-rotted manure to improve drainage and fertility. I like to add some bone meal for extra phosphorus, which promotes root growth.
* Raised Beds (Optional): If your soil is heavy clay, consider planting in raised beds. This will improve drainage and make harvesting easier.
Planting Your Seed Potatoes
Now for the fun part!
1. Cut Large Potatoes: If your seed potatoes are large (bigger than an egg), you can cut them into smaller pieces. Each piece should have at least 2-3 “eyes” (sprouts). Let the cut pieces dry for a day or two to callous over. This helps prevent rotting.
2. Dig Trenches: Dig trenches that are about 6-8 inches deep and 2-3 feet apart.
3. Plant the Potatoes: Place the seed potato pieces (or whole small potatoes) in the trenches, with the sprouts facing up. Space them about 12 inches apart.
4. Cover with Soil: Cover the potatoes with about 4 inches of soil.
5. Water Well: Water the area thoroughly after planting.
Hilling Your Potatoes
This is a crucial step for maximizing your potato harvest. Hilling involves gradually covering the potato plants with more soil as they grow.
* Why Hill? Hilling encourages the plants to produce more potatoes along the buried stems. It also protects the developing potatoes from sunlight, which can turn them green and bitter (and slightly toxic).
* When to Hill: When the potato plants are about 6-8 inches tall, it’s time to start hilling.
* How to Hill: Use a hoe or shovel to pull soil from the sides of the trench up around the base of the plants, burying the stems. Leave only the top few inches of the plant exposed.
* Repeat: Repeat the hilling process every 2-3 weeks as the plants grow, until you’ve created a mound of soil around each plant that’s about 12 inches high.
Watering and Fertilizing
Potatoes need consistent moisture, especially during tuber formation.
* Watering: Water deeply whenever the top inch of soil feels dry. Avoid overwatering, which can lead to rot.
* Fertilizing: Potatoes are heavy feeders. Side-dress your plants with a balanced fertilizer (like 10-10-10) a few weeks after planting and again after hilling. Follow the instructions on the fertilizer package. I also like to use a liquid seaweed fertilizer every few weeks for an extra boost.
Pest and Disease Control
Keep an eye out for common potato pests and diseases.
* Colorado Potato Beetles: These beetles can quickly defoliate your potato plants. Hand-pick them off the plants or use an organic insecticide like neem oil or spinosad.
* Flea Beetles: These tiny beetles create small holes in the leaves. Use row covers to protect your plants or spray with neem oil.
* Potato Blight: This fungal disease can cause the leaves to turn brown and die. Prevent blight by planting disease-resistant varieties and ensuring good air circulation. If blight appears, remove infected foliage immediately and spray with a copper fungicide.
* Scab: This disease causes rough, scabby patches on the potato skins. Avoid planting potatoes in alkaline soil and rotate your crops.
Harvesting Your Potatoes
The moment we’ve all been waiting for!
* Timing: Potatoes are typically ready to harvest about 80-100 days after planting, depending on the variety.
* Early Potatoes (New Potatoes): You can harvest “new potatoes” (small, tender potatoes) a few weeks after the plants flower. Gently dig around the base of the plant and remove a few potatoes, being careful not to disturb the rest of the plant.
* Mature Potatoes: For mature potatoes, wait until the foliage starts to turn yellow and die back. This indicates that the potatoes have stopped growing and are ready to be harvested.
* Digging: Use a garden fork or shovel to carefully dig up the potatoes. Be gentle to avoid damaging them.
* Curing: After harvesting, let the potatoes dry in a cool, dark, and well-ventilated place for a week or two. This helps to toughen the skins and prevent rot.
* Storage: Store cured potatoes in a cool, dark, and dry place (ideally around 40-50°F). Avoid storing them near apples or onions, as these release ethylene gas, which can cause the potatoes to sprout.
Troubleshooting
Even with the best planning, things can sometimes go wrong. Here are a few common issues and how to address them:
* No Sprouts: If your seed potatoes don’t sprout, they may be old or treated with sprout inhibitors. Try a different batch of seed potatoes.
* Poor Growth: Poor growth can be caused by lack of sunlight, poor soil, or insufficient watering. Make sure your plants are getting enough sun, amend the soil with compost, and water regularly.
* Green Potatoes: Green potatoes are caused by exposure to sunlight. They contain solanine, which is a toxic alkaloid. Don’t eat green potatoes. Prevent greening by hilling your plants properly.
* Small Potatoes: Small potatoes can be caused by overcrowding, poor soil, or insufficient watering. Space your plants properly, amend the soil with compost, and water regularly.
Enjoying Your Homegrown Potatoes
Congratulations! You’ve successfully grown your own potatoes. Now it’s time to enjoy the fruits (or rather, tubers) of your labor. There’s nothing quite like the taste of freshly dug, homegrown potatoes. Bake them, boil them, mash them, fry them – the possibilities are endless! I hope this guide has inspired you to give potato growing a try. Happy gardening!
Conclusion
So, there you have it! Growing potatoes at home, even if you only have a small balcony or patio, is not only achievable but also incredibly rewarding. Forget those bland, store-bought potatoes that lack that fresh-from-the-earth flavor. With this simple DIY trick, you can cultivate your own supply of delicious, nutrient-rich potatoes, bursting with taste and goodness.
This isn’t just about saving money (though that’s certainly a perk!). It’s about connecting with your food, understanding where it comes from, and experiencing the satisfaction of nurturing something from seed (or in this case, a potato eye!) to harvest. Imagine the pride you’ll feel serving up a potato salad made entirely from potatoes you grew yourself.
But the best part? This method is incredibly versatile. Feel free to experiment with different potato varieties. Russets are great for baking and fries, Yukon Golds are perfect for mashed potatoes, and red potatoes hold their shape well in salads. You can even try growing fingerling potatoes for a gourmet touch.
Consider adding companion plants to your potato containers. Marigolds can help deter pests, while basil can improve the flavor of your potatoes. Get creative and tailor your potato-growing experience to your own preferences and needs.
Don’t be intimidated if you’ve never grown anything before. This DIY potato-growing trick is beginner-friendly and requires minimal effort. The key is to provide your potatoes with plenty of sunlight, well-draining soil, and consistent watering. And remember, patience is key! It takes time for potatoes to mature, but the wait is well worth it.
We strongly encourage you to give this DIY potato-growing method a try. It’s a fun, educational, and ultimately delicious experience. Once you’ve harvested your first crop of homegrown potatoes, you’ll be hooked!
And most importantly, we want to hear about your experience! Share your photos, tips, and stories in the comments below. Let’s build a community of home potato growers and inspire others to get their hands dirty. What variety did you choose? What challenges did you face? What successes did you celebrate? Your feedback will help others learn and grow, and together, we can all enjoy the bounty of homegrown potatoes. So, grab a container, some seed potatoes, and get growing! You won’t regret it. This **grow potatoes at home** method is a game changer.
Frequently Asked Questions (FAQ)
Q: What kind of container should I use to grow potatoes?
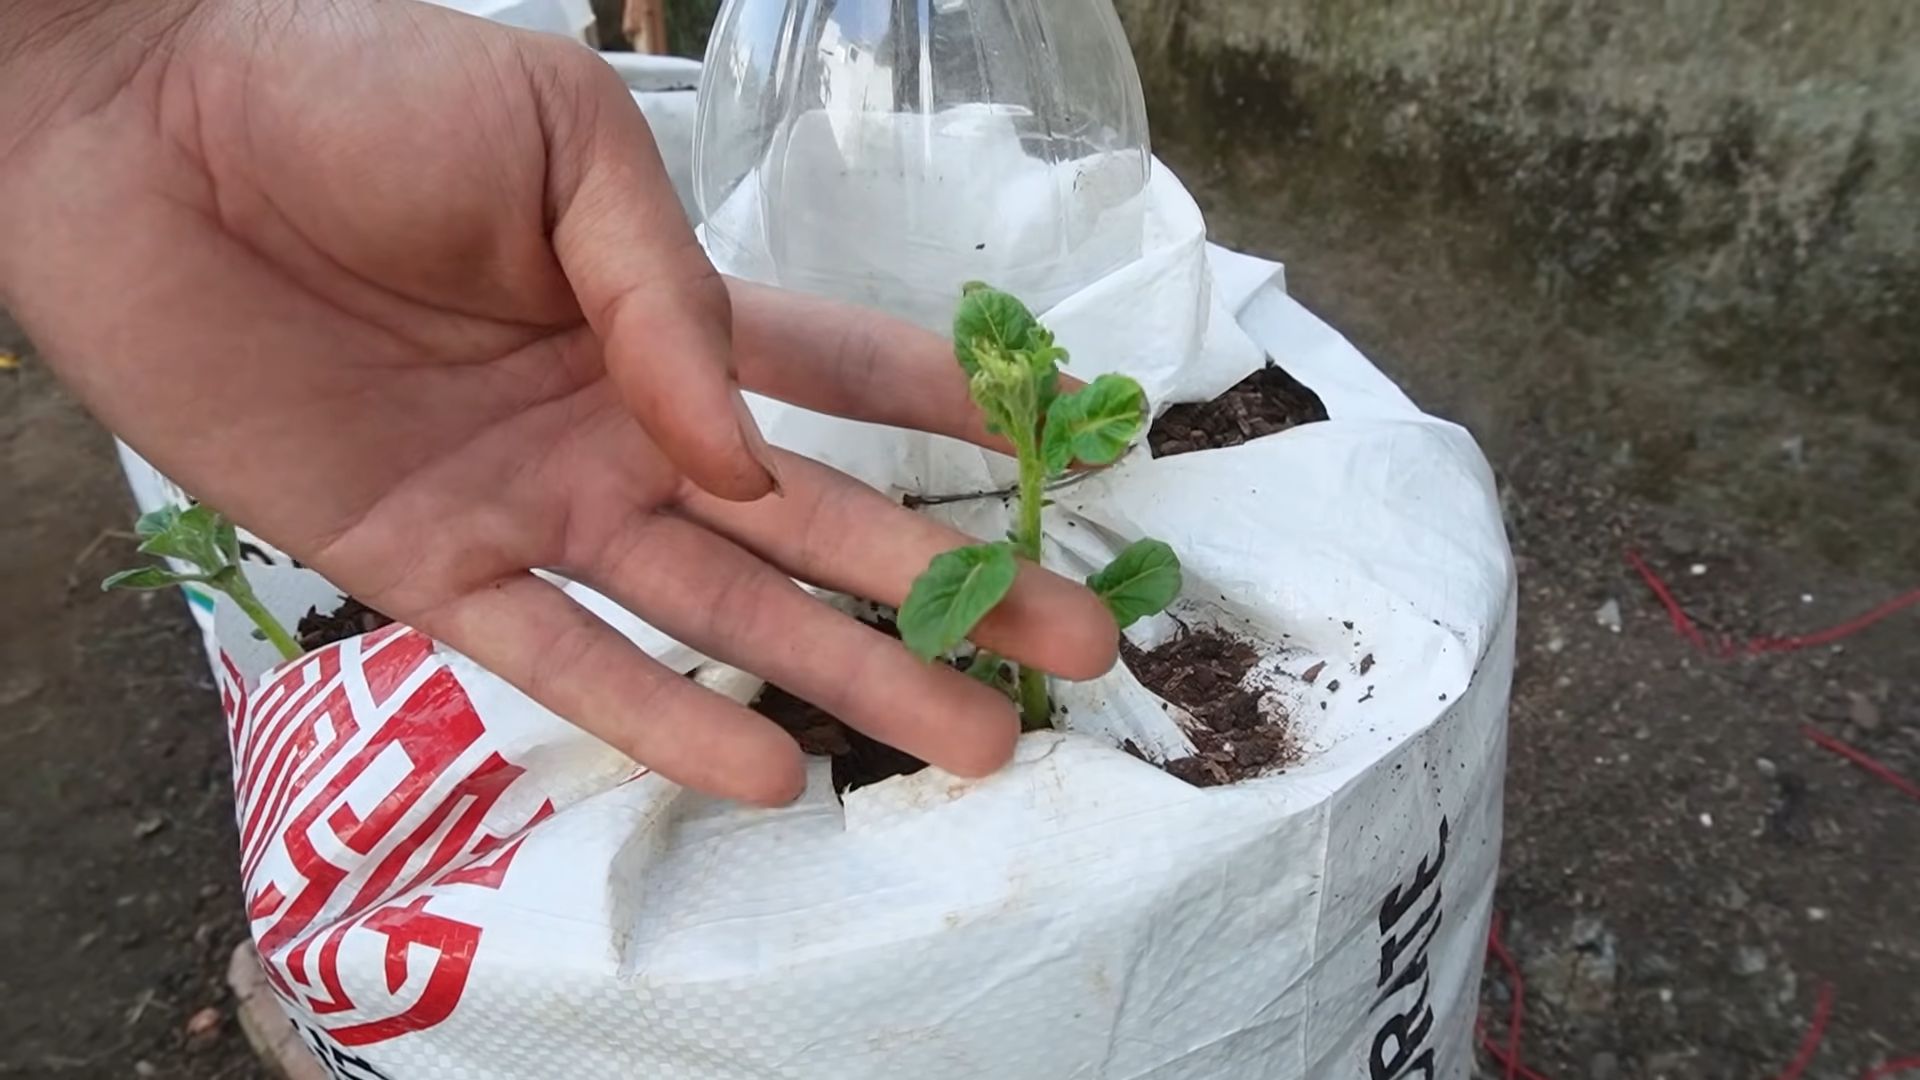
A: The ideal container should be at least 15 gallons in size and have drainage holes. You can use plastic pots, fabric grow bags, or even repurposed containers like old trash cans or laundry baskets. The key is to ensure that the container is large enough to accommodate the growing potato plants and allows for proper drainage to prevent root rot. Fabric grow bags are particularly beneficial as they allow for better aeration of the soil and prevent the roots from becoming root-bound.
Q: Where can I get seed potatoes?
A: Seed potatoes are specifically grown for planting and are available at most garden centers, nurseries, and online retailers. Look for certified disease-free seed potatoes to ensure a healthy crop. Avoid using potatoes from the grocery store, as they may have been treated with chemicals to prevent sprouting. You can also use potatoes that have already sprouted “eyes” as seed potatoes. Simply cut the potato into pieces, ensuring that each piece has at least one eye, and let the cut surfaces dry for a day or two before planting.
Q: How much sunlight do potatoes need?
A: Potatoes need at least six to eight hours of direct sunlight per day to thrive. Choose a location for your container that receives plenty of sunlight throughout the day. If you live in a particularly hot climate, you may need to provide some afternoon shade to prevent the plants from overheating. Insufficient sunlight can result in smaller potatoes and reduced yields.
Q: What kind of soil should I use?
A: Potatoes prefer well-draining, slightly acidic soil with a pH between 6.0 and 6.5. You can use a commercial potting mix or create your own mix by combining equal parts of compost, peat moss, and perlite or vermiculite. Avoid using heavy clay soil, as it can become waterlogged and prevent the potatoes from developing properly. Adding organic matter to the soil will improve drainage and provide essential nutrients for the plants.
Q: How often should I water my potato plants?
A: Water your potato plants regularly, especially during hot, dry weather. The soil should be kept consistently moist but not waterlogged. Check the soil moisture by sticking your finger into the soil about an inch deep. If the soil feels dry, it’s time to water. Avoid overwatering, as this can lead to root rot. As the plants mature and the potatoes begin to form, you may need to water more frequently.
Q: How do I “hill” my potatoes?
A: “Hilling” is the process of adding more soil to the container as the potato plants grow. This encourages the plants to produce more potatoes along the buried stem. When the plants are about 6 inches tall, add a few inches of soil to the container, covering the lower part of the stems. Repeat this process every few weeks as the plants continue to grow, until the container is almost full.
Q: When are potatoes ready to harvest?
A: Potatoes are typically ready to harvest about 70-100 days after planting, depending on the variety. You can start harvesting “new potatoes” (small, immature potatoes) a few weeks after the plants flower. To harvest new potatoes, carefully dig around the base of the plant and remove a few potatoes, leaving the rest to continue growing. For mature potatoes, wait until the plants have flowered and the foliage begins to die back. At this point, stop watering the plants and allow the soil to dry out slightly. Then, carefully dig up the entire plant and harvest the potatoes.
Q: How do I store my harvested potatoes?
A: Store your harvested potatoes in a cool, dark, and dry place. A root cellar is ideal, but a basement or garage can also work. Avoid storing potatoes in the refrigerator, as this can cause them to develop a sweet taste. Before storing, brush off any excess soil and allow the potatoes to cure for a week or two in a well-ventilated area. This will help to toughen the skins and prevent spoilage. Store potatoes in a single layer in a cardboard box or burlap sack. Check the potatoes regularly and remove any that show signs of rot.
Q: What are some common potato pests and diseases?
A: Common potato pests include aphids, potato beetles, and flea beetles. You can control these pests by handpicking them off the plants, using insecticidal soap, or introducing beneficial insects like ladybugs. Common potato diseases include early blight, late blight, and potato scab. To prevent these diseases, use disease-free seed potatoes, provide good air circulation, and avoid overwatering. If you notice signs of disease, remove the affected leaves or plants immediately.
Q: Can I grow potatoes in the same container year after year?
A: It’s generally not recommended to grow potatoes in the same container year after year, as this can deplete the soil of nutrients and increase the risk of disease. It’s best to rotate your crops and use fresh soil each year. If you must use the same container, amend the soil with plenty of compost and other organic matter to replenish nutrients.

Leave a Comment