

Growing peanuts in a bucket might sound like a quirky experiment, but trust me, it’s a surprisingly rewarding and space-saving way to enjoy fresh, homegrown peanuts! Forget acres of farmland; with a little know-how, you can cultivate these tasty legumes right on your patio, balcony, or even indoors.
The history of peanut cultivation stretches back thousands of years, with evidence suggesting they were first grown in South America. From ancient civilizations to modern-day snacks, peanuts have nourished and delighted people across the globe. Now, you can be a part of that legacy, even if you’re short on space!
Why should you try this DIY project? Well, for starters, it’s incredibly satisfying to harvest your own food. Plus, store-bought peanuts simply can’t compare to the fresh, nutty flavor of homegrown ones. But more importantly, growing peanuts in a bucket is a fantastic solution for urban gardeners or anyone with limited outdoor space. It’s also a fun and educational activity for kids, teaching them about plant life cycles and where their food comes from. I’m excited to share my easy-to-follow guide, packed with tips and tricks to ensure a bountiful peanut harvest, no matter where you live!
Growing Peanuts in a Bucket: A Beginner’s Guide
Hey there, fellow gardening enthusiasts! Ever thought about growing your own peanuts? It’s surprisingly easy, even if you don’t have a sprawling garden. I’m going to walk you through how to grow peanuts right in a bucket – a perfect project for small spaces, balconies, or even just a fun experiment. Let’s get started!
What You’ll Need
Before we dive in, let’s gather our supplies. This is what I’ve found works best:
* A Large Bucket: Aim for at least a 5-gallon bucket. Bigger is better, as it gives the peanut plants room to spread their roots. Make sure it has drainage holes!
* Peanut Seeds: You can use raw, unsalted peanuts from the grocery store (in-shell or shelled). Roasted peanuts won’t sprout. I prefer using Virginia peanuts because they tend to produce larger peanuts.
* Potting Mix: A well-draining potting mix is crucial. Avoid using garden soil, as it can become compacted in a container. I like to mix compost into my potting mix for extra nutrients.
* Water: Essential for keeping your peanut plants hydrated.
* Sunlight: Peanuts need at least 6-8 hours of direct sunlight per day.
* Optional:
* Pea gravel or small rocks for the bottom of the bucket to improve drainage.
* Liquid fertilizer formulated for vegetables.
* Mulch (straw or wood chips) to help retain moisture.
Step-by-Step Planting Guide
Okay, let’s get our hands dirty! Here’s how I plant my peanuts in a bucket:
1. Prepare the Bucket: First things first, make sure your bucket has adequate drainage holes. If it doesn’t, drill a few into the bottom. I usually go for about 4-5 holes, each about a quarter-inch in diameter. This prevents waterlogging, which can rot the peanut roots. If you’re using pea gravel, add a 1-2 inch layer to the bottom of the bucket. This helps with drainage even further.
2. Fill the Bucket with Potting Mix: Now, fill the bucket with your potting mix, leaving about 2-3 inches of space at the top. This space is important for watering and prevents the soil from overflowing. Gently pat down the soil to remove any large air pockets.
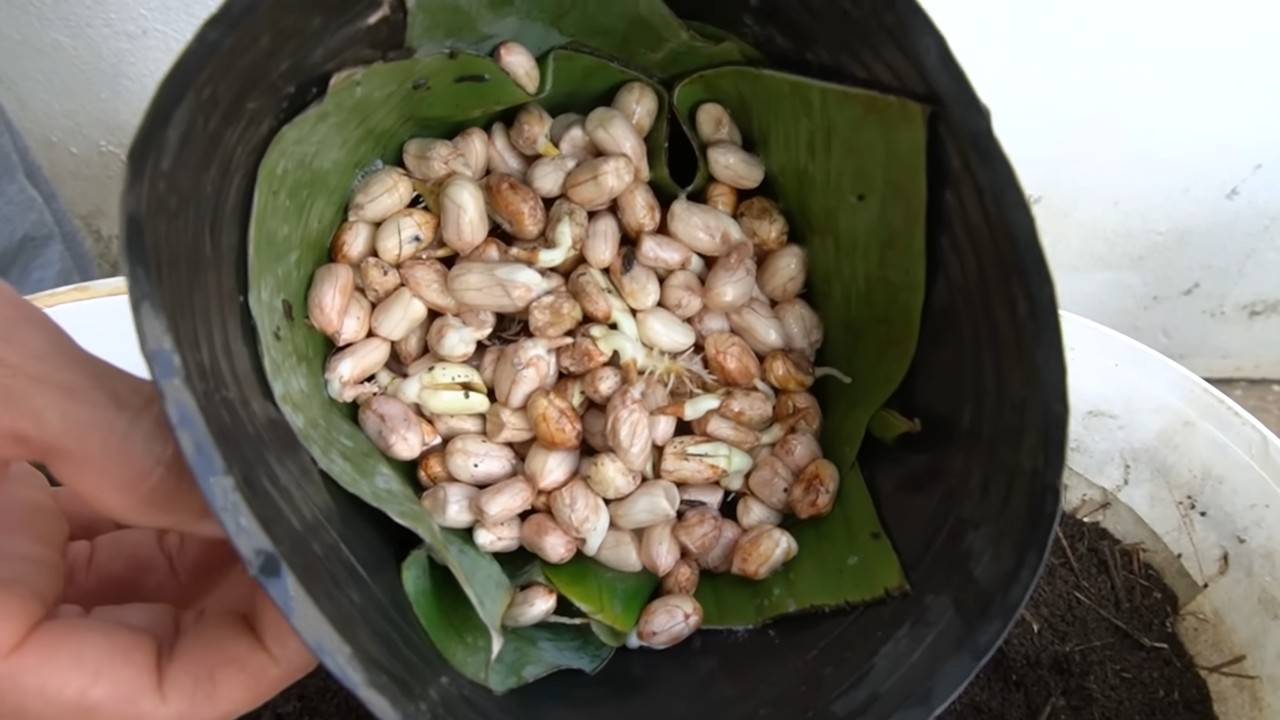
3. Plant the Peanut Seeds: This is the fun part! If you’re using in-shell peanuts, gently crack the shells open without damaging the seeds inside. Plant the peanut seeds about 1-2 inches deep and about 4-6 inches apart. I usually plant 3-4 seeds per bucket to increase my chances of germination.
4. Water Thoroughly: After planting, water the soil thoroughly until water drains out of the bottom of the bucket. This ensures that the soil is evenly moist and helps the seeds to germinate.
5. Place in a Sunny Location: Peanuts are sun-loving plants, so place your bucket in a location that receives at least 6-8 hours of direct sunlight per day. A south-facing balcony or patio is ideal.
Caring for Your Peanut Plants
Now that your peanuts are planted, here’s how to keep them happy and healthy:
1. Watering: Keep the soil consistently moist, but not waterlogged. Water when the top inch of soil feels dry to the touch. During hot, dry weather, you may need to water more frequently. I usually check the soil moisture every day.
2. Fertilizing: Peanuts are legumes, which means they can fix nitrogen from the air. However, they still benefit from occasional fertilization. About 4-6 weeks after planting, you can start fertilizing with a liquid fertilizer formulated for vegetables. Follow the instructions on the fertilizer label. I usually fertilize every 2-3 weeks.
3. Weeding: Keep the bucket free of weeds. Weeds compete with the peanut plants for nutrients and water. Gently pull out any weeds that appear.
4. Hilling: As the peanut plants grow, they will produce “pegs” that grow downwards from the base of the plant into the soil. These pegs are where the peanuts will develop. To encourage peanut production, you can “hill” the soil around the base of the plants. This means adding more soil to cover the base of the plants and the pegs. I usually do this every few weeks as the plants grow.
5. Pest Control: Keep an eye out for pests such as aphids, spider mites, and caterpillars. If you notice any pests, you can try spraying the plants with insecticidal soap or neem oil. I prefer using organic pest control methods whenever possible.
Harvesting Your Peanuts
This is the moment we’ve been waiting for! Harvesting peanuts is a bit different than harvesting other vegetables. Here’s how I do it:
1. Timing: Peanuts typically take about 120-150 days to mature. You’ll know they’re ready to harvest when the leaves start to turn yellow and the plant begins to die back. This usually happens in the fall.
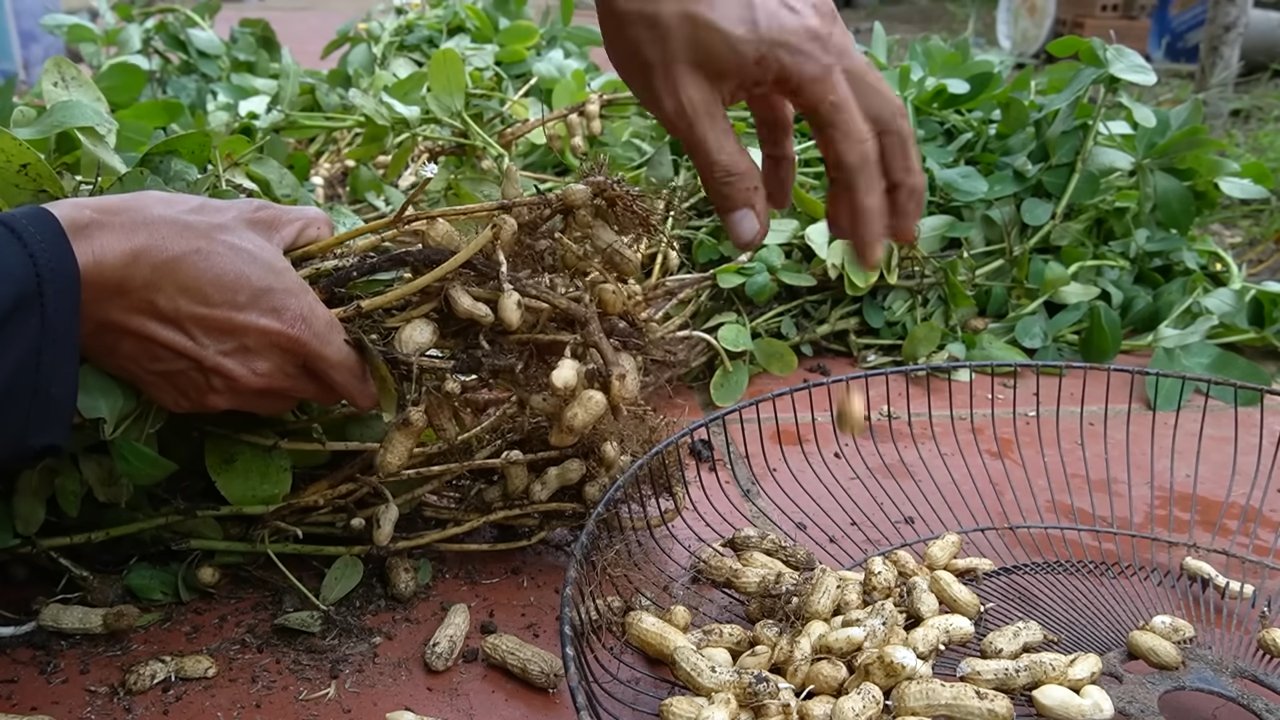
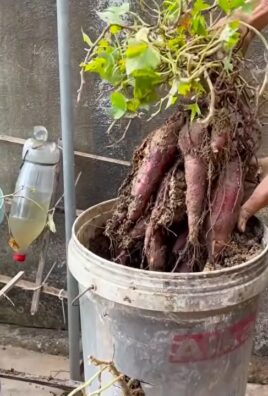
2. Harvesting: To harvest the peanuts, gently pull the entire plant out of the bucket. You may need to loosen the soil around the edges of the bucket first.
3. Cleaning: Shake off any excess soil from the peanuts.
4. Curing: This is an important step! To cure the peanuts, hang the entire plant upside down in a warm, dry, well-ventilated place for about 2-4 weeks. This allows the peanuts to dry and develop their flavor. I usually hang them in my garage.
5. Separating the Peanuts: Once the peanuts are cured, you can separate them from the plant. Simply pull them off the roots.
6. Storing: Store the peanuts in a cool, dry place. You can store them in their shells or shelled. I usually store them in airtight containers.
Troubleshooting
Sometimes, things don’t go exactly as planned. Here are some common problems you might encounter and how to fix them:
* Poor Germination: If your peanut seeds don’t germinate, it could be due to several factors. Make sure the seeds are fresh and viable. Also, ensure that the soil is consistently moist but not waterlogged. The soil temperature should be warm enough for germination (around 70-80°F).
* Yellowing Leaves: Yellowing leaves can indicate a nutrient deficiency. Try fertilizing with a balanced fertilizer. It could also be a sign of overwatering or underwatering. Check the soil moisture and adjust your watering accordingly.
* Lack of Peanut Production: If your peanut plants are growing well but not producing peanuts, it could be due to a lack of pollination. Peanuts are self-pollinating, but sometimes they need a little help. Gently shake the plants to help distribute the pollen. Also, make sure the plants are getting enough sunlight.
* Pests: As mentioned earlier, pests can be a problem. Regularly inspect your plants for pests and take action as soon as you notice them.
Extra Tips for Success
Here are a few extra tips that I’ve learned over the years:
* Choose the Right Variety: Different peanut varieties have different growing requirements. Choose a variety that is well-suited to your climate. Virginia peanuts are a good choice for most areas.
* Start Indoors: If you live in a colder climate, you can start your peanut seeds indoors about 4-6 weeks before the last frost. This will give them a head start.
* Use a Self-Watering Bucket: If you’re prone to forgetting to water your plants, consider using a self-watering bucket. These buckets have a reservoir of water at the bottom that the plants can draw from as needed.
* Have Fun! Growing peanuts is a rewarding experience. Don’t be afraid to experiment and learn from your mistakes.
Growing peanuts in a bucket is a fun and easy way to enjoy fresh, homegrown peanuts, even if you don’t have a lot of space. With a little bit of care and attention, you can harvest a bountiful crop of peanuts right from your balcony or patio. Happy gardening!
Conclusion
So, there you have it! Growing peanuts in a bucket is not only possible, but it’s also a surprisingly rewarding and accessible project, even if you don’t have a sprawling garden. We’ve walked you through the entire process, from selecting the right peanuts and preparing your container to nurturing your plants and harvesting your very own homegrown bounty.
Why is this DIY trick a must-try? Because it democratizes gardening. It allows anyone, regardless of their living situation, to experience the joy of cultivating their own food. Imagine the satisfaction of shelling those peanuts, knowing you nurtured them from seed to snack, all within the confines of a simple bucket. It’s a fantastic way to connect with nature, learn about the life cycle of a plant, and enjoy a delicious, healthy treat. Plus, it’s a conversation starter! How many people can say they grow their own peanuts?
But the fun doesn’t stop there. Feel free to experiment with different peanut varieties. Virginia peanuts, known for their large size, might be a fun challenge. Or, try Spanish peanuts for a sweeter, nuttier flavor. You can also play around with the soil composition. Adding a bit of bone meal can provide extra phosphorus, which is crucial for root development and peanut production. Consider companion planting! Marigolds can help deter nematodes, while basil can repel other pests.
Don’t be afraid to get creative with your container, too. While a standard 5-gallon bucket works perfectly well, you could also use a larger container for even more peanut production. Just ensure it has adequate drainage. You can even decorate your bucket to add a personal touch to your peanut-growing project.
The key to success with this DIY peanut growing method is patience and observation. Keep a close eye on your plants, water them regularly, and provide them with plenty of sunlight. Don’t be discouraged if you encounter a few bumps along the road. Gardening is a learning process, and every mistake is an opportunity to grow (pun intended!).
We wholeheartedly encourage you to give growing peanuts in a bucket a try. It’s an easy, affordable, and incredibly satisfying project that will bring a touch of the farm to your home. And most importantly, it allows you to enjoy fresh, homegrown peanuts.
Once you’ve harvested your first batch of homegrown goodness, we’d love to hear about your experience! Share your photos, tips, and tricks in the comments below. Let’s create a community of bucket peanut growers and inspire others to embark on this fun and rewarding journey. What variety did you grow? What challenges did you face? What did you learn? Your insights could be invaluable to other aspiring peanut farmers. So, go ahead, get your hands dirty, and discover the magic of growing your own peanuts!
Frequently Asked Questions (FAQ)
1. What kind of peanuts should I use to start growing peanuts in a bucket?
You should use raw, unsalted peanuts that are still in their shells. Roasted or salted peanuts will not germinate. Look for peanuts specifically labeled for planting, as these are more likely to sprout. Virginia peanuts, Spanish peanuts, and Runner peanuts are all suitable varieties for bucket growing. Experiment to see which variety thrives best in your local climate and container.
2. How much sunlight do peanut plants need when growing peanuts in a bucket?
Peanut plants need at least 6-8 hours of direct sunlight per day to thrive. Choose a location for your bucket that receives ample sunlight throughout the day. If you don’t have a sunny spot, you may need to supplement with a grow light. Rotate the bucket regularly to ensure all sides of the plant receive equal sunlight exposure.
3. What kind of soil is best for growing peanuts in a bucket?
Peanut plants prefer well-draining, sandy loam soil. A good potting mix will work well. Avoid heavy clay soils, as they can become waterlogged and inhibit peanut development. You can amend your potting mix with perlite or vermiculite to improve drainage. Adding compost will provide essential nutrients for healthy growth.
4. How often should I water my peanut plants in a bucket?
Water your peanut plants regularly, especially during hot, dry weather. The soil should be consistently moist, but not waterlogged. Check the soil moisture by sticking your finger about an inch deep. If the soil feels dry, it’s time to water. Water deeply, allowing the water to drain out of the bottom of the bucket. Reduce watering frequency during cooler, cloudier periods.
5. How long does it take to grow peanuts in a bucket?
It typically takes 120-150 days (4-5 months) from planting to harvest. The exact time will depend on the peanut variety, climate, and growing conditions. Be patient and monitor your plants closely for signs of maturity.
6. How do I know when my peanuts are ready to harvest from the bucket?
The leaves of the peanut plant will start to turn yellow and brown, and the plant will begin to wilt. This is a sign that the peanuts are nearing maturity. You can also dig up a few peanuts to check their size and maturity. The shells should be well-formed and the kernels should be plump and fully developed.
7. How do I harvest peanuts from a bucket?
Carefully dig up the entire plant from the bucket. Gently shake off any excess soil. Hang the plant upside down in a warm, dry place for several weeks to cure the peanuts. This will improve their flavor and shelf life.
8. Can I grow peanuts indoors in a bucket?
While it’s possible to grow peanuts indoors in a bucket, it can be challenging. Peanut plants require a lot of sunlight, so you’ll need to provide supplemental lighting with a grow light. You’ll also need to ensure adequate ventilation and humidity. Indoor growing may result in a smaller yield compared to outdoor growing.
9. What are some common problems when growing peanuts in a bucket?
Some common problems include pests (such as aphids and spider mites), diseases (such as leaf spot), and nutrient deficiencies. Monitor your plants regularly for signs of problems and take appropriate action. Use organic pest control methods whenever possible. Ensure your plants are receiving adequate nutrients by fertilizing with a balanced fertilizer.
10. Can I reuse the soil from my peanut bucket for other plants?
Yes, you can reuse the soil, but it’s best to amend it with fresh compost and other organic matter to replenish nutrients. Peanut plants can deplete the soil of certain nutrients, so amending it will ensure that it’s suitable for other plants. Avoid using the soil for plants that are susceptible to the same diseases as peanuts.
11. What fertilizer is best for growing peanuts in a bucket?
A balanced fertilizer with an NPK ratio of 5-10-10 is a good choice for peanut plants. The higher phosphorus content promotes root development and peanut production. Avoid over-fertilizing, as this can lead to excessive foliage growth and reduced peanut yield. Follow the instructions on the fertilizer label carefully. You can also use organic fertilizers, such as compost tea or bone meal.
12. How do I store my harvested peanuts?
After curing, store your peanuts in a cool, dry place in an airtight container. Shelled peanuts can be stored in the refrigerator or freezer for longer shelf life. Properly stored peanuts can last for several months.
Leave a Comment